Insights, ideas and inspiration. A go to wisdom hub right here.
Featured Posts

Tutorials
7 Min Read

Latest Posts
General
19 min read
How a WordPress Development Retainer Maximizes Your Website's ROI Over Time
Your enterprise website is not a finished asset after launch. It is a revenue channel, campaign engine, publishing system, integration layer, and trust signal that needs continuous attention.
A WordPress development retainer gives your team access to ongoing development, maintenance, and support services without restarting the sales process every time you need help.
Instead of waiting for a new quote, a new kickoff, and a new vendor ramp-up, you work with a dedicated team that already understands your stack, business goals, and technical aspects.
In this guide, we’ll break down how an enterprise WordPress retainer works, what it costs, when it beats project-based work, and how WPoets helps enterprise teams turn a website into a long-term ROI engine.
What Is an Enterprise WordPress Retainer?
A WordPress retainer is an ongoing relationship between your company and a WordPress agency for a fixed monthly fee. Retainers act as a managed service providing access to scalable resources and ongoing support, including developers, QA, DevOps, project management, and strategic consulting.
Unlike project-based work, where the scope is fixed and the engagement ends after delivery, the retainer model assumes your needs will evolve. One month you may be launching new landing pages, the next integrating third-party tools, and later building custom functionality.
Most retainer agreements include:
- Most retainers include a set number of hours each month
- Plans can range from 50 to 200 hours per month for enterprise teams.
- Clients pay a predictable monthly fee rather than an hourly rate for retainer services.
- Retainer plans are flexible and can be adjusted from month to month, and can be scaled up or down as your business needs change.
This goes beyond a standard WordPress maintenance plan. Typical maintenance services focus on essentials like WordPress core updates, theme and plugin updates, backups, uptime monitoring, and security checks.
While a WordPress retainer includes these ongoing maintenance tasks, an enterprise development retainer provides additional value through custom development, performance optimization, feature enhancements, quality assurance, and strategic roadmap planning to support long-term business growth.
What makes it enterprise-grade is the complexity it supports: complex sites, multisite networks, compliance needs, high traffic, API integrations, custom functionality, custom features, and a custom platform built on WordPress.
On the agency side, a retainer team typically includes a technical lead, WordPress developer, webmaster, designer, DevOps, QA support, or project manager.
On the client side, marketing, IT, product, or communications teams usually own priorities. The best results come from an ongoing partnership where both sides treat the site as a living product.
Why Enterprise Websites Need Continuous Investment
The launch-and-forget approach for a website creates expensive problems. A site may launch perfectly, but over time, newly added product and service pages, campaign launches, WordPress core and plugin updates, and growing content can make it slower, harder to manage, and more fragile.
Here are the common issues we see:
- Technical debt grows when WordPress core, PHP, plugins, and themes are not updated regularly.
- Marketing teams lose speed when every small change requires a new scope.
- Integrations break as CRM, analytics, or marketing automation APIs change.
- Security risk increases as vulnerabilities appear across the WordPress ecosystem.
- Performance drops as media, scripts, tracking tags, and database bloat increase.
Retainers focus on ongoing improvement rather than simply fixing problems as they arise. Instead of waiting for something to break, like a contact form malfunctioning or a campaign landing page failing during a critical launch, your development team works proactively to identify and address potential issues early.
This approach helps keep your website running smoothly, reduces unexpected disruptions, and supports better long-term performance.
Security is one of the clearest examples. Retainers provide continuous security monitoring for vulnerabilities. Continuous security monitoring is a standard component of most WordPress retainer services. Retainers conduct regular security audits to identify vulnerabilities, and priority emergency response times minimize website downtime.
This matters because a modern enterprise website is never truly finished. Your business model changes, your business grows, your offerings shift, and your customers expect faster speed, greater accessibility, and improved usability every year.
Understanding ROI in an Enterprise WordPress Environment

For enterprise WordPress websites, the return on investment often comes from operational and marketing efficiencies such as launching campaigns faster, attracting higher-quality leads, improving conversion rates, minimizing downtime, and removing internal bottlenecks that slow teams down.
These gains can have a significant impact on overall business performance and growth.
A WordPress development program should improve the following:
- Creating new pages for products and services
- Technical SEO fixes
- Designing images for landing pages, web pages, sliders, infographics, and e-mailers
- Conversion rates through ongoing testing and minor modifications.
- Campaign performance through faster publishing workflows.
- Website speed through speed optimization and frequent audits.
- User engagement through better navigation and content systems.
- Operational efficiency by reducing vendor coordination.
- Reliability through backups, security monitoring, and priority support.
A WordPress retainer helps keep your site running at its best through ongoing speed testing, performance monitoring, and regular optimization efforts.
Performance optimization stands as one of the most valuable services in a WordPress retainer. Website speed directly impacts user experience, search rankings, and the effectiveness of paid marketing campaigns. Even minor performance issues lead to lower engagement and missed conversion opportunities.
This includes tracking key Core Web Vitals metrics — Largest Contentful Paint (LCP), Interaction to Next Paint (INP), and Cumulative Layout Shift (CLS) — to identify and address potential issues before they affect users.
Monthly reporting is also important. Monthly reports show site performance and security status. A good report should show what changed, what improved, which risks were reduced, how many retainer hours were used, and what’s next.
The biggest ROI challenges usually come from slow development cycles, multiple vendors, technical bottlenecks, and rising maintenance costs. When no one has the full picture, the cost of coordination can exceed the cost of development work.
Retainer vs. Project-Based vs. In-House

Project-based engagements are useful for major redesigns, migrations, rebrands, and similar projects with a clear finish line. But project-based delivery creates stop-start momentum for active marketing teams.
Every new project requires discovery calls, scoping, approvals, onboarding, QA planning, and context transfer. Understanding a client's code is crucial for effective solutions and faster repairs.
A team that already knows your theme, plugins, custom blocks, hosting setup, and edge cases can solve problems faster than a vendor seeing the codebase for the first time.
An in-house team gives you control, but hiring a full-time developer is not always efficient. Salary, benefits, tools, management, QA, DevOps, and backup coverage add up quickly. WordPress retainer solutions for ongoing growth can save businesses up to one-ninth the cost of a full-time hire, especially when you need a mix of skills rather than one person.
Here’s a simple comparison:
| Model | Best for | Limitations |
| Project-based | Redesigns, migrations, fixed builds | Slow for ongoing needs |
| Basic plan or maintenance plans | Stable sites needing updates and backups | Limited new development work |
| Monthly retainer | Active sites needing continuous support | Requires clear prioritization |
| In-house team | Constant internal product work | Higher fixed costs and hiring risk |
A retainer is more cost-effective than project-based work for ongoing needs. It is also more flexible than relying only on in-house WordPress developers, because retainer providers can assign resources based on the task.
How an Enterprise WordPress Retainer Delivers Long-Term ROI
The ROI of a WordPress retainer compounds over time because the same team keeps improving the same system.
First, campaign velocity improves. When your marketing team needs new landing pages, form changes, tracking updates, or custom blocks, access to a development team reduces delays.
Retainers provide priority access to development teams for urgent needs, and priority support helps protect launches when timing matters.
Second, the website gets faster and more reliable. Performance optimization, caching improvements, CDN tuning, database cleanup, and image optimization are not one-time tasks. They require regular attention as the site grows.
Third, UX improves through continuous improvement. A retained team can review analytics, adjust navigation, improve forms, redesign or revamp pages, and run development sprints around conversion opportunities.
Fourth, technical debt stays under control. Regular WordPress core and plugin updates, malware scanning, testing, refactoring, and documentation help keep the site running smoothly, rather than allowing small problems to become expensive outages.
Finally, integrations become easier to manage. Enterprise WordPress development supports sites that often depend on CRMs, analytics tools, membership systems, event platforms, or payment systems. When those integrations change, a retainer team with technical expertise can respond without having to start from scratch.
What to Look for in an Enterprise WordPress Retainer Partner

Not all retainer services are equal. Some retainer providers only handle updates and tickets. Others focus on Enterprise WordPress services, with experts embedded into your marketing and technology workflow.
Before signing retainer agreements, look for:
- Clear scope: what is included, what is excluded, and how overages work.
- Team continuity: avoid rotating freelancer pools that lose context.
- Quality assurance: staging, code review, testing, and deployment discipline.
- Monthly reporting: Number of hours used, completed work, site health, risks, and next priorities.
- Strategic consulting: guidance on architecture, roadmap, and business growth.
- Flexibility: ability to scale retainer hours during launches
- SLA clarity: response times, escalation paths, uptime expectations, and coverage windows.
You should also ask about unused hours. Some agencies expire unused hours monthly, some roll them over for a limited period, and some convert them into backlog work. The policy should be stated clearly before the monthly fee begins.
Cultural fit matters too. Enterprise marketing teams need communication that is clear, fast, and practical. IT teams need documentation, reliability, and security discipline. The right WordPress agency can work with both.
How WPoets Helps Enterprises Maximize Website ROI

At WPoets, we help enterprise teams get the most out of WordPress through design, custom development, migrations, hosting, maintenance, and ongoing support.
We believe in delivering results early through an MVP-first approach, keeping communication simple and transparent at every stage, and continuing to refine and improve your website after launch so it can grow alongside your business.
A WPoets WordPress development retainer includes the following:
- Maintenance and security: WordPress core, plugin, theme, and PHP updates; malware scans; security monitoring; and uptime monitoring.
- Backups and recovery: Retainers ensure regular backups of your site's data. Regular backups are included in WordPress retainer services.
- Ongoing development: new templates, Gutenberg blocks, campaign pages, third-party API integrations, and custom functionality.
- Performance optimization: LCP, INP, CLS audits, caching, image optimizations, database tuning, and speed optimization.
- Marketing support: landing pages, form integrations, A/B testing setup, analytics custom event creation and tracking, CRM integrations, and content updates.
- Monthly reporting: a detailed breakdown of development hours, support hours, DevOps hours, security status, performance metrics, risks, and next steps.
- Roadmap planning: prioritization of new features, technical debt, and growth initiatives.
We also help businesses migrate from platforms like Webflow, Framer, Drupal, Sitecore, Kirby, Umbraco, Agility CMS, Ghost CMS, Kentico, AEM, and other CMS solutions to WordPress.
For organizations with complex publishing workflows or multi-step approval processes, our migration expertise, combined with ongoing development and support, ensures a smooth transition and helps maximize the value of their investment long after the new site goes live.
WordPress retainer costs vary for small- to mid-complexity needs, while enterprise plans can be higher depending on traffic, SLA, integrations, and velocity.
Small/Mid-level plans: Many providers offer basic to mid-level plans for ~$50–$600+. However, development-oriented retainers (with guaranteed developer hours, custom work, etc.) typically start around $750–$1,000 and go up to ~$1,500+ for more proactive support.
Enterprise plans: Premium retainers with dedicated teams, priority SLAs, and high concurrency often begin around $1,500–$2,000 and can exceed $3,000.
At WPoets, we have three plans.
- Care (Standard): 5 hours of monthly development, 10 support hours, and 5 DevOps hours
- Improvement (Pro): 15 hours monthly, 10 support hours, and 5 DevOps hours
- Growth (Epic): 30 hours monthly, 10 support hours, and 5 DevOps hours
Basic retainer plans start at $270 per month for monthly maintenance and support, but those usually cover only basic updates rather than enterprise-grade development services.
The right WordPress retainer cost depends on the number of development hours required for regular website work.
Monthly retainer fees provide predictable costs for ongoing website management, and a fixed monthly fee is easier to budget than surprise invoices after urgent repairs.
Which enterprise teams benefit most

A development retainer isn't the right fit for every website. If your site is primarily a static brochure with only occasional updates throughout the year, a basic maintenance plan may be all you need to keep things running smoothly.
Retainers are most useful for:
- SaaS and product marketing teams running frequent campaigns, pricing tests, and product launches.
- Enterprise organizations with compliance, multi-region, multilingual, or multisite requirements.
- Content-heavy publishers, ed-tech platforms, and nonprofits with large taxonomies and traffic spikes.
- Marketing and communications teams without in-house WordPress developers.
- Companies whose websites directly support pipelines, donations, subscriptions, or customer education.
If your team needs development work every week or every month, a retainer is usually more cost-effective than quoting every task at an hourly rate. It also gives retainer clients priority access when urgent issues appear.
Measuring the Success of Your Enterprise WordPress Retainer

A retainer should be measured by outcomes, not only by activity. Hours matter, but business impact matters more.
Suggested KPIs:
Track these metrics from month one:
- Site speed: page load time, mobile performance, and Core Web Vitals.
- Uptime: outage minutes, incident frequency, and response time.
- Campaign velocity: time from request to publish.
- Development throughput: completed tasks, new features, minor modifications, and release quality.
- Security posture: vulnerabilities found, patches applied, audits completed, and backup health.
- Cost control: emergency fixes avoided, project-based work reduced, and internal time saved.
At WPoets, monthly reporting ties completed work to business outcomes.
For example, a report should not only say “optimized images.” It should show whether performance improved, whether the page passed key speed checks, and whether that work supports business goals.
Set a baseline in month one. Then compare progress at 6 and 12 months. Over time, the value of a monthly retainer should show up in faster releases, fewer emergencies, better conversion paths, and a more stable website.
Conclusion
An enterprise website needs more than occasional fixes. It needs continuous support, ongoing maintenance, security monitoring, performance optimization, and a development team that understands the business behind the code.
A WordPress development retainer turns your website from a one-time project into an ongoing investment. With the right partner, you get predictable costs, priority access, allocated resources, and continuous improvements that support business growth.
Not sure whether a monthly retainer, a one-time project, or a hybrid approach is the best fit for your website? The WPoets team can review your current setup, understand your goals, and help you choose the engagement model that delivers the most value for your business.
Please get in touch with our team for a custom retainer proposal.
FAQ
What Is a WordPress Retainer? Why Does Your Business Need One?
A WordPress retainer is essentially a regular contract you've got in place between your business and a WordPress development agency, a deal where you pay a fixed monthly fee for whatever level of ongoing support, upkeep, and maintenance assistance you need.
Unlike one-off project work, which is done with a clear endpoint in mind, a retainer provides a steady supply of support to keep your website secure, up to date, and aligned with your business's changing needs.
This type of agreement essentially gives you priority access to a team of pros for your site, leading to faster turnaround times on issues and enabling them to come up with proactive ideas to improve things. If your business needs regular updates, new features, and good old-fashioned reliable IT support without the hassle of employing full-time devs, then a WordPress development retainer is probably what you need.
For big companies and fast-growing startups, a retainer just makes good sense; it ensures your website stays fresh and evolves right in step with your marketing campaigns, customer needs, and business goals.
What's included in a WordPress development retainer?
The exact scope depends on business requirements, but a WordPress development retainer typically includes:
- Ongoing WordPress core, plugin, and PHP updates
- Security monitoring, backups, and uptime monitoring
- Performance optimization and Core Web Vitals improvements
- Landing page and template development
- Custom Gutenberg blocks and content enhancements
- UX and conversion rate optimization improvements
- CRM, marketing automation, and third-party integrations
- Technical SEO implementation and support
- Strategic consulting and website roadmap planning
- Dedicated development hours for ongoing enhancements
- Design assets required for the website (banner images, icons, vector images, infographics, among others)
At WPoets, retainers are designed to combine maintenance, development, and continuous improvement to help businesses maximize their website's value over time.
How much does a WordPress retainer cost?
The cost of a WordPress retainer depends on just how much hand-holding your site needs.
Basic maintenance retainers will probably start at a few hundred bucks a month. At the same time, a full-service plan that covers ongoing development, optimizing your site for speed, monitoring security, updating content, and generally keeping you on track can run $1,000+ a month. That's the sort of deal that's usually out of reach for small businesses and most startups.
Rather than paying out for a bunch of one-off fixes or projects, a retainer gives you the peace of mind of knowing exactly what you're going to be paying out every month, and you also get to tap into a team that really knows your site inside out.
This gives you the freedom to keep tweaking your site to make it run faster, add new features, make it easier for users to find what they're looking for, and stay on track with your business objectives without having to hire a whole team of in-house experts.
What's the difference between a WordPress retainer and a maintenance plan?
A WordPress retainer is quite different from a maintenance plan, and it really shows when you're talking about enterprise-level needs.
While a maintenance plan is all about keeping the basics covered: WordPress core, theme, and plugin updates, backups, monitoring for security threats, and making sure your site is online, a WordPress retainer is a far more strategic partnership.
For larger businesses, a retainer can mean ongoing custom development, fine-tuning your site's performance to perfection, top-notch support, and continual improvement aligned with your business goals.
What that means for your website is not just keeping it secure and up to date, but actually letting it grow alongside your marketing efforts, the integrations you need, and the user experience you want.
And the best part is it all comes with a predictable fixed monthly fee, a set amount of time that you know you'll get each month, so you're not hit with surprise bills. This means you can turn on more support when you need it and slow down when you don't, so you get faster results and a more proactive approach.
In essence, a maintenance plan will keep your site running, but a WordPress retainer will really help your site grow, innovate, and deliver a long-term return on investment.
Do I need a retainer, or is one-time project work better?
It depends on how actively your site supports your business.
Project-based work is the right choice for a complete redesign, a platform migration, or a major build with a clear finish line. It gives you a fixed scope, a fixed cost, and a defined delivery date.
But once that project launches, project-based work becomes expensive for ongoing needs. Every change requires a new scope, a new kickoff, and a vendor ramp-up, meaning a team that has never seen your codebase is solving problems that a retained team would handle in a fraction of the time.
A retainer is the better model when your site needs monthly development attention: new campaigns, integration updates, performance work, content changes, or UX/UI iterations.
At WPoets, we often pair an initial project (redesign or migration) with a retainer starting the month after launch, specifically to avoid the launch-and-abandon pattern.
How is a monthly WordPress retainer structured?
A WPoets retainer is built around three components:
A fixed block of hours is allocated each month, split between planned roadmap work, proactive maintenance, and a buffer for urgent or unplanned requests. Hours are not a vague allowance; they are tracked and reported transparently.
A defined maintenance layer runs continuously in the background (support + DevOps hours): updates, security monitoring, backups, uptime checks, and performance audits. This is not counted against development hours; it is part of the baseline service.
A monthly planning and reporting cycle keeps both sides aligned. At the start of each month, priorities are confirmed. At the end, you receive a report covering hours used, work completed, site health metrics, and next priorities.
The same core team stays on your account month to month, so context builds over time rather than resetting with every engagement.
How do WordPress retainer services work?
Once you start a retainer with WPoets, the first two to four weeks involve a technical and UX audit of your existing WordPress setup, plugins, hosting, custom code, and performance baseline.
From that audit, we build a roadmap balancing must-fix issues with continuous improvements.
From there, work flows through shared tasks that your team wants implemented on the website, with our suggestions, and includes weekly or bi-weekly check-ins between your team and ours.
All changes go through staging environments, code review, and testing before reaching production. At the end of each month, you receive a detailed report of what was done, what improved, and what is planned next.
The team assigned to your account- developer, DevOps, and technical lead or PM stays consistent. That continuity is what separates a retainer from an ad hoc support ticket system. The team learns your site deeply over time, which means faster execution, fewer errors, and better judgment on what to prioritize.
What are the benefits of our WordPress maintenance retainer?
A WordPress maintenance retainer means you've got a fully managed website maintenance team watching your back, providing ongoing support, and keeping your website up & running smoothly without you even thinking about it.
Instead of frantically trying to fix problems when they come up, your updates, security checks, backups, and performance tweaks are handled proactively to help prevent those pesky problems from biting you in the first place & causing you more headaches.
Plus, it means you've got a bunch of experts who are already familiar with your site & can jump on any issues that pop up, get improvements done in no time, & handle any new requirements as they come up.
With the peace of mind that comes from knowing exactly how much you'll pay each month, and the flexibility to scale up support as your business grows, a retention agreement helps you avoid downtime, keep your site running as smoothly as possible, and give your users a better experience overall.
Over time, this steady attention keeps your website safe, reliable, and in line with what you want it to do for your business.
General
13 min read
Drupal 10 EOL: Upgrade to Drupal 11 or Switch to WordPress?
December 9, 2026, marks the official end-of-life date for Drupal 10. After that date, Drupal core stops receiving security patches, bug fixes, and official support. If your enterprise runs a Drupal website on version 10, you have roughly five months to act before your site will no longer receive official support.
Drupal 10 End of Life: What's Happening after December 9, 2026?
After December 9, 2026, Drupal 10 will no longer receive security support. Here is what that means for site owners and enterprise teams in practical terms:
- Security vulnerabilities go unpatched: Any newly discovered exploits in Drupal core or contributed modules will not receive fixes. Your Drupal site becomes an increasingly attractive target, and security risks compound every month you remain on an outdated version.
- Infrastructure compatibility breaks: As PHP versions, Symfony components, and hosting environments continue to evolve, the technologies Drupal 10 depends on will eventually reach the end of their support lifecycle. Over time, this can lead to compatibility issues with your server environment, third-party integrations, and future updates.
- Maintenance costs spike: When official security updates are no longer available, your team has two choices: identify and patch vulnerabilities yourself or live with the security risks. In most cases, both options are more expensive than staying on a supported platform.
- Compliance pressure increases: Regulated industries (finance, healthcare, education) may not pass audits when running an outdated platform that no longer receives security patches.
At WPoets, we are a WordPress-first agency, but we approach this decision honestly. We also support structured, low-risk migrations from Drupal, including Drupal 7, Drupal 8, Drupal 9, and Drupal 10. sites. Our goal is to help you choose the path that genuinely fits your organization, not selling a platform for its own sake.
Understanding Drupal's Release Cycle and Drupal 10 End of Life
Drupal ships a new major version roughly every two years. Drupal 10 arrived in 2022, Drupal 11 launched in mid-2024, and Drupal 12 is planned for the end of 2026. Each Drupal version receives approximately two years of active support (new features and bug fixes) followed by security-only support until two newer major versions are available. Once the second successor ships, the older version hits EOL.
Here are the key dates that matter right now:
- Drupal 7 reached end of life on January 5, 2025. Drupal 7 will no longer receive security updates after EOL, yet approximately 180,000 websites still use Drupal 7 as of 2023, leaving them vulnerable to security vulnerabilities. Outdated Drupal 7 sites are prime targets for hackers and malware, partly because Drupal 7's reliance on older PHP versions increases security risks.
- Drupal 8 and 9 are already unsupported. Drupal 8 and 9 are no longer supported by the Drupal community.
- Drupal 10 enters EOL on December 9, 2026—a fixed, non-negotiable date regardless of Drupal 12's exact release timing.
Running unsupported software isn't just risky in theory; it leads to real downtime and real bugs, and the cost only grows the longer you wait.
Drupal 7 is the clearest example. Organizations that put off migrating are now finding that the jump from Drupal 7 to Drupal 10 isn't an upgrade at all; it's a full rebuild, often costing 16 to 30 weeks of developer time to complete. Many organizations that delayed action on Drupal 7 found themselves on an outdated platform with escalating security issues and no easy path forward.
This context makes choosing between upgrading to Drupal 11 and migrating to WordPress time-sensitive. Delaying until late 2026 means competing for limited agency and contractor capacity just as security exposure increases.
What looks like a routine version change is, in practice, a decision that will define your platform ecosystem for the next five to ten years.
Option 1: Upgrading to Drupal 11 and then upgrading Drupal to 12
If you want to stay in the Drupal ecosystem, upgrading to Drupal 11 and then to Drupal 12 is the path.
Stuck on Drupal 7, 8, or 9?
You know the drill by now: those versions have already reached the EOL, and it's only getting harder to keep them secure and running smoothly. So yeah, the priority is to get to Drupal 11 ASAP. With Drupal 12 building on top of Drupal 11, you can't just jump from those legacy versions to Drupal 12; it doesn't work that way.
The longer you put it off, the more exposed your site is to security risks, technical debt, and the likelihood of a more costly migration down the line.
Drupal 10
The clock is ticking on Drupal 10, which is due to lose support on December 9, 2026, so you've still got some time, but not as much as it might seem. If you're dealing with a large or super customized site, the upgrade process can take months to plan, test, and execute. If your goal is to stay on the latest and greatest version, start planning the move to Drupal 11 now.
Or, if you're keen on going with Drupal 12 instead, you might want to consider waiting until it's fully stable; that way, your contributed modules and custom integrations have a chance to catch up.
What the upgrade involves:
For a typical Drupal 10 site, you need to bring your codebase to the latest version, audit all contributed modules for Drupal 11 compatibility, refactor deprecated code, update your hosting environment to PHP 8.3+ and MySQL 8.0+, and run thorough regression testing.
The Upgrade Status module is a good starting point; it flags compatibility issues before you even begin the upgrade. From there, tools like Drupal Rector can take care of a good chunk of the deprecated code cleanup automatically, saving your team from doing it all by hand.
However, automated refactoring is only the first step; remaining compatibility issues should be reviewed manually, followed by another Upgrade Status scan before proceeding with the Drupal core upgrade
Benefits of Staying on Enterprise Drupal Deployments:
- No disruption to your team's existing workflows or custom code
- You prefer developer-led content updates over empowering marketing teams with self-service editing.
- You don't mind submitting tickets for routine website modifications.
- You keep the Drupal-specific modules you've already invested in
- Editors stay in a familiar interface, cutting down on retraining
- You eliminate the security and compliance risks of running an outdated version.
Hidden complexity and bottlenecks:
In reality, the upgrade is messier than it sounds. Contributed modules often lag months behind on Drupal 11 compatibility, and if one you rely on is unmaintained, you're stuck patching it yourself or rebuilding it, which isn't a small ask.
Worse still, refactoring for deprecated APIs doesn't stay contained when you update a core library like Symfony or your JavaScript toolchain, and it can ripple straight into your front end.
Beyond the code, Drupal has structural bottlenecks that the upgrade doesn't solve:
- Hosting costs remain high: Enterprise Drupal hosting costs considerably more than managed WordPress hosting for equivalent traffic.
- Developer dependency is constant: Many organizations find that modern Drupal is optimized for developers, while marketing teams often require additional technical support to implement website changes.
- The roadmap is developer-steered: The platform has grown increasingly developer-centric over the years, making it harder for non-technical site builders to manage and evolve sites without engineering support. As one longtime user put it on the Drupal.org forums, it can feel like a platform built for developers, by developers.
- The upgrade treadmill continues: Even after moving to Drupal 11, you face the same cycle: Drupal 12, then 13, each with its own EOL date, deprecated code cleanup, module compatibility audits, and hosting stack changes. The advanced features you build today may require refactoring again in two to three years.
Upgrading to Drupal 11 makes sense if you have a strong in-house Drupal engineering team, complex custom workflows deeply tied to Drupal architecture, and minimal complaints from marketing about usability. If any of those conditions are shaky, it's time to evaluate alternatives.
Option 2: (Recommended) Migrating from Drupal 10 to WordPress
When organizations learn that their Drupal version is approaching end of support, many take the opportunity to reassess whether Drupal remains the best long-term fit. Every month of delay increases technical debt, security exposure, and the likelihood of a rushed migration.
Moving from Drupal to WordPress is not an "upgrade", it's a complete rebuild and content migration.
But here's the important context: it's similar in effort to moving from Drupal 7/8 to Drupal 10, which was also a complete rebuild. The difference is that migrating from Drupal to WordPress gives you a fundamentally different platform trajectory afterward.
Migrating from Drupal to WordPress is often more straightforward than moving between Drupal major versions. The migration process requires remapping content types, taxonomies, media, and custom functionality, but the destination platform offers compounding advantages.
Why content and marketing teams prefer WordPress:
WordPress's user-friendly interface is the single most cited reason enterprises migrate from Drupal. WordPress allows non-technical users to manage content easily through the block editor (Gutenberg), which provides drag-and-drop content creation without developer involvement.
Content editors can build new pages, create landing pages, and update campaigns without filing developer tickets. WordPress offers an intuitive dashboard for site management, making routine content work accessible to non-technical users and allowing them to focus on publishing rather than platform mechanics. WordPress has a lower learning curve than Drupal, which means less training overhead and faster onboarding for new team members.
Performance and scalability:
Get the hosting and theme right, and WordPress can match or beat Drupal on speed. That's down to cleaner code, better caching, and optimized hosting, not some inherent platform advantage. Built properly, WordPress performs at a real enterprise level.
Ecosystem and long-term stability:
WordPress runs a huge share of the web, and that scale isn't an accident; it comes from a genuinely massive plugin ecosystem, mature enterprise hosting options, and easy integrations with the SaaS tools most teams already use.
But the real advantage isn't the size of the ecosystem. It's how WordPress handles change. Updates roll out incrementally, without blowing up your site in the process, and WordPress has a long track record of protecting backward compatibility.
You're not staring down a forced rebuild every couple of years just to stay supported, which is exactly the treadmill Drupal keeps you on with its major version cycles.
WordPress is preferred for content-heavy sites that require easy management, offering a more user-friendly, lower-cost alternative to Drupal. Migrating to WordPress can reduce maintenance costs significantly while giving content teams the autonomy to manage content and publish to web standards without constant developer intervention.
Low investment, higher ROI
WordPress developer rates typically range from $50–$150/hour, while Drupal specialists drawn from a smaller, more specialized talent pool often command somewhat higher rates for comparable enterprise work.
The talent pool is substantially larger, which means faster hiring and more competitive pricing. Search engines don't care which CMS you use-they care about site performance, content quality, and technical SEO, all of which WordPress handles well with proper configuration.
WPoets specializes in Drupal to WordPress migration for SaaS, enterprise, ed-tech, and nonprofit teams, including strategy, UX redesign, and structured migration of large content archives.
Total Cost of Ownership (TCO): Drupal 11 Upgrade vs WordPress Migration
The initial project cost is just the opening bid. What actually matters is total cost of ownership over the platform's lifetime, and Drupal consistently runs higher on maintenance than WordPress, category after category. Long-term, WordPress comes out ahead on cost.
| Cost Component | Drupal 11 Upgrade | WordPress Migration |
| Initial implementation | Lower upfront if purely upgrading (module compatibility, code refactoring, theme updates). | Higher initial: full rebuild + content migration. |
| Hosting | Often requires specialized enterprise Drupal hosting | Wider choice of managed WordPress hosting providers |
| Developer rates | Smaller specialist talent pool | Larger global developer ecosystem |
| Ongoing maintenance | More effort to manage modules, dependencies, and major upgrades | Simpler update process with strong backward compatibility |
| Future major upgrades | Recurring every ~2 years (D12, D13…), each requiring deprecated code cleanup, module audits, hosting stack changes | Incremental updates with backward compatibility; no forced "big bang" rebuilds |
| Content team productivity | Developer tickets for many content changes; site builders limited by admin UX | Marketing autonomy via block editor; fewer dev dependencies for day-to-day work |
Drupal Hidden Costs You Shouldn't Ignore
- Module maintenance burden: When contributed modules lose maintainers, your team absorbs that cost. Patching, forking, or rebuilding functionality that the Drupal community no longer supports adds up quickly.
- Recurring modernization effort: Enterprise organizations typically need to rebuild themes, update custom modules, and migrate content to a new Drupal installation. While Drupal 10 to 11 upgrades are more incremental, every major release still requires planning, compatibility validation, and development effort.
- Specialist scarcity premium: As Drupal's market share shrinks relative to WordPress, finding and retaining Drupal talent becomes more expensive.
Platform-Agnostic Costs
Regardless of which CMS you choose, some costs remain constant:
- API integrations and custom development
- SEO strategy and ongoing optimization
- UI/UX improvements and design work
- Compliance and accessibility requirements
- Performance optimizations and continuous improvements
- Retainers
Migrating to WordPress can lead to considerable savings when you factor in the compounding effect of lower hosting, cheaper talent, reduced maintenance, and eliminated rebuild cycles over a five-year horizon.
Decision Framework: Upgrade Drupal or Replatform to WordPress?
This is not just a CMS upgrade decision. You're deciding which ecosystem your business will depend on for the next 5–10 years. Here's a concrete framework to align your stakeholders.
Stay with Drupal (upgrade to 11) if:
- You've got an experienced Drupal team that's committed to staying long-term
- Your workflows, entity references, and integrations are so tightly tied to Drupal's architecture that rebuilding would cost more than just maintaining what you have
- Content changes needing developer involvement aren't a pain point for your marketing team; it's accepted and already built into the budget
- You don't mind the recurring cycle of major upgrades every two to three years, module audits and all
- You're already close to Drupal 10.6.x, and your contributed modules are well maintained
Switch to WordPress if:
- Content teams are asking for more autonomy; they want to create new pages, run campaigns, and update content without filing developer tickets
- Each Drupal upgrade has been painful, delayed, or cost nearly as much as building a new site from scratch
- Hiring and retaining Drupal expertise has become difficult or expensive in your market
- You want to consolidate multiple properties onto one new cms that's easier to support long-term
- Your organization has a low tolerance for recurring platform migrations and version lock-in
How WPoets Can Help You Choose and Execute the Right Path
WPoets is a WordPress-first agency focused on high-performance enterprise WordPress development and structured migrations from Drupal and other CMSs. We work with marketing teams at SaaS, enterprise, ed-tech, fintech, biotech, nonprofit, and publishing companies.
What we offer for this decision:
- CMS strategy consultation: We'll review your current Drupal site, content structure, business requirements, and team workflows to show you what a migration to WordPress would involve. You'll get a clear understanding of whether it's the right fit for your goals, timeline, and budget.
- Full migration execution: Custom theme/templates/patterns/blocks development, structured content migration, SEO preservation, and managed hosting, all delivered with clear communication, MVP-first milestones, and iterative improvements rather than one-off, high-risk rebuilds.
- Long-term WordPress retainers: And we don't disappear after launch. We stick around for ongoing maintenance, performance tuning, security monitoring, and continuous improvements as your site evolves.
December 9, 2026, isn't a soft target; it's fixed. And the earlier you start planning around it, the more options you'll have, along with real leverage to negotiate. Wait until Q4 2026, and you'll be competing with everyone else for the same shrinking pool of agency capacity at premium prices.
Ready to evaluate your options? Get in touch with WPoets, we'll review your current Drupal setup, map out your options, and help you land on a concrete plan before Drupal 10 end-of-life turns into a security scramble.
Before we talk, it helps to have a few basics ready:
- Your current Drupal version and hosting environment
- Roughly how many content types, taxonomies, and pages your site has
- Any known custom modules or third-party integrations
- Your internal timeline and compliance deadlines, if any
At the end of the day, Drupal 10 reaching end of life isn't a crisis. It's an opening, a chance to move to a platform that actually serves your team better long-term: lower costs, more editorial freedom, and a roadmap you can count on.

General
13 min read
Umbraco 16 End of Life: Should You Upgrade to v17 or Migrate to WordPress?
Is your website running on Umbraco 16? Here's what happens next.
You wake up one morning to find your website has been compromised…
Customer data is exposed… Your team is scrambling… And when you dig into what went wrong, the answer is uncomfortable: your CMS hadn't received a security patch in months.
This is exactly what can happen when you keep running a CMS past its end of life.
Umbraco 16 reached the end of life on June 12, 2026, after which, Umbraco stopped releasing security patches for version 16.
No bug fixes. No updates. No official support if something breaks.
Your site will still load… Your pages will still work… But every day you stay on an unsupported version, the risk quietly grows.
So you have a decision to make.
Do you upgrade to Umbraco 17 and stay in the Umbraco ecosystem? Or is this the right moment to step back and ask if WordPress is a better fit for where your business is headed?
Both are valid paths. And this post walks you through each one so you can choose with confidence.
What Does "End of Life" Mean for Umbraco 16?
End of life means the people who build and maintain Umbraco stop looking after that version.
No more fixes. No more patches. No more help if something goes wrong.
Here is what that looks like in practice for Umbraco 16.
The Official Timeline
Umbraco 16 is a standard release, which means it gets a shorter support window than a long-term support version.
Full support for version 16 has already ended. The final phase, where only security patches were being released, ended on June 12, 2026.
After that date, version 16 is on its own.
If you are looking for a supported path forward within Umbraco, version 17 is the one to be on. It is the current long-term support release and is supported until November 27, 2028.
Worth noting: Umbraco 13 is also a long-term support release, but its support ends on December 14, 2026. So if you are on version 13, thinking you have more time, that window is closing fast, too.
Your Site Still Works. So, Why Act Now?
This is the part that trips a lot of teams.
After June 12, 2026, no Umbraco 16 sites went offline. Pages still load. Forms still submitted. Everything looks fine on the surface.
But "fine on the surface" is not the same as "safe."
Think of it like a building where the locks stop getting maintained. The building is still standing. But if someone finds a new way in, no one will come to fix the gap.
Once Umbraco 16 reaches end of life, these things stop:
- Security patches for newly discovered vulnerabilities
- Bug fixes for issues that get reported
- Updates to stay compatible with newer browsers, third-party packages, and server environments
- Official support when something breaks, and your team needs help
The longer you wait, the more exposure you carry.
Security, Compliance, and Business Risk
For small sites, the risk is mostly about security.
For enterprises, it goes further than that. Standards such as GDPR, ISO 27001, and SOC 2 require organizations to run actively supported software.
Running an unsupported version is not just a technical problem. It is a governance problem.
- It can show up as a finding in a security audit.
- There is also an operational risk that builds slowly and quietly.
- The tools and services your site connects to keep updating on their own schedules. Over time, those updates stop being compatible with a version that is no longer being maintained. Integrations start breaking.
- Workarounds pile up.
- The cost of staying grows.
And if a breach happens while you are running unsupported software, explaining that to customers, partners, or regulators is a difficult conversation to have.
Acting now is not about panic. It is about making a planned, controlled decision before the situation forces one on you.
So, What Are Your Options?
You have two clear paths in front of you.
You can upgrade to Umbraco 17 and stay within the Umbraco ecosystem. Or you can use this moment to move to WordPress and build on a platform that may serve your team better for the next decade. Both are solid choices.
The right one depends on your team, your setup, and where you want to be two or three years from now. Let's look at each one honestly.
Option 1: Upgrade to Umbraco 17
What Is Umbraco 17?
Umbraco 17 is the latest long-term support release. That means it is the version Umbraco officially backs for an extended period, with support running until November 27, 2028.
It is built on .NET 10, which is a meaningful foundation upgrade. The platform is faster, more stable, and better aligned with how modern .NET development works.
Here is what improved from version 16:
- Faster overall performance
- Consistent date and time handling across the system (everything now works in UTC)
- A cleaner, more modern content editor that has been evolving since version 14
- Stronger alignment with current .NET development standards
- A large number of bug fixes. Version 17.0.0 alone shipped with 169 fixes and improvements
If you are already in the Umbraco ecosystem, version 17 gives you a stable home for the next few years.
Is the Upgrade from v16 to v17 Complicated?
The honest answer: less complicated than previous upgrades, but that doesn’t mean it's easy.
If you moved from version 13 to version 14, that was a significant undertaking. The jump from version 16 to version 17 is much smoother by comparison. Developers who have gone through it describe it as far less disruptive.
That said, there are a few things to be aware of before you start:
- Date values stored in the system are now automatically converted to UTC. The migration runs on its own, but you should verify your data after
- Some older parts of the version 16 codebase that were marked for removal have now been removed in version 17
- Third-party packages may not yet be compatible with version 17. Check this before you begin
- Any custom extensions built for the older back office will need to be reviewed
For a clean, lightly customized version 16 site, the upgrade is manageable.
For sites that have heavy custom builds, older packages, or complex integrations, expect more planning and testing time.
When Does Upgrading to v17 Make Sense?
Staying in the Umbraco ecosystem is the right call if:
- Your development team works in .NET and knows Umbraco well
- You are on Umbraco Cloud and benefit from its managed setup
- You actively use Umbraco-specific products like Umbraco Commerce, Umbraco Engage, or Umbraco Workflow
- Your site is relatively clean with no major legacy customizations
- You are not planning a platform change right now
One more thing worth thinking about. Umbraco has been around for over 20 years and shows no signs of going anywhere.
If your team is already invested in the platform, staying and upgrading is a good long-term decision. The question is whether the platform still fits how your business operates today.
Option 2: Migrate from Umbraco 16 to WordPress

Why EOL Is the Right Moment to Rethink Your Platform
Here is something worth sitting with.
Umbraco's end of life forces you to act. And since you are already making a change, it is worth asking a bigger question: is Umbraco still the right platform for how your team actually works today?
Many organizations adopted Umbraco years ago because their development team worked in .NET or because the platform gave them the control they needed at the time. That was the right call then.
But digital teams have changed. Marketing teams are bigger. Content moves faster. SEO, campaigns, and digital growth are now owned by non-developers, who often feel the friction of Umbraco every single day.
So the question is no longer just "does this CMS work?" It is, "Does this CMS work for how we actually operate today and how we want to operate three years from now?"
What Decision-Makers Are Really Weighing
If you are the person building the case for a migration internally, you already know the hardest part is not the technology. It is getting buy-in from people who are weighing cost, risk, and disruption.
Here is what is typically keeping leadership up at night:
- "What does this cost, and is the ROI clear?"
- "How long will the site be disrupted during migration?"
- "What happens to our SEO rankings?"
- "Can we actually maintain this new platform without adding headcount?"
- "Are we trading one set of problems for another?"
These are fair concerns. And WordPress, when implemented properly by the right team, addresses all of them directly.
- Lower ongoing development cost.
- A faster content workflow.
- A larger talent pool.
- Better SEO tooling out of the box.
- A platform with no forced version migrations every few years.
Why More Enterprises Are Moving to WordPress

WordPress powers over 40% of all websites on the internet. That includes large enterprises, global media companies, and complex multi-site platforms. It is not just a blogging tool. It is a mature, enterprise-ready platform.
Here is why it keeps coming up as the alternative to Umbraco:
Your marketing team can actually work on their own
In Umbraco, even small layout or content changes often need a developer. That means tickets, wait times, and a content team that cannot move at the speed the business needs.
WordPress's block editor lets marketing and content teams create pages, update layouts, and publish without waiting on anyone. Developers still handle the complex stuff. But the day-to-day is no longer a bottleneck.
Hiring becomes much easier
Umbraco runs on .NET. That is a smaller, more specialized talent pool. Finding developers who know the platform well takes time and costs more.
WordPress has one of the largest developer communities in the world. Whether you are hiring in-house, working with freelancers, or partnering with an agency, finding skilled WordPress talent is faster and generally more cost-effective.
A much bigger ecosystem of tools and integrations
Umbraco supports extensions, but the library is limited. Most enterprise marketing tools, CRMs, analytics platforms, and personalization engines have direct WordPress integrations available as plugins.
That means less custom development to get your stack connected, and a faster time to market when you want to add something new.
Better SEO without custom builds
WordPress has mature, well-tested SEO plugins like Yoast and Rank Math. Clean URL structures, XML sitemaps, structured data, and image optimization without writing a single line of custom code.
In Umbraco, getting to the same level of SEO capability usually requires custom development work.
No vendor lock-in
WordPress is open source. You own your codebase, choose your hosting, and tools. You are not tied to any single company's roadmap or pricing decisions.
If a better tool comes along, you can bring it in without rebuilding your entire platform.
WordPress Is Enterprise-Ready
A common hesitation we hear is: "But is WordPress really built for enterprise?"
The short answer is yes.
WordPress handles high-traffic sites, complex multi-site setups, multilingual platforms, and sophisticated integrations. Explore our case studies to see it in action.
Managed WordPress hosting providers like Kinsta, Pantheon, Hostinger, and Bluehost offer infrastructure built for enterprise scale: automatic scaling, CDN delivery, daily backups, uptime monitoring, and proactive security scanning.
Role-based access control, custom editorial workflows, and governance structures can all be implemented. Enterprises with strict compliance requirements use WordPress every day.
The platform has matured significantly. The question is not whether WordPress can handle enterprise needs. It is whether it is the right fit for your specific setup.
Umbraco 17 vs WordPress: A Side-by-Side Look
Still not sure which way to go? This table breaks it down across the factors that actually matter to your team and your business.
| Factor | Umbraco 17 | WordPress |
| Ease of use for content teams | Structured editor with guardrails. Most layout changes still need a developer | Block editor lets marketing teams build and publish pages without developer help |
| Developer talent pool | Smaller pool of specialists. Requires .NET experience | One of the largest developer communities in the world. Much easier to hire |
| Upgrade and maintenance | Version 17 is supported until November 2028. Forced upgrades every few years | Continuous updates. No forced version migrations |
| Plugins and extensions | Around 300 to 400 packages are available | Over 60,000 plugins. Most tools your team already uses have a direct integration |
| SEO tools | Custom development usually required to match enterprise SEO needs | Mature plugins like Yoast and Rank Math are available out of the box |
| Hosting options | Requires .NET compatible hosting. Umbraco Cloud is the managed option | Works on almost any hosting setup. A wide range of managed WordPress hosts is available |
| Multilingual support | Built into the content model natively | Needs a plugin or manual setup |
| Headless architecture | Content Delivery API built in. Strong native headless story | Possible via REST API. Very capable but feels more adapted than native |
| Open source | Yes, MIT license | Yes, GPLv2 |
| Vendor dependency | Tied to Umbraco's roadmap and product decisions | Community governed. No single vendor controls the platform |
| Cost | Free core CMS. Umbraco Cloud and add-ons like Commerce and Workflow are paid | Free core CMS. Hosting and premium plugins are the main costs |
| Long-term support | Version 17 supported until November 27, 2028 | No forced EOL cycles. Updates are continuous |
In short, Umbraco 17 gives you a clean, structured platform if your team is already in the .NET world. WordPress gives you speed, flexibility, and a much bigger ecosystem if your team wants to move fast and stay independent.
So, Which Path Is Right for You?
There is no universal right answer here. The best choice is the one that fits how your team works and where your business is headed.
Here is a simple way to think about it.
Choose Umbraco 17 if:
- Your development team works in .NET and already knows Umbraco well
- You actively use Umbraco-specific products like Umbraco Commerce, Umbraco Engage, or Umbraco Workflow
- Your site is on Umbraco Cloud, and the upgrade from version 16 is straightforward
- You want to stay on a single, structured platform without changing your tech stack
- Your site has minimal customizations, and the move to version 17 is a clean lift
If most of these apply to you, upgrading is the logical next step. Plan it properly, test thoroughly, and you will be in a good place through November 2028.
Choose WordPress if:
- Your marketing team waits on developers for regular content updates and layout changes
- You want access to a larger talent pool and more agency options without paying a premium
- You are not using any Umbraco-specific products that would need to be replaced
- You are already planning a redesign or a structural overhaul of your website
- You want SEO and content workflows that work out of the box without custom builds
- You want the freedom to host anywhere, integrate any tool, and scale without being tied to one vendor's roadmap
If most of these sound familiar, this EOL moment is a genuine opportunity.
You are already doing the work of a migration. The question is just whether you migrate to version 17 or to a platform that removes the friction your team deals with every day.
Ready to Make Your Move?
Umbraco 16's end of life is not just a deadline. It is a decision point.
If you are upgrading to version 17, the path is clear. Plan it properly, check your packages, test everything, and you will have a stable platform to work on through 2028.
If you are considering WordPress, this is the right time to make that move. You are already doing the work. The only question is whether you come out of it on a platform that removes the friction your team deals with every day.
The real question is not which platform has more features—it is which one helps your team move faster, and your business grow without constant roadblocks.
If you are leaning toward WordPress, WPoets specializes in Umbraco to WordPress migrations. We handle the full process, from content and structure to SEO preservation and integrations, so nothing gets lost in the move.
Learn more about our Umbraco to WordPress migration service.
Not sure which path makes more sense for your specific setup? A short conversation with our team can bring a lot of clarity. Get in touch here.
General
17 min read
How to Preserve Your Website's SEO While Migrating to WordPress
You've worked hard to get your website where it is today.
The traffic didn't come overnight. The rankings took months, or sometimes years of consistent effort. And now you're considering a move to WordPress.
But something's holding you back - What if the migration wipes out all of that?
You're not the only one to think so…
Most businesses that come to us with migration plans have the same worries:
- What happens to all my URLs? Will Google lose track of my pages?
- My top-ranking pages took forever to get there. What if they disappear from search results?
- I have no idea if my metadata and page structure will carry over.
- I've heard of websites losing more than half their traffic after a migration. What if that happens to me?
These are real risks because we can’t deny they've tripped up businesses before.
The truth is, most SEO losses during a migration come down to a few avoidable mistakes.
- Missing redirects.
- High-value pages accidentally removed during a redesign.
- A site structure that search engines can no longer read properly.
Here's the other truth: none of that has to happen to you.
When a migration is planned carefully with SEO at the center of every decision, search engines can follow along without losing a beat. Your rankings, authority, and traffic don't have to go anywhere.
In fact, a well-executed WordPress migration often ends up improving SEO performance most of the time
Better site structure. Faster load times. More control over your content.
So how do you make sure a migration goes the right way?
We'll walk you through every phase to show you what we do before the migration, during it, and after your new WordPress site goes live. And at the end, we’ll share our simple checklist that makes sure nothing gets missed
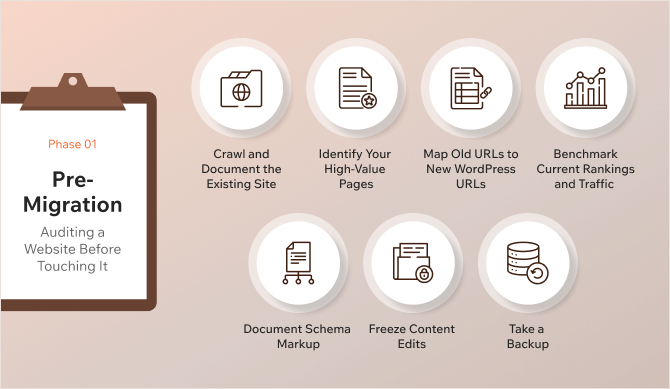
Phase 1: Pre-Migration - Auditing a Website Before Touching It
People often jump straight into building the new WordPress site.
Pages get restructured. URLs get changed. Old content gets left behind. And by the time the new site goes live, there's no record of what the old one looked like.
That's how rankings disappear.
Therefore, it's important to have a clear picture of what you have in the beginning - what's live, what's ranking, and what Google is paying attention to on your current site.
Here's what to do.
Crawl and Document the Existing Site
Every page that exists today needs to be accounted for in the new site.
Therefore, saving up a complete list of every URL along with the data attached to each one, like the title tags, meta descriptions, heading structures, internal links, canonical tags, and status codes is a good idea.
This can be done using tools like Screaming Frog or Sitebulb that crawl every page.
Other things that can be covered up here are:
Recording all on-page SEO elements
Every page on a website has SEO signals like Title tags, Meta descriptions, Headings, Image alt text, and Canonical tags attached to it. Google uses these to understand what each page is about and how to rank it.
It is important to carry them over so Google doesn’t have to start figuring things out from scratch again. It’ll save time and avoid drastic drops in rankings.
This also means going through the high-value pages and recording every element is important. The crawl data export we mentioned above will help here.
Taking stock of the content
Not everything on your current website will need to be moved. Therefore, it's important to go through the existing content with fresh eyes.
You won’t want to move the following:
- Old blog posts with outdated information.
- Landing pages for campaigns that ended two years ago.
- Thin pages that were never bringing in traffic.
When you decide you don’t need them, pages can’t just be removed. We will need to check if a page has backlinks pointing to it or any organic traffic that comes over. Removing it without a redirect means losing that SEO value entirely.
For every page you decide to remove, you need a plan - either redirect it to the most relevant page on the new site, or serve a proper 410 (gone) status to tell Google the page no longer exists.
Managing the Hreflang tags for multilingual websites
If your current website serves visitors in more than one language, you likely have hreflang tags that tell Google which version of a page to show to users in different countries or languages.
Before migrating to WordPress, these tags need to be documented carefully and rebuilt correctly on the new WordPress site. If they break during the migration, Google may start showing the wrong language version of your pages to the wrong users, and that affects rankings.
Identify Your High-Value Pages
Not all pages on the website are equally important.
Some pages bring in most of your traffic, some rank for the keywords, some have earned backlinks from other websites. Those links carry real authority.
Therefore, it is important to sort and prioritize pages you cannot afford to lose during migration.
This is where we can pull data from Google Search Console and Google Analytics and look for
- Pages with the highest organic traffic
- Pages ranking for your most important keywords, pages with the strongest backlink profiles
- Pages that drive enquiries or sales
Map Old URLs to New WordPress URLs
You don’t want broken links confusing crawlers, resulting in low rankings. Mapping URLs is one step that prevents more SEO damage than the rest.
Every migration comes with a few, if not many, URL changes. It is important to know which old URL maps to which new one.
That’s why building a simple spreadsheet listing the Old URL, New URL, and Priority will help.
This document drives your redirect setup. Without it, URLs are most likely to get missed.
While everyone focuses on pages here, URLs pointing to images, PDF files, media files, etc. also have to be considered. You won’t want to lose your position if images from your website are ranking.
Benchmark Current Rankings and Traffic
Before the migration, it is important to make a note of the current position of the website. To do so, we need to:
- Export keyword rankings and performance data from Google Search Console, Ahrefs, or Semrush.
- Note monthly organic traffic.
- Record where the top pages sit in search results today.
This gives a measurable reference to be compared with that of the new site. If anything drops after the migration, it’ll be easier to respond quickly, as this data will help track what went wrong.
Document Schema Markup
Schema markup helps Google display rich results in search, like star ratings, FAQs, or article details. These are easy to overlook during a migration, and losing them can affect how pages appear in search results even if rankings stay the same.
If a current site uses structured data like Organization, Service, Author Review, FAQ schema, breadcrumb schema, or review schema, these have to be noted down and rebuilt on WordPress.
Google's Rich Results Test helps check which pages have schema in place and what type.
Freeze Content Edits
New pages, updated copy, or restructured navigation can create discrepancies between the audit data and the actual site by the time migration begins.
Any changes to the live site have to be paused once the pre-migration audit is underway.
A content freeze keeps the reference data accurate. It also means there's less chance of something slipping through the gaps during the move.
Take a Backup
If something goes wrong during the migration, a clean backup means the old site can be restored to start over again without losing anything.
Therefore, it is important to take a full backup of the current site before anything changes on the technical side. This means - the database, files, .htaccess configuration, etc.
You can read more about the best backup and restore WordPress plugins.
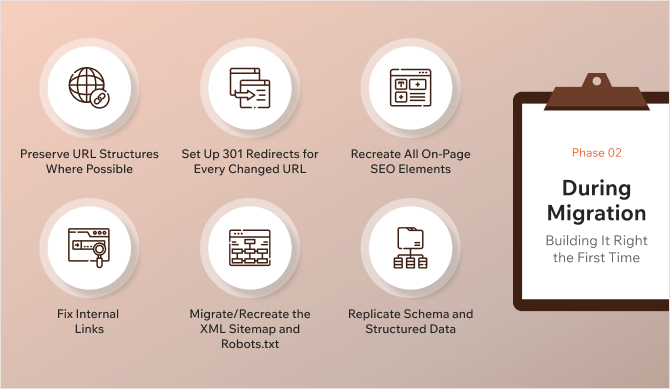
Phase 2: During Migration - Building It Right the First Time
The audit is done. The groundwork is in place.
Now comes the part where most SEO damage can actually happen. That’s because most often people get busy focusing on the look and feel rather than the technical details.
The second phase is about making sure everything that’s documented in Phase 1 makes it across to the new WordPress site.
Preserve URL Structures Where Possible
A URL that already works, ranks, has backlinks, and brings in traffic is best left as it is.
WordPress lets us set custom permalink structures. So in many cases we can match what was there before.
The fewer URLs are changed, the fewer redirects need to be set up. And the fewer redirects, the less room there is for something to go wrong.
URLs should only be changed if there's a good reason to do so. If it does not need to change, it should be added to the URL mapping document before the new site goes live.
Set Up 301 Redirects for Every Changed URL
A 301 redirect tells Google that a page has permanently moved to a new address. It passes the ranking authority from the old URL to the new one. Without it, anyone or any search engine visiting the old URL hits a dead end.
Therefore, it's important to go through the URL mapping document and set up a redirect for every single URL (including pages, images, media files, etc.) that has changed.
While in this step, there’ll be a couple of instances to watch out for:
- Redirect chains: This is when Page A redirects to Page B, which redirects to Page C. Each redirect dilutes the SEO value being passed. Such instances need to collapse so the old URL points directly to the final destination.
- Redirect loops: This is when Page A redirects to Page B, which redirects back to Page A. It breaks the page entirely. These have to be identified before the site goes live.
Redirects can be managed through the .htaccess file or a WordPress plugin like Redirection.
Recreate All On-Page SEO Elements
The best way to recreate on-page SEO elements on a WordPress website is to use an SEO plugin like Yoast SEO or Rank Math.
Once the plugin is installed, every title tag, meta description, heading structure, and image alt text needs to be in place on the new site before it goes live. This might require a manual check to ensure everything is in place—especially for the high-value pages on the website.
Some page builders and WordPress themes generate their own headings automatically sometimes. This can conflict with or override what is being set. Therefore, a manual check will also help in identifying pages with duplicate H1s (if at all).
Fix Internal Links
Internal links on a website ease navigation. Every link inside the website that points to an old URL needs to be updated.
If there are 301 redirects, visitors will still get to the right place. But internal links going through redirects put unnecessary load on the server and weaken the flow of SEO value through the site. Google also prefers to follow direct links, not chains.
The cleanest way to fix this is a database-level search and replace. A plugin like WP Migrate or Better Search Replace helps to swap out old URLs for new ones across the entire WordPress database in one go.
After that, it's important to run a crawl of the new site and check that no internal links are returning errors or going through redirects. Every internal link should point directly to a live page.
Migrate/Recreate the XML Sitemap and Robots.txt
The XML Sitemap and Robot.txt files tell search engines where to go and where not to.
- XML Sitemap: The sitemap is a list of all the pages Google should index. Once the WordPress site is built, a fresh sitemap can be generated using the SEO plugin. It's important to make sure it only lists pages that actually need to be indexed, and that no old URLs have crept in. The XML Sitemap has to be submitted to Google Search Console once the site goes live.
- Robots.txt: This file tells search engines which parts of the site they're allowed to crawl. During development and testing, it's common practice to block search engines from crawling the staging site. If that block doesn't get removed before the site goes live, Google can't crawl any of it. Rankings drop fast. It's important to double-check the robots.txt file before launch. There should be no Disallow: / rule sitting in there.
Replicate Schema and Structured Data
If the old website has some schema markup implemented, it is important to bring it over to the new WordPress website.
Without schema markups, it becomes difficult for search engines to understand the context of the website, and the site will lose its visual enhancements in search results (like Organization, Person, Service, Professional service, star ratings, or FAQs), which drastically decreases click-through rates.
Schema markup is easy to overlook during a migration because it doesn't change how the site looks. But it changes how Google reads it.
Most SEO plugins handle common schema types. For more specific or custom schema, adding a JSON-LD code manually to the relevant pages helps. Schema Validator and Google's Rich Results Test help confirm everything is valid and being picked up correctly once the schema is implemented on the new website.
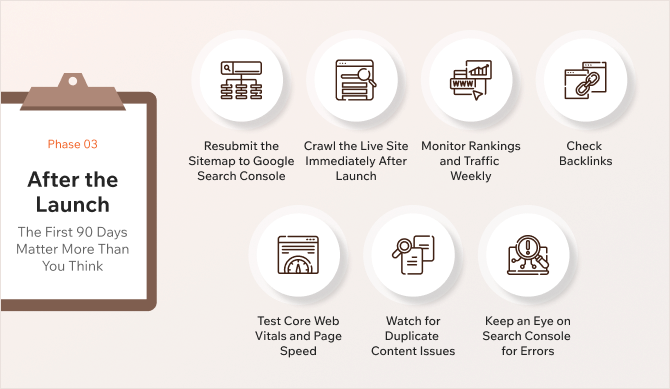
Phase 3: After the Launch - The First 90 Days Matter More Than You Think
By the time you reach here, the new WordPress site is live. The hard work is done.
But the first 30 to 90 days after a migration could see some problems surface.
Google is re-crawling the site, re-evaluating pages, and deciding how to treat the new URL structure. If something went wrong during the migration, this is when it’ll be highlighted.
The good news: if issues are caught early, they can be fixed before they do the real damage.
Here's what to stay on top of…
Resubmit the Sitemap to Google Search Console
The first thing to do after the new site goes live is to resubmit the sitemap to the Google Search Console.
This can be done by logging in to the Google Search Console, going to the Sitemaps section, and submitting a new XML sitemap. This tells Google exactly where the pages are and prompts it to start crawling the new site.
If the domain changed during the migration, the new domain has to be added and verified as a property in the Search Console before submitting anything.
Crawl the Live Site Immediately After Launch
To ensure problems (if any) are caught before Google does, it is important to run a full crawl of the new site as soon as it goes live.
Things to look for in this crawl are:
- Pages returning 404 errors that Google will try to visit and find nothing at.
- Redirect chains that need to be collapsed.
- No pages should be accidentally blocked in the robots.txt.
- Missing title tags, duplicate meta descriptions, or pages without H1 headings.
- Pages showing up in Crawled - currently not indexed
Compare this crawl against the one in Phase 1. Every page that existed before should either be live on the new site or have a redirect in place. If something is missing, it needs to be fixed now.
Monitor Rankings and Traffic Weekly
In the first few weeks after migration, small fluctuations are normal. Google takes time to process the changes and re-index pages.
This is where it is important to pull up the benchmark data recorded before the migration and start comparing.
A minor dip in traffic or a few positions lost on certain keywords is okay. If a high-value page that was sitting on page one has disappeared from the first three pages, that's a signal something went wrong.
Things to be checked in this case are:
- Whether the redirects are in place
- Whether the on-page SEO elements are there
- Whether Google has indexed the new URL
The faster a problem is found, the faster things can be fixed. This is why monitoring rankings is important.
Check Backlinks
Backlinks pointing to old URLs are only useful if those URLs redirect correctly to the new ones. That’s why the steps to map URLs and set up 301 redirects are important.
Tools like Ahrefs, SEMrush, or Google Search Console's Links report help to check which external sites are linking to the website and where those links are landing. If any of these are hitting 404 pages, it means a redirect was missed.
Every backlink that lands on a dead page is a loss. So, it is important to fix them.
Test Core Web Vitals and Page Speed
Moving to a new WordPress setup can change how quickly the pages load.
Testing core vitals can be done using the Search Console and the page speed can be checked using the Google PageSpeed Insights.
If performance has dropped, understanding what’s causing it will help fix it soon. A heavy theme, too many plugins, unoptimized images, or a lack of caching can all slow a WordPress site. These are fixable but need to be caught early because page speed is a ranking factor.
Watch for Duplicate Content Issues
WordPress, by default, can create multiple versions of the same content. Pages like Category pages, tag archives, author pages, and pagination can all generate URLs that contain similar or identical content.
If Google indexes multiple versions of the same page, it has to decide which one to rank. It often gets this wrong or splits the ranking value between them. It's important to keep an eye on the Search Console coverage report for pages being indexed.
Canonical tags can be used to point Google to the preferred version of each page, and no-index settings can be applied to archive pages or thin content that shouldn’t be shown in search results.
Keep an Eye on Search Console for Errors
Search Console will show how Google sees the site in real time. This needs to be looked at at least once a week for the first three months.
- The Coverage report will flag pages that couldn't be indexed and tell why.
- The Performance report will show whether the clicks and impressions are trending in the right direction.
- The Enhancements section will highlight any issues with the schema markup or Core Web Vitals.
An early fix here will help maintain and manage the website rankings.
Most post-migration issues are fixable. The ones that cause lasting damage are the ones that go unnoticed for weeks or months.
The Upside: What WordPress Now Makes Possible
If you are still having second thoughts about moving to WordPress, here's something worth stepping back to appreciate: After moving to WordPress, you're not just in the same position you were before. You're in a better one.
WordPress gives a level of control over SEO that most other platforms don't. And once the website is on it, here’s what can be put to use:
- SEO plugins that do the heavy lifting: Plugins like Yoast SEO and Rank Math give real-time SEO feedback, like flagging missing meta descriptions, weak titles, and keyword issues before anything goes live.
- Schema markup without the headaches: Most SEO plugins handle structured data like articles, FAQs, breadcrumbs, and more without touching a line of code.
- Full control over the site structure: WordPress gives full control over the site structure - the navigation, category hierarchy, and internal linking. This makes sure Google always knows which pages matter most.
- Page speed that can actually improve: Caching plugins like WP Rocket and W3 Total Cache can significantly reduce load times. A faster site means better rankings.
- A content system built for growth: WordPress makes it easy to organize, publish, and maintain content consistently.
Moving to WordPress need not just be a survival but an upgrade if done the right way!
In the Closing - Migrate With a Plan, Not With Hope
A WordPress migration is not a threat to your SEO. An unplanned one is.
The difference between businesses that come out of a migration with rankings intact and those that don't most of the time comes down to one thing - the preparation.
The consequences of getting it wrong are real.
In October 2024, Beroe Inc. migrated their website to a new platform expecting better traffic, more leads, and stronger performance. The outcome was the opposite. A poorly handled migration led to an approximately 80% drop in website traffic and lead generation. Years of organic growth, gone in weeks.
That's not a worst-case scenario. That's what happens when a migration is treated as a design project instead of an SEO-critical one.
This shouldn’t always be the case.
Every step listed above will help prevent that outcome. When each of the phases, like the audit, the redirects, the on-page checks, and the post-launch monitoring, is followed carefully, search engines move with the site instead of losing track of it, things fall in place.
Done right, a WordPress migration doesn't just protect your SEO. It gives you a better foundation to grow from.
Need a seamless SEO-safe WordPress migration? Get in touch with our team to plan your move the right way.

Tutorials
12 min read
How to Migrate from Ghost CMS to WordPress in 2026
Introduction
Moving your site from Ghost to WordPress can seem complex, but the process is actually much simpler than it appears. If you’re planning to make the switch, you’re in the right place.
In this step-by-step blog, you’ll learn exactly how to migrate your Ghost site to WordPress safely and quickly.
We’ll cover everything from exporting data, converting Ghost’s JSON to WordPress-compatible CSV, importing content, preserving SEO settings, and launching your new site without losing traffic. And if you’d prefer expert help, our Ghost to WordPress migration service takes care of everything delivering a smooth, safe move with no downtime or data loss.
Why Migrate from Ghost to WordPress?
Ghost is popular for being simple, fast, and clean, perfect for writers and small blogs. But, as your site grows and you need more advanced features, Ghost’s minimalist approach can start to feel restrictive.
That’s where WordPress stands out, a flexible, open-source CMS offering unmatched control over design, functionality, and long-term scalability. You can build anything from a simple blog to a full-scale business or enterprise website with ease.
With tools like Yoast SEO and Rank Math, you can optimize your content to rank in search results. And because it supports advanced content types, custom workflows, and tons of integrations, it’s a platform that’s truly built for the future.
You also gain the advantage of a massive global community, helpful documentation, and experts who can step in whenever you need support.
So if Ghost’s minimalist setup is starting to hold you back and you want more creative freedom, powerful features, and full ownership of your site, migrating to WordPress is a smart move for your growth.
Prerequisites and Preparation
Before you begin migrating your site from Ghost to WordPress, make sure you have everything ready to ensure a smooth transition:
1. Choose the Right WordPress Hosting
Choose a reliable WordPress hosting provider that offers fast performance, strong security, and daily backups. Managed WordPress hosts like Kinsta or SiteGround handle speed, backups, and security automatically.
If you prefer more control, you can also choose VPS hosting.
2. Install WordPress
Install WordPress, and after it's done, here are the next steps:
- Log in to Your WordPress Dashboard: Access your site admin by visiting mynewwebsite.com/wp-admin and entering your credentials.
- Choose a Simple Default Theme for Testing: To get started, activate a default WordPress theme such as Twenty Twenty-Four (the latest official default theme).
3. Optional: Create a Staging Environment
If you want to preview your migrated content before launch, set up a staging site. Many hosting providers include this feature, or you can use plugins like WP Staging. This allows you to:
- Test the import process safely
- Adjust design and functionality
- Fix any issues before live
Export Content from Ghost
The first step in migrating from Ghost to WordPress is to export all your existing Ghost content, including posts, tags, and authors.
- Log in to your Ghost Admin Dashboard.
- Go to Settings → Import/Export.
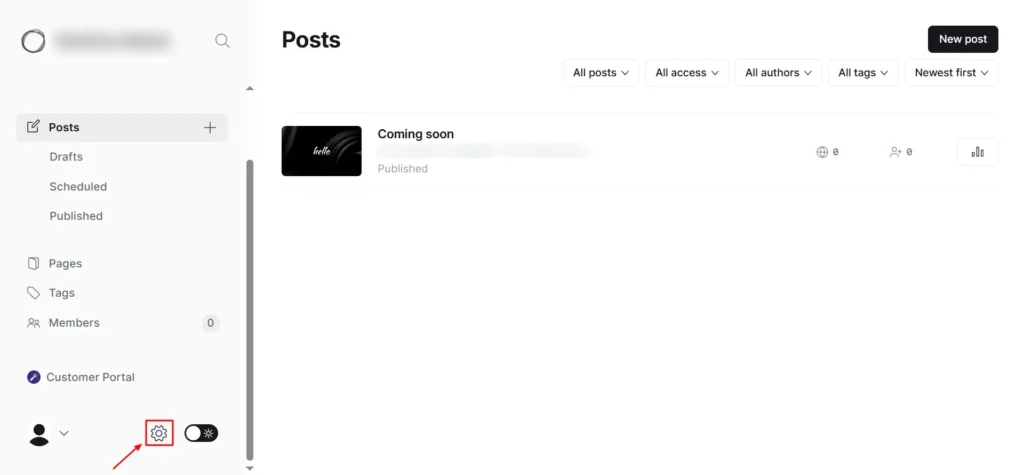
Screenshot 1: Settings → Import/Export
- Click Export your content.
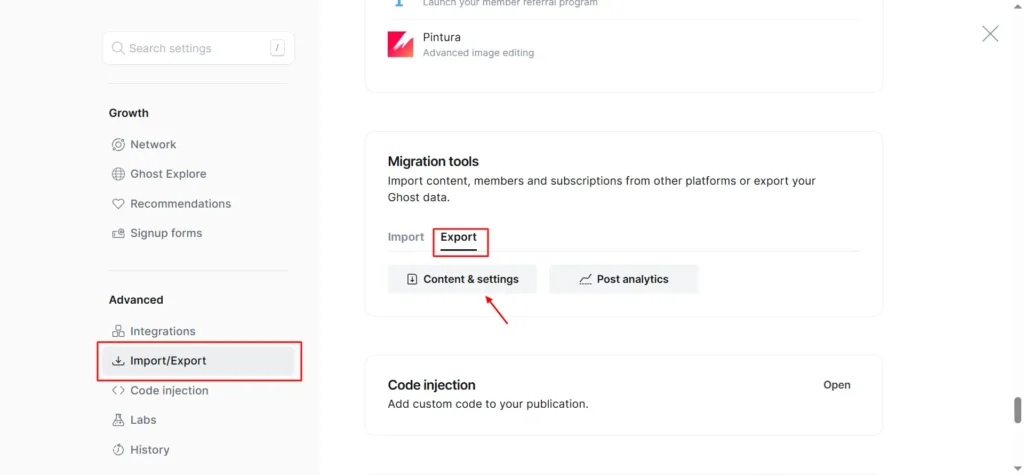
Screenshot 2: Export Content
- Ghost will generate a JSON file that contains all your posts, pages, and metadata.
- Download and save this file safely; you’ll need it in the next step.
Convert Ghost Export for WordPress
WordPress does not directly import Ghost’s JSON format, so you’ll need to convert it into a CSV file.
Clean the Ghost JSON File
Ghost exports the entire database, not just your posts. This means it also includes a lot of Ghost-specific system data, such as:
- Theme configuration and design settings
- Memberships, newsletters, and subscription products
- Roles, permissions, and internal integrations
- Site settings, API keys, and system metadata
These are not supported by WordPress and can cause unwanted clutter or errors during CSV conversion and import.
Before converting the file to CSV, open the .json file in a JSON formatter (eg. https://jsonformatter.org/) and remove the following sections:
- meta
- custom_theme_settings
- newsletters
- products, offers, and billing data
- roles, roles_users
- settings
- Authentication keys and internal system records
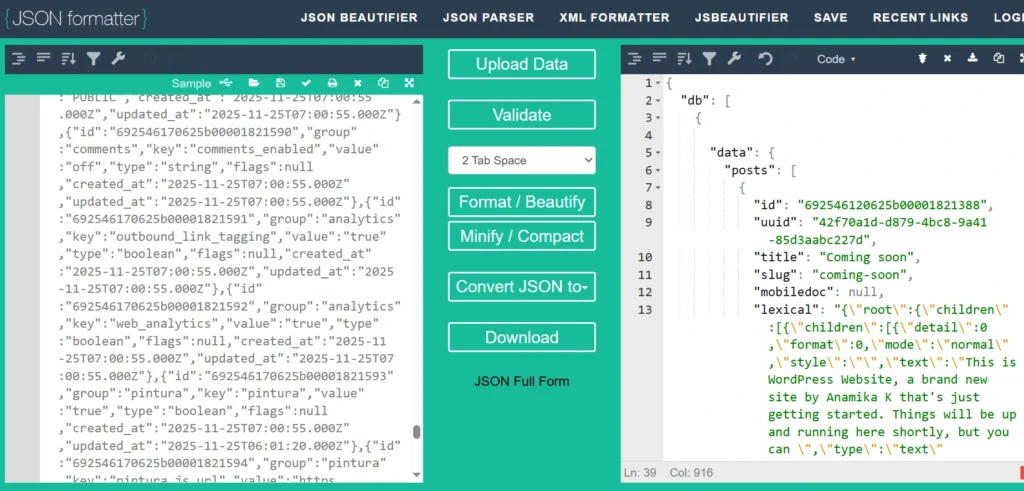
Screenshot 3: JSON Formatter
| Note: This cleanup does not affect your posts or pages; it only removes Ghost-specific system data that WordPress cannot use. |
Convert JSON to CSV
Once the JSON file has been cleaned:
- Upload the simplified .json file to an online conversion tool
https://convertcsv.com/json-to-csv.htm
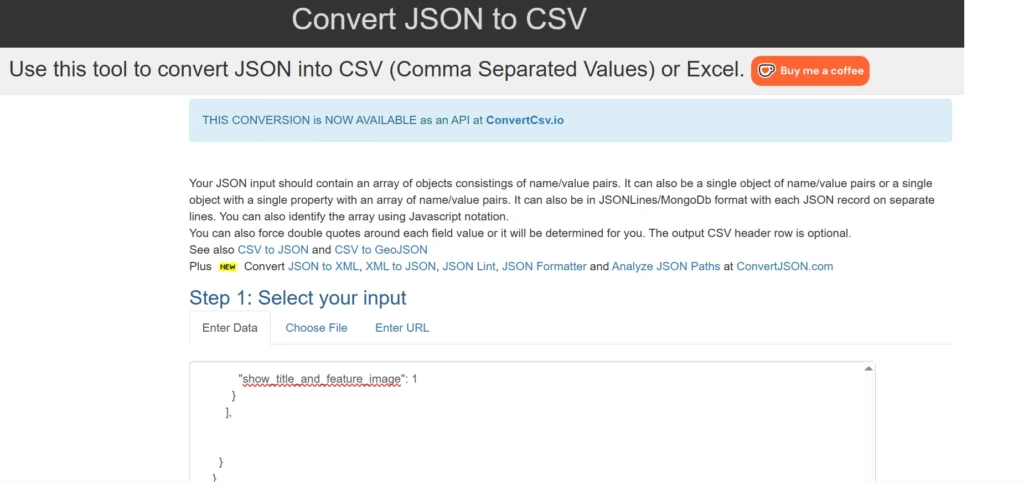
Screenshot 4: JSON to CSV Converter
- Before you convert, review and adjust the settings before converting to ensure the CSV is WordPress-friendly.
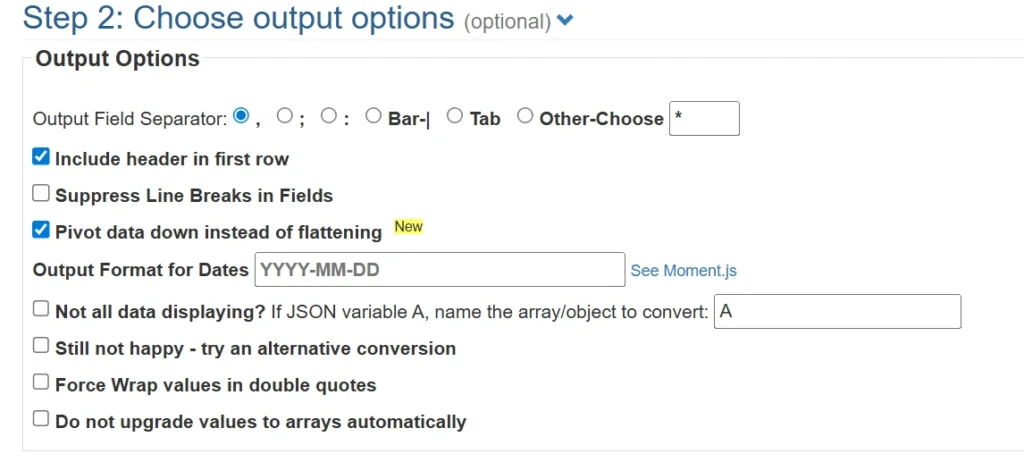
Screenshot 5: Choose output options
Enable - Include header in first row and Pivot data down instead of flattening.
| Note: These settings prevent formatting issues and generate a CSV that imports cleanly into WordPress. |
- Convert the file directly to CSV
- Download the generated CSV file
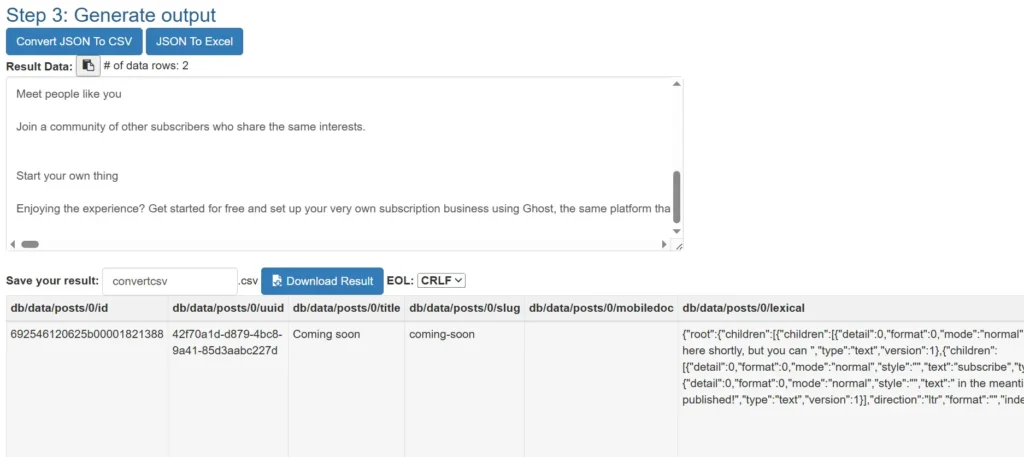
Screenshot 6: Download CSV file
Ghost saves content in nested JSON objects. When converting, these nested structures are flattened into long, path-based column names, like: db/data/posts/0/title
Since WordPress import tools do not recognize Ghost’s internal data structure, these column headers must be renamed to WordPress-compatible fields.
Ghost to WordPress Column Mapping
| Ghost CSV Column | WordPress Field |
| db/data/posts/0/title | post_title |
| db/data/posts/0/slug | slug |
| db/data/posts/0/html | post_content |
| db/data/posts/0/feature_image | featured_image |
| db/data/posts/0/type | post_type |
| db/data/posts/0/status | post_status |
| db/data/posts/0/published_at | post_date |
After downloading the CSV file:
- Upload the CSV file to Google Sheets
- Open the file and review the first row (column headers)
- Rename Ghost-specific, path-based column names to WordPress-compatible fields.
- Save the changes and download the file again as a CSV
This step makes it easier to review, edit, and validate column names before import.
Changing column names won’t affect your content; it just helps map the data correctly for a smooth, error-free WordPress import.
Prepare Author Column in CSV
Before importing posts, ensure the CSV file includes an author-related column (for example, post_author) containing the intended author username.
If authors do not yet exist in WordPress, posts can still be imported and will be assigned to a default user. Once authors are created, posts can be reassigned or re-imported with correct author mapping.
Import Content into WordPress
There are multiple ways to move content from Ghost to WordPress. You can use the built-in WordPress importer for XML/WXR files, rely on WP-CLI or command-line tools if you’re a developer, or use import plugins for CSV files.
We’ll use the WP Import Export Lite plugin because it offers an easy, non-technical way to import Ghost CSV files while properly managing HTML content, images, authors, and duplicate posts.
1. Install the WordPress Importer Exporter Lite plugin and activate it.
2. Go to WP Imp Exp → New Import
Open the WP Import Export Lite plugin from the WordPress admin menu and click New Import.
3. Upload Your Converted Ghost CSV
Upload your CSV file containing Ghost data (converted from JSON → CSV).
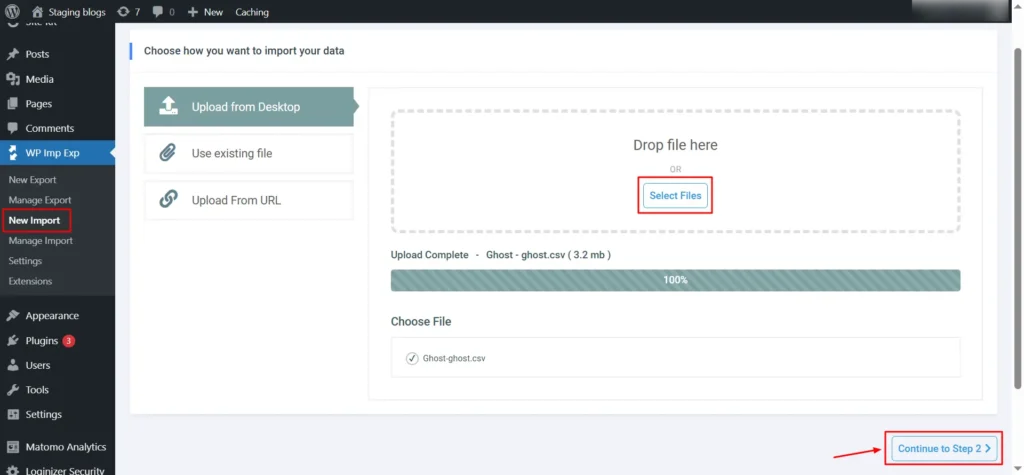
Screenshot 7: New Import
Click Continue to Step 2.
4. Select "Post" as the Import Type
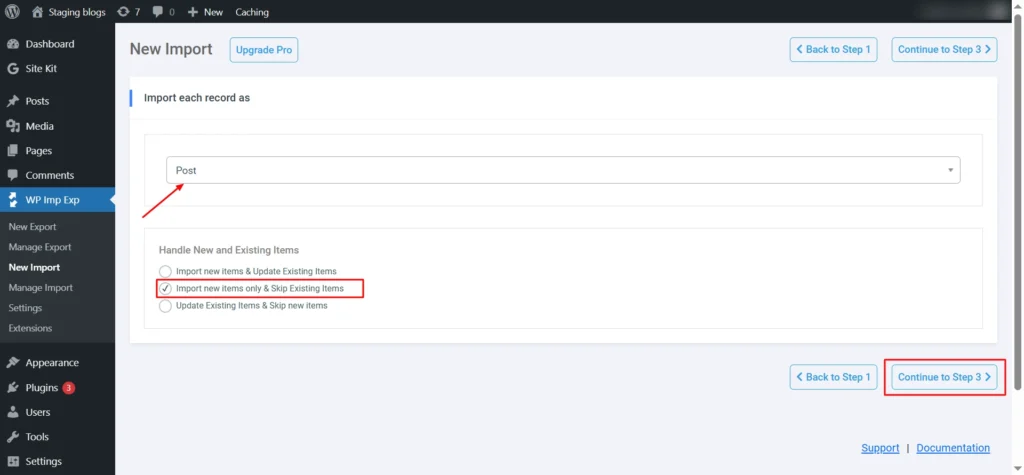
Screenshot 8: Select Post
In the dropdown, choose: Post
Select the option: Import new items only and Skip existing items."
(This ensures no duplicates if you re-run the import.)
Click Continue to Step 3.
5. Map Your Ghost Fields to WordPress Fields
Post Title, Content, and Excerpt
- Map post_title to {post_title[1]}
- Map Post Content to {post_content[1]}
- Map Post Excerpt to {post_excerpt[1]}
Enable: Search image through content and import images wrapped in <img> tags.
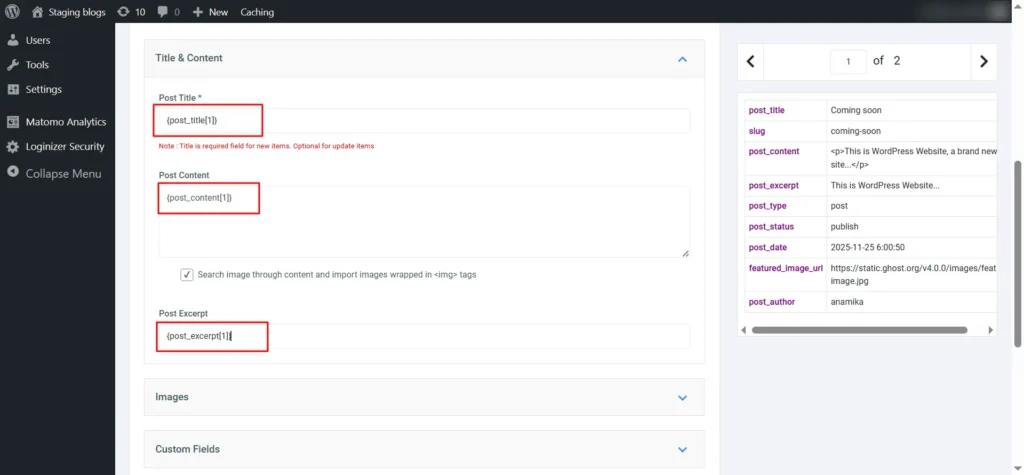
Screenshot 9: Map Title and Content
| Note: Ghost’s Mobiledoc is an internal editor format and is not always included in exports. WordPress cannot read Mobiledoc data. For this reason, always use the HTML content field, which is fully rendered and universally supported for WordPress imports. |
Import Images
Your converted CSV includes a featured image column, so you can map it directly during import. In WP Import Export Lite, map the featured image field (e.g., _feature_image) to WordPress’s _thumbnail_id.
Enable: Download images hosted elsewhere
This enables image downloading so that WordPress imports the image into the Media Library.
Image Options
- Enable: Search through content and import images wrapped in <img> tags
- Enable: Set the first image as the Featured Image (_thumbnail_id)
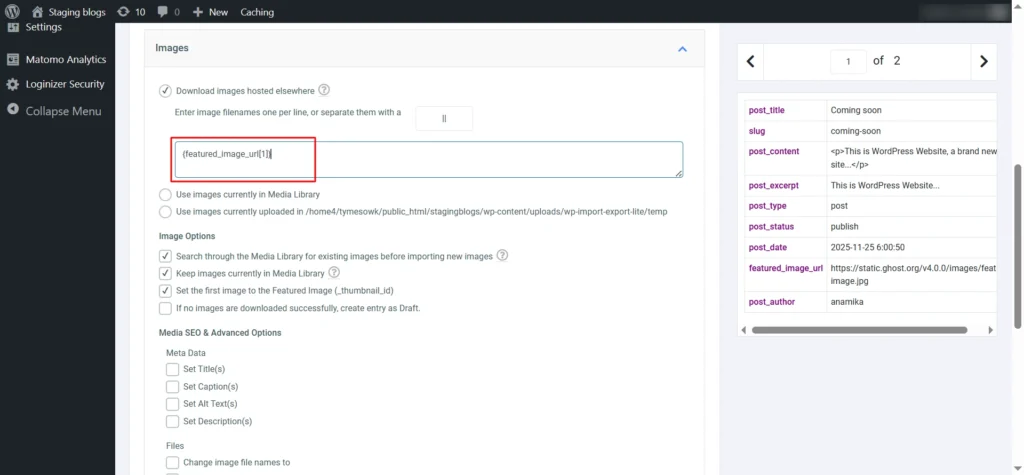
Screenshot 10: Map Featured Image
Map the Publish Date and the Slug
- In Other Post Options→Post Dates → As specified, enter: {post_date[1]}
- This uses Ghost’s original publish date.
- The date field must use a format supported by WordPress. Example: 2024-11-10 13:00:00 (YYYY-MM-DD HH:MM: SS)
- Scroll down to Post Slug and map: {slug[1]}
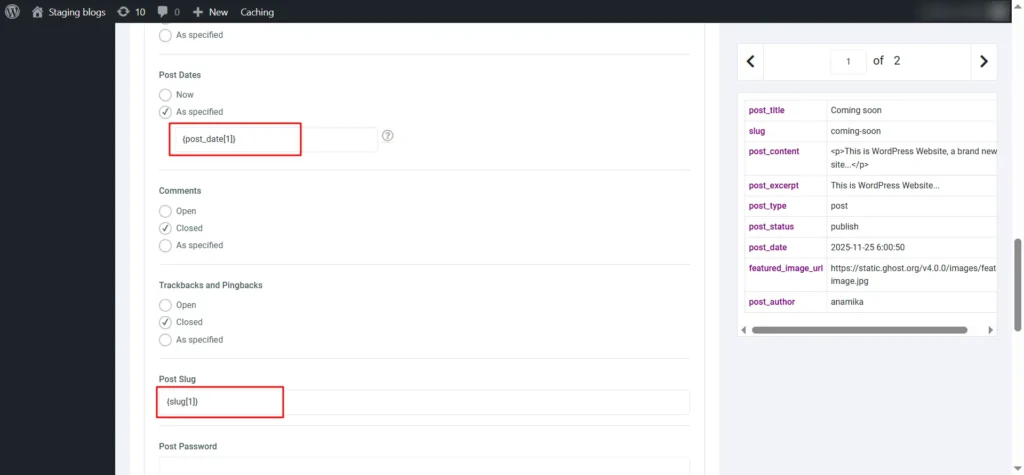
Screenshot 11: Map Publish Date and Slug
Map Ghost Roles to WordPress Roles
| Ghost Role | Wordpress Role | Notes |
| Administrator | administrator | Full access to content and settings |
| Editor | editor | Can publish/manage posts, including others’ content |
| Author | author | Can publish/manage own post only |
| Contributor | contributor | Can write/manage own posts, but cannot publish |
| Owner | administrator (closest match) | Closest match for full permissions |
| Super Editor | editor | Limited to editorial capabilities |
| Note: Ghost exports may include entries such as Blog Owner, Admin Integration, Ghost Explore Integration, Self-Serve Migration Integration, DB Backup Integration, and Scheduler Integration. These are system accounts and internal integrations, not real users. WordPress handles them through plugins, APIs, and WP-Cron, so they aren’t transferred as users. |
When importing posts from Ghost, WordPress does not automatically create users. To ensure posts are assigned correctly and authors have proper permissions, manually add each author.
Add Authors Manually
- In WordPress, go to: Users → Add New
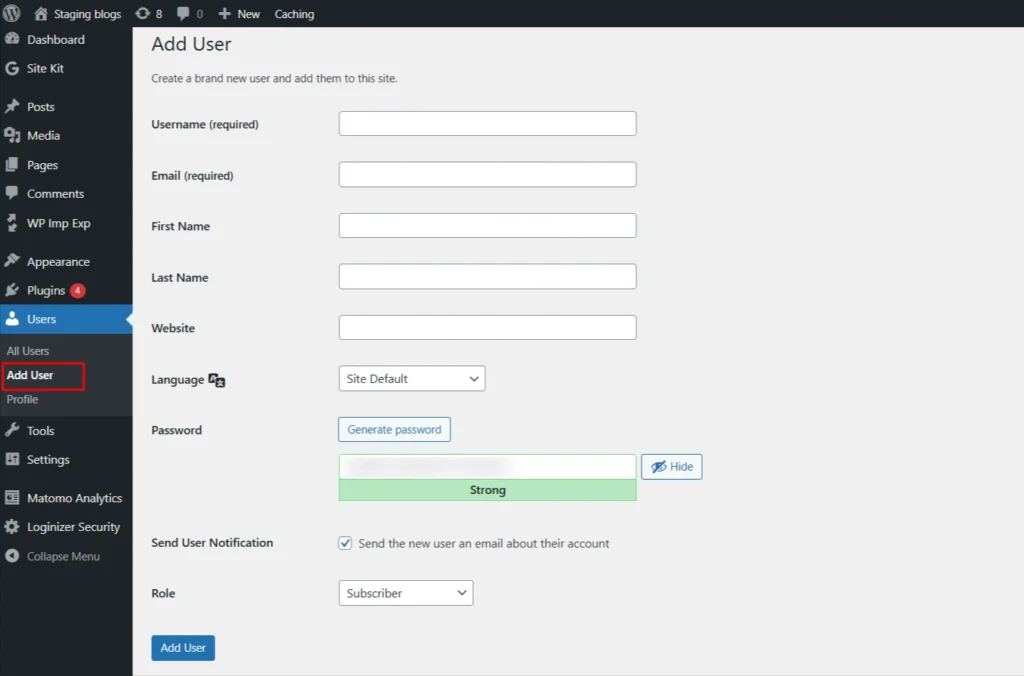
Screenshot 12: Add New User
- Fill in the author details:
- Username → unique login name
- Email → author’s email
- First and Last Name → optional
- Display Name → author’s public name
- Password → set manually or let WordPress generate
- Role → assign according to the mapping table above
- Bio → optional, adds extra author info
- Click Add New User. Repeat for each author.
- Map Author in Post Import: When importing posts, map the author field to {post_author[1]} so each post is assigned to the correct user.
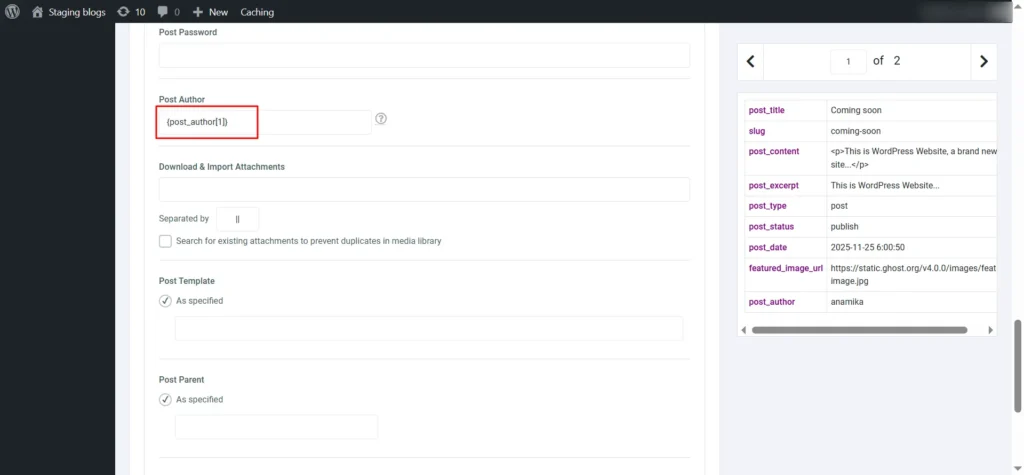
Screenshot 13: Map Post Author
6. Choose How to Handle Existing Items
- In Search Existing Item, select the field you want to use for detecting duplicates.
- Choose Slug because each slug is unique.
- In the input box, map the slug column from your CSV: Eg: {slug[1]}
- This ensures posts with the same slug will be updated, not duplicated.
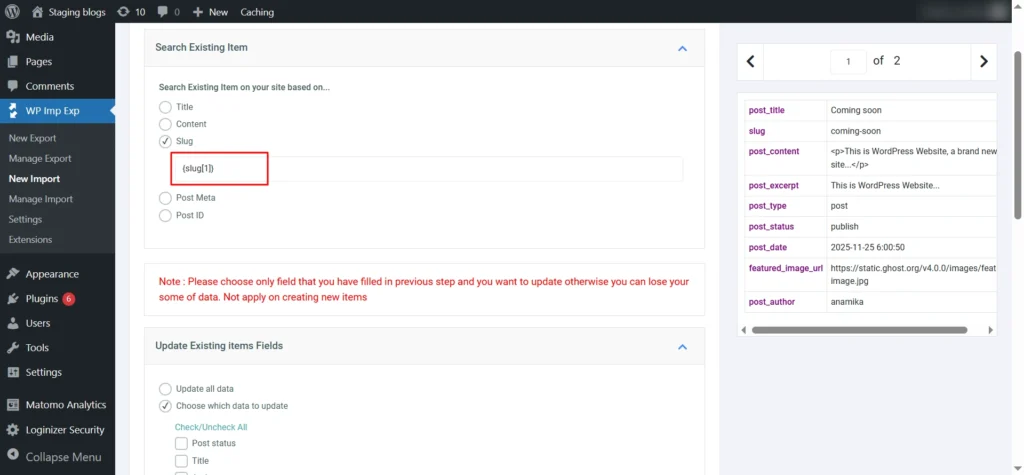
Screenshot 14: Search Existing Item
7. Update Existing Items Fields
- Choose which parts of your content to update, or choose 'update all' if you want.
- Post status
- Title
- Author
- Slug
- Content / Description
- Excerpt / Short Description
- Dates
- Menu order
- Parent post
- Post type
- Comment status
- Ping Status
- Post Password
- Attachments
- Images
- Custom Fields
- Taxonomies (incl. Categories and Tags)
- For your first import, you’ll need to select at least one field, as the plugin requires it.
- Check Title, Content, and Images as these are essential fields and safe to include.
- Keep other fields unchecked to avoid overwriting titles, slugs, images, etc.
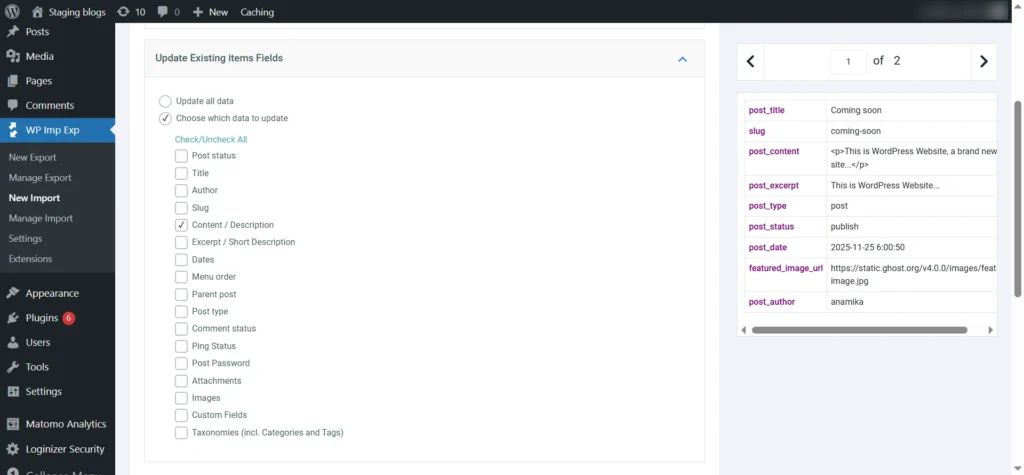
Screenshot 15: Update Existing Items Fields
8. Configure Advanced Options
- Enable Iterative, Piece-by-Piece Processing.
- Set the number of records to process in each iteration.
- For example: 5 records per iteration (as shown in the screenshot).
- This helps avoid server timeout issues during heavy imports.
- Click Continue to move to the next step.

Screenshot 16: Configure Advanced Options
9. Run the Import
- Click Continue and start the import.
- The plugin will process the records in batches (e.g., 5 at a time).
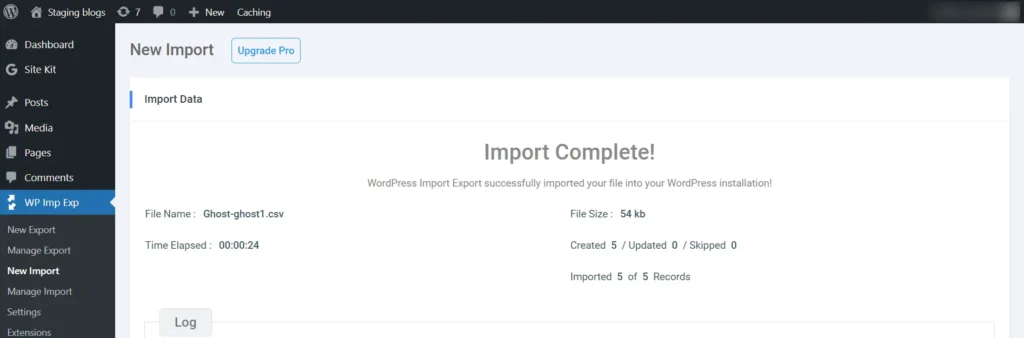
Screenshot 17: Run the Import
10. Verify Results
- Go to Posts → All Posts.
- Check if:
- Existing posts were updated correctly.
- New posts were created as expected.
- No duplicates were generated.
- Open individual posts to confirm the content has been updated (only the fields you selected).
Update URLs and Permalinks
To maintain SEO rankings and prevent broken links, it’s crucial to match your old Ghost URLs with your new WordPress permalinks.
- Go to Settings → Permalinks in your WordPress dashboard.
- Choose a structure similar to your Ghost URLs, such as:
/blog/postname/ - Save changes.
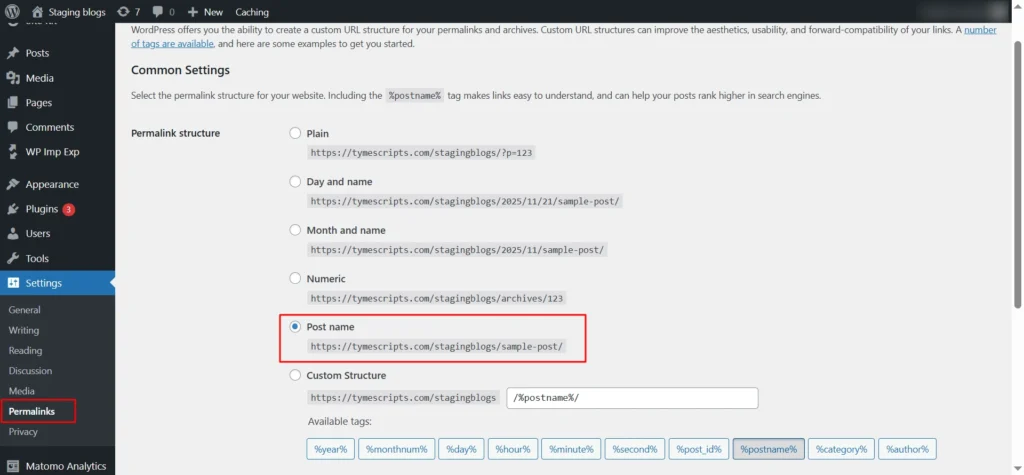
Screenshot 18: Set Permalinks
Point Your Domain to WordPress
Once everything is imported and tested, it’s time to make your WordPress site live.
If You Used a Ghost Subdomain
If your old site was hosted on a Ghost-provided subdomain, you can’t directly redirect that domain to your new WordPress site.
Instead, update your Ghost site’s homepage with a banner notifying visitors that your website has moved to a new address.
If You Used a Custom Domain
If your Ghost site uses a custom domain like mynewwebsite.com, you can easily point it to your new WordPress hosting provider by updating the DNS settings.
Steps to Point Your Domain:
- Log in to your domain registrar (GoDaddy, Namecheap, Google Domains, etc.).
- Remove existing Ghost DNS/Nameserver records.
- Add your new WordPress host’s nameservers or A record.
- Wait for DNS to propagate (up to 24 hours).
- Confirm your domain loads your WordPress site.
SEO, Plugins, and Final Checks
It’s time to fine-tune your new WordPress site for performance, visibility, and consistency.
1. Install Essential SEO Plugins
Ghost handles basic SEO, but WordPress gives you far more control.
Install a plugin like Yoast SEO or Rank Math to manage:
- Meta titles and descriptions
- XML sitemaps
- Canonical URLs
- Schema markup and social tags
If you’ve imported metadata from Ghost using WP All Import, verify that it appears correctly in your SEO plugin.
2. Check Internal Links and Redirects
Ensure all internal links point to the correct WordPress URLs.
Use a plugin like Better Search Replace to update any old Ghost URLs within posts.
Then, set up 301 redirects (using the Redirection plugin or your .htaccess file) to preserve SEO value from old Ghost links.
3. Reinstall Analytics and Tracking
Reconnect Google Analytics, Search Console, and any marketing or tracking scripts that were active on your Ghost site.
4. Optimize Speed and Performance
- Install caching and optimization plugins like WP Rocket, LiteSpeed Cache, or W3 Total Cache.
- Compress and serve images via Smush, EWWW Image Optimizer, or a CDN such as Cloudflare.
5. Test Responsiveness and Design
Check every page on mobile, tablet, and desktop to ensure layout, typography, and navigation look perfect.
Potential Challenges and How to Solve Them
- Content Structure Differences: Ghost uses a minimalist content model focused mostly on simple posts and tags, while WordPress supports complex content types, categories, and custom taxonomies. Mapping Ghost content properly during migration and using converter tools that maintain relationships helps avoid lost or miscategorized content.
- Broken URLs: Ghost’s permalink structure might differ from WordPress’s. Without proper 301 redirects, users risk broken links. Setting WordPress permalinks to reflect the original URLs and using redirection plugins like Redirection ensures SEO value is preserved.
- Theme and Design Differences: Ghost themes cannot be used in WordPress, and replicating your Ghost site’s look may require customization. Choose a modern WordPress block theme or page builder (like Gutenberg or Elementor) to recreate the layout.
See how we helped CARS24 Australia overcome migration challenges and preserve SEO in our Ghost CMS to WordPress migration case study.
Conclusion
Migrating from Ghost to WordPress isn’t just shifting your content; it’s leveling up to a platform built to grow with you.
With a smooth import process, your posts, media, and SEO value come over cleanly, and WordPress gives you far more freedom to customize and expand your site. Whether you're introducing new functionality or enhancing your digital presence,
WordPress provides the freedom and control to shape your website exactly the way you want. You’re now set up on a platform that’s ready for the future.

Tutorials
14 min read
How to Set Up Matomo in WordPress for Complete Website Tracking (Part 3)
Introduction
In Part 2, we went deeper into Matomo’s advanced reporting capabilities. You learned how to analyze detailed user behaviour, traffic sources, conversions, and e-commerce performance to make data-driven decisions. These reports included:- Behaviour Reports
- Acquisition Reports
- E-commerce Reports
- Goals & Conversions
- Tag Manager
- Settings
- General Tracking Settings
- <script> Tag Settings
- Access
- Manage user roles, permissions, and access control.
- Privacy & GDPR
- Ensure full compliance with privacy laws and user consent requirements.
- Exclusions
- Control which users, roles, or IPs should be excluded from tracking.
- Geolocation
- Enable accurate location tracking for advanced reporting.
- Advanced Settings
- Fine-tune performance, database options, and system-level behaviors.
- Matomo Admin section
- Matomo Marketplace
- Install powerful plugins and manage subscriptions.
- Diagnostics section
- Help section
Settings for Auto Tracking mode
The Auto Tracking mode automatically creates and inserts the Matomo tracking JavaScript based on your selected settings. Simply choose what you want to track, and Matomo for WordPress will handle the rest. There is a “show generated tracking code” link. It displays the tracking code as shown below.Screenshot 1: Settings → Tracking → Settings for Auto Tracking mode
- Tracking code: This is a preview of the tracking code generated from your current configuration. The tracking code will be automatically added to your site and will send visitor data to Matomo.
- <noscript> code: This is a preview of your <noscript → code, which forms part of your tracking setup. It will only be added to your website if the noscript feature is enabled.
Privacy
The Privacy settings help you configure data protection options, such as consent handling and anonymization, to ensure your tracking complies with privacy regulations.- Disable Cookies: Enable/Disable
- Completely turns off the use of tracking cookies. This can help improve privacy compliance, but it may reduce Matomo’s ability to identify returning visitors accurately.
- Limit Cookie Lifetime: Enable/Disable
- Set a shorter cookie duration if you want to minimize how long user activity is tracked over time.
Subdomain
The Subdomain settings allow you to track visitors across your site’s subdomains as a single visit, ensuring accurate cross-subdomain analytics.- Treat Subdomains as One Website: Enable/Disable
- Enable this option to track visitors seamlessly across all subdomains by adding a *.-prefix to the cookie domain.
- Do not count subdomains as outlinks: Enable/Disable
- Treat all subdomains as part of a single website instead of external links by using a *.-prefix for the tracked domain.
- Enable Cross-Domain Linking: Enable/Disable
- When turned on, this ensures the same visitor ID is used across multiple domains. Since cookies can’t be shared between domains, Matomo appends a “pk_vid” parameter to URLs linking to your other domains. To make this feature work, be sure to configure which domains should be considered local in your Matomo settings.
Link Tracking
Link Tracking automatically records clicks on outbound links, downloads, and special link interactions to help you understand how visitors engage with your site.- Add New File Types for Download Tracking
- Matomo automatically tracks downloads for files with extensions included in its list. To track additional file types, add their extensions here, separated by a vertical bar (|).
- Define All File Types for Download Tracking
- Replace Matomo’s default list of file extensions for download tracking with your own, separated by a vertical bar (|). Leave this field blank to keep the default settings (recommended).
- Set CSS Classes to Track as Downloads:
- Specify CSS classes for links that should be tracked as downloads (in addition to ‘piwik_download’). Enter multiple class names separated by a vertical bar (|). Leave blank to use Matomo’s default settings.
- Set CSS Classes to Track as Outlinks
- Specify CSS classes for links that should be tracked as outlinks (in addition to ‘piwik_link’). Enter multiple class names separated by a vertical bar (|). Leave blank to keep Matomo’s default settings.
Other Tracking
Other Tracking includes additional automatic tracking options that capture extra user interactions, giving you more detailed and comprehensive analytics data.”-
- Track JavaScript Errors: Enable/Disable
- Enable this option to record JavaScript errors on your website as Matomo events.
- Track JavaScript Errors: Enable/Disable
- Enable Content Tracking:
-
-
- Turn on content tracking to monitor user interactions with specific pieces of content across your website.
- Options are
- Disabled
- Track all content blocks
- Track only visible content blocks
- Options are
- Turn on content tracking to monitor user interactions with specific pieces of content across your website.
-
- Enable Heartbeat Timer (enable with Care):
-
-
- Activate a heartbeat timer to measure visit duration more accurately by sending periodic ping requests while a visitor remains on your site.
- Specify the interval in seconds (default: 15) or set to 0 to disable.
-
Advanced
The Advanced settings let you customize deeper tracking behaviours and technical options to fine-tune how Matomo collects your website’s analytics data.-
- Force POST requests: Enable/Disable
- When enabled, Matomo will use POST requests for trackCookie. This option is useful if you encounter “HTTP 414 URI Too Long” errors in your tracking code.
- Custom consent screen:
- Enables a specific Matomo consent mode. Configure this only if you are using your own consent screen, as it requires a custom WordPress setup. By default, no consent mode is activated.
- Options are
- None
- Require cookie consent
- Require tracking consent
- Endpoint for HTTP Tracking API:
- Options are
- Default
- Through WordPress Rest API
- By default, the HTTP Tracking API uses the Matomo plugin directory URL: https://yourwebsite.com/wp-content/plugins/matomo/app/matomo.php.
- You can switch to the WP REST API if you want to hide matomo.php or if the default URL isn’t working. https://yourwebsite.com/wp-json/matomo/v1/hit/
- Options are
- Endpoint for JavaScript tracker :
- By default, the JS tracking code is served from “https://yourwebsite.com//wp-content/uploads/matomo/matomo.js.”
- Options are
- Default
- Through WordPress's Rest API (Slower)
- Plugin
- Options are
- You can choose to deliver it through the WP REST API (“https://tymescripts.com//wp-json/matomo/v1/hit/”) to hide matomo.js.
- However, this method launches WordPress PHP on every request, making it slower than serving the file directly from your web server.
- By default, the JS tracking code is served from “https://yourwebsite.com//wp-content/uploads/matomo/matomo.js.”
- Force POST requests: Enable/Disable
Screenshot 2: Settings → Tracking → Settings for Auto Tracking Mode
Settings for Manual Tracking mode (Inactive)
In Manual tracking mode, you can create and customize your own JavaScript tracking code as needed. Matomo for WordPress will then automatically embed this script into your site’s HTML.Tracking code
Displays the JavaScript tracking script that collects visitor data for Matomo.Noscript code
Provides a fallback tracking method for visitors who have JavaScript disabled.Screenshot 3: Settings → Tracking → Settings for manual tracking Mode
Script Tag Settings
These settings apply to most tracking modes and determine how Matomo for WordPress embeds <script> elements into your pages. In most cases, the default options are sufficient and don’t need to be changed.Force Matomo to use a specific protocol
Options are- Disable (Default)
- https (SSL)
JavaScript code position
- Footer/Header
Add data-cfasync=false; Enable/Disable
- Adds data-cfasync="false" to the script tag to prevent Cloudflare’s Rocket Loader from modifying the script. This option is not applicable when using the Manual tracking mode.
Screenshot 4: Settings → Tracking → <script> → Tag Settings
Developer Settings
If your tracking code isn’t functioning properly, enabling this setting can help identify the issue. When activated, the tracker debugs the diagnostic details in tracking requests. It’s best to use this option only when troubleshooting and disable it immediately afterwards.Tracker Debug Mode:
Options are- Disabled (recommended)
- Always enabled
- Enabled on demand.
JavaScript tracking code
Want to manually add the tracking code to your site or use another plugin? No problem! Just copy and paste the tracking code below; you can customize it if needed.Noscript tracking code
Adds a fallback tracking code for visitors who have JavaScript disabled.Screenshot 5: Settings → Tracking → Developer Settings
Access
Control which user roles have permission to view and manage your reporting data.- WordPress Role Matomo Role
- Editor: None/View/Write/Admin
- Author: None/View/Write/Admin
- Contributor: None/View/Write/Admin
- Subscriber: None/View/Write/Admin
- Customer: None/View/Write/Admin
- Shop manager: None/View/Write/Admin
Roles
You can grant individual users access to Matomo in one of the following roles:- Matomo View
- Matomo Write
- Matomo Admin
- Matomo Super User
Capabilities
You can also use a WordPress plugin to manage Matomo capabilities for individual users. The following capabilities are supported:- superuser_matomo
- admin_matomo
- write_matomo
- View_matomo
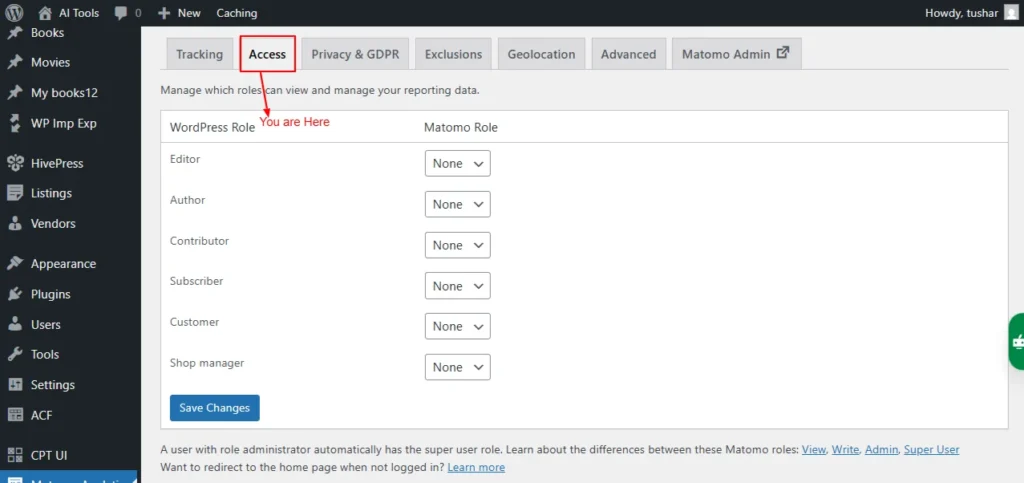
Screenshot 6: Settings → Access
Privacy & GDPR
This setting tab helps set your privacy and GDPR settings. Matomo Analytics is built with privacy by design. All collected data is stored exclusively in your own MySQL database; no external business or Matomo team member can access it, and your logs or reports are never sent to other servers.Ways Matomo protects the privacy of your users and customers
Key privacy features include:- Anonymise data and IP addresses
- Configure data retention
- Matomo has an opt-out mechanism that lets users opt out of web analytics tracking (see below for the shortcode)
- Asking for consent
- GDPR overview
- GDPR tools
Let users opt out of tracking
You can embed the opt-out iframe on your website in two ways:- Use the shortcode [matomo_opt_out_form].
- You can customize it with the language option (e.g., "de" or "en").
- By default, the language is automatically detected from the user’s browser.
- Example: [matomo_opt_out_form language=de]
- Add the “Matomo Opt-Out” block directly to your page.
Screenshot 7: Settings → Privacy And GDPR
Exclusions
You can configure exclusions in this tab for which the data won't be collected.Tracking filter:
Select the user roles you do not want Matomo to track.- Administrator
- Editor
- Author
- Contributor
- Subscriber
- Customer
- Shop manager
- Matomo View
- Matomo Write
- Matomo Admin
- Matomo Super User
Global list of Excluded IPs:
Enter the list of IP addresses you want Matomo to exclude from tracking, with one IP per line.- You can use CIDR notation (e.g., 1.2.3.4/24) or wildcards (e.g., 1.2.3.* or 1.2.*.*).
- Your current IP address is 58.84.60.127.
Global list of URL query parameters to exclude:
List each URL parameter you want to exclude from tracking and reports on a separate line.- Regular expressions (e.g., /^sess.*|.*[dD]ate$/) are supported.
- Matomo automatically excludes common session parameters like phpsessid and sessionid.
Global list of user agents to exclude:
Enter a list of user agents you want Matomo to exclude from tracking.- If a visitor’s user agent string contains any of the specified values, that visitor will not be tracked.
- This is useful for excluding bots or crawlers.
- You can also use regular expressions, such as /bot|spider|crawl|scanner/i.
Keep Page URL fragments when tracking Page URLs: Check/uncheck
If the checkbox below is unchecked, URL fragments (the part after “#”) will be excluded from tracking. For example, example.org/index.html#first_section will be recorded as example.org/index.html.
Screenshot 8: Settings → Exclusions
Geolocation
On this tab page, you can configure how Matomo determines your visitors’ locations. Matomo identifies visitor locations using a geolocation database. By default, it uses DB-IP, but accuracy may vary. You can switch to MaxMind (free or paid), though Matomo can’t auto-configure it due to GDPR. Simply enter your MaxMind license key below to enable it.MaxMind License Key:
Leave the field blank to continue using DB-IP. If you add a MaxMind license key, WordPress will fetch a ~60 MB database from MaxMind and store it in wp-content/uploads/matomo.
Screenshot 9: Settings → GeoLocation
Advanced
The Advanced settings provide additional configuration options for customizing how Matomo works, offering more control over tracking, performance, and technical behaviour.Proxy IP headers
Set Proxy IP headers, choose one of the options below- REMOTE_ADDR YOUR_IP (Default)
- HTTP_CLIENT_IP No value found
- HTTP_X_REAL_IP YOUR_IP58
- HTTP_X_FORWARDED_FOR YOUR_IP58
- HTTP_X_FORWARDED No value found
- HTTP_FORWARDED_FOR No value found
- HTTP_FORWARDED No value found
- HTTP_CF_CONNECTING_IP No value found
- HTTP_TRUE_CLIENT_IP No value found
- HTTP_X_CLUSTER_CLIENT_IP No value found
Delete all data on uninstall:
By default, uninstalling the Matomo plugin permanently deletes all data, unless you have a backup. If you disable this option, the tracked data in your database will be preserved. This helps protect your historical analytics data from being accidentally deleted during uninstallation.Enable archiving via HTTP Server-side.
If you’re having issues with archiving (report generation), enabling this option may help resolve the problem.Server-side tracking delay
Specifies the delay (in seconds) before server-side tracking is triggered.- When e-commerce actions (like cart updates or orders) happen via AJAX or REST, Matomo tries to track them with JavaScript on the next page view. If no page view occurs within the set time, it falls back to server-side tracking. This setting controls how long Matomo should wait before switching.
Screenshot 10: Settings → Advanced
Matomo Admin
This tab takes you to the Matomo admin dashboard settings menu
Screenshot 11: Matomo Admin setting menu
Marketplace
The Marketplace lets you browse, install, and manage additional Matomo plugins and features to extend your analytics capabilities.Overview
Here you can activate free and premium features of Matomo Analytics- Top free plugins
- Marketing Campaigns Reporting
- Evaluate the performance of your marketing campaigns by tracking up to five channels: campaign, source, medium, keyword, and content, instead of just two.
- Custom Alerts
- Set up custom alerts to get notified about important changes on your website or app!
- Free Plugins are available here: https://plugins.matomo.org/free
- Premium features
- Heatmap & Session Recording
- Custom Reports
- Premium Bundle
- Most popular content engagement
- Form Analytics
- Video & Audio Analytics
- Users Flow
- Most popular acquisition & SEO features
- Search Engine Keywords Performance
- SEO Web Vitals
- Advertising Conversion Export
- Multi Attribution
- Other premium features
- Funnels
- Cohorts
- Crash Analytics
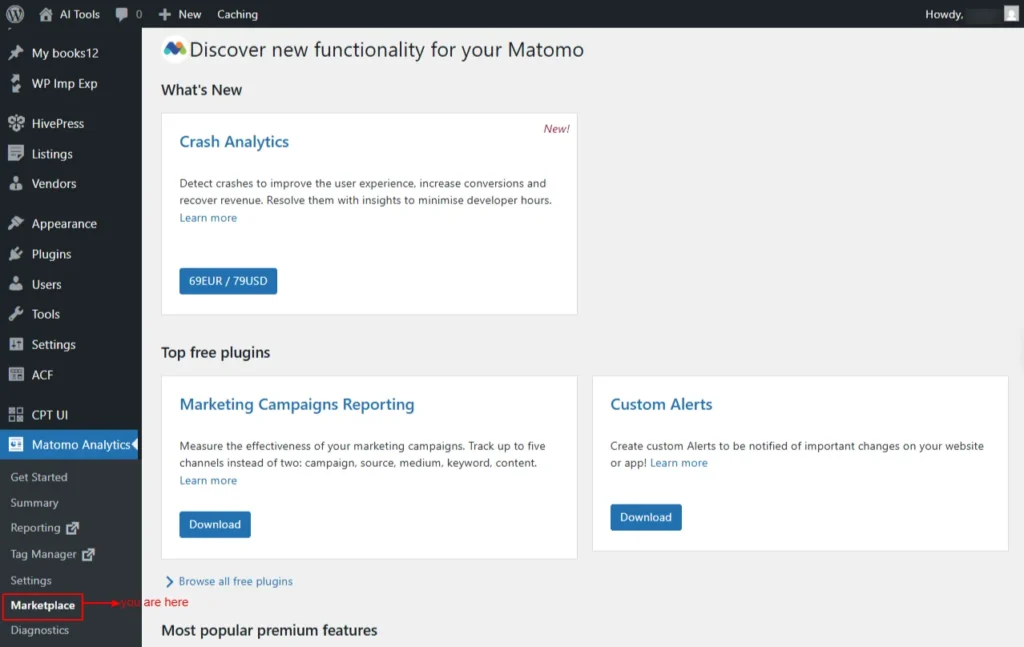
Screenshot 12: Marketplace → Overview
Install Plugins
Matomo Marketplace is a central platform where you can find and install plugins, themes, and integrations that extend the capabilities of Matomo. It includes both free and premium add-ons created by Matomo and third-party developers, helping you customize analytics for your specific needs. You can download the Matomo Marketplace for the WordPress plugin and install it, or upload and install the plugin.- If you prefer not to use the Matomo Marketplace, you can manually download plugins. Automatic updates work only when the Marketplace plugin is enabled.
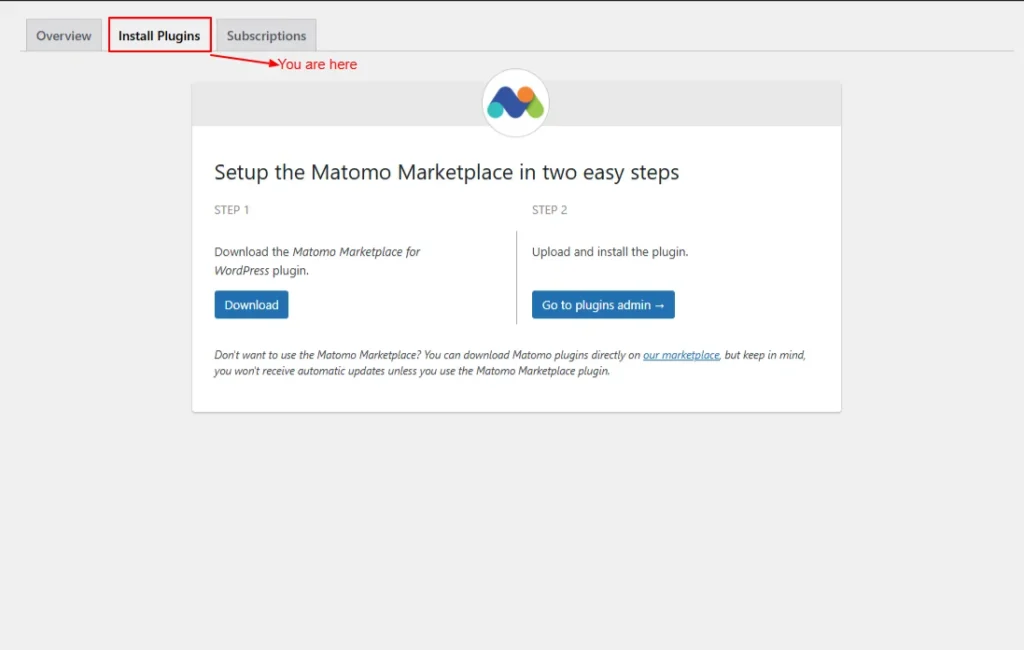
Screenshot 13: Marketplace → Install Plugins
Once installed, it will list all the marketplace plugins that can be installed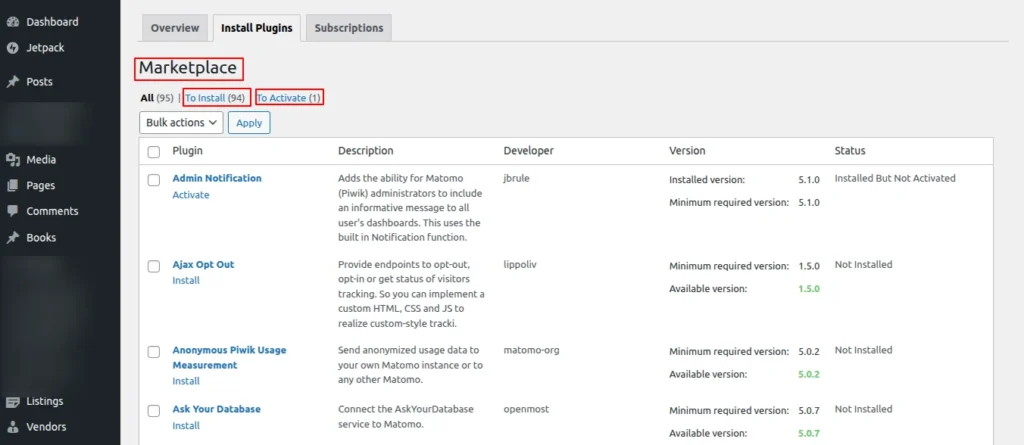
Screenshot 14: List of Marketplace
Subscriptions
Here, you can see all the subscripts for Plugins that are activated
Screenshot 15: Premium Feature Subscriptions
Diagnostics
Diagnostics provides system checks, error logs, and troubleshooting tools to help you identify and fix issues with your Matomo setup.System Report
This page generates a system report, which can then be shared with the Matomom support team if needed. Note: Be careful when sharing this since it contains a lot of information about your WordPress setup.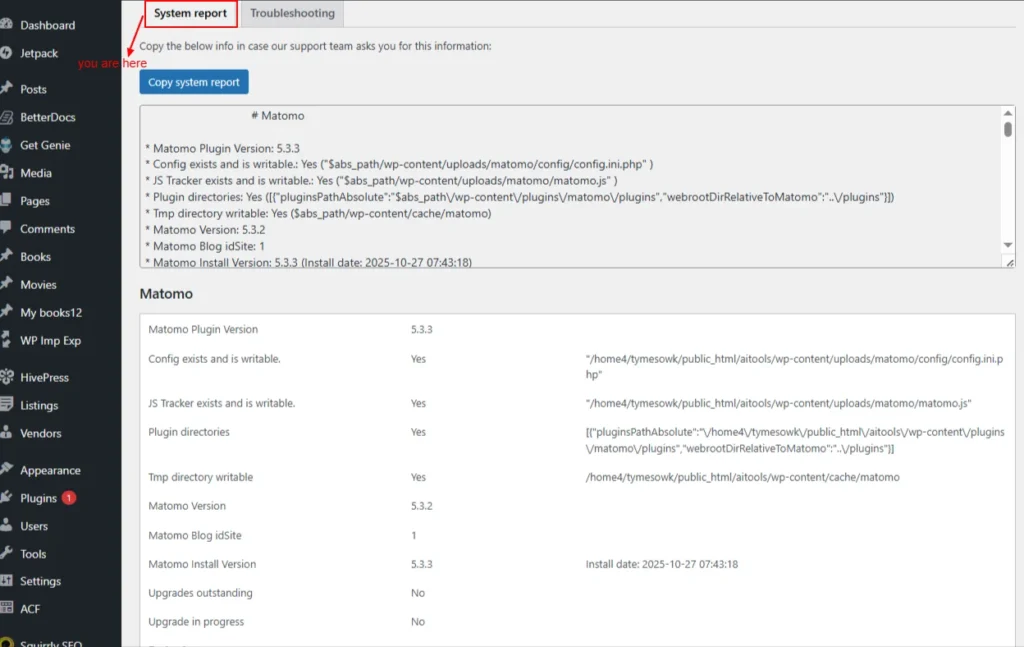
Screenshot 16: Diagnostics → System Report
Troubleshooting
The Troubleshooting section offers tools to identify, debug, and resolve common issues in your Matomo installation.- Archive reports: Process and update your analytics reports to ensure fresh, accurate data.
- Clear Matomo cache: Removes stored cache files so the system can rebuild fresh data and improve performance.
- Install/update Geo-IP DB: Downloads or updates the GeoIP database used to detect visitor locations.
- Sync users: Matches and updates WordPress user data with Matomo’s user records.
- Sync site (blog): Ensures the WordPress site information is correctly synced with Matomo’s site settings.
- Run Updater: Executes pending updates for Matomo’s database or internal components. Regenerate tracking code: Creates a fresh tracking code snippet in case any configuration has changed.
- Run scheduled task: Manually triggers Matomo’s scheduled tasks that usually run automatically (like processing reports).
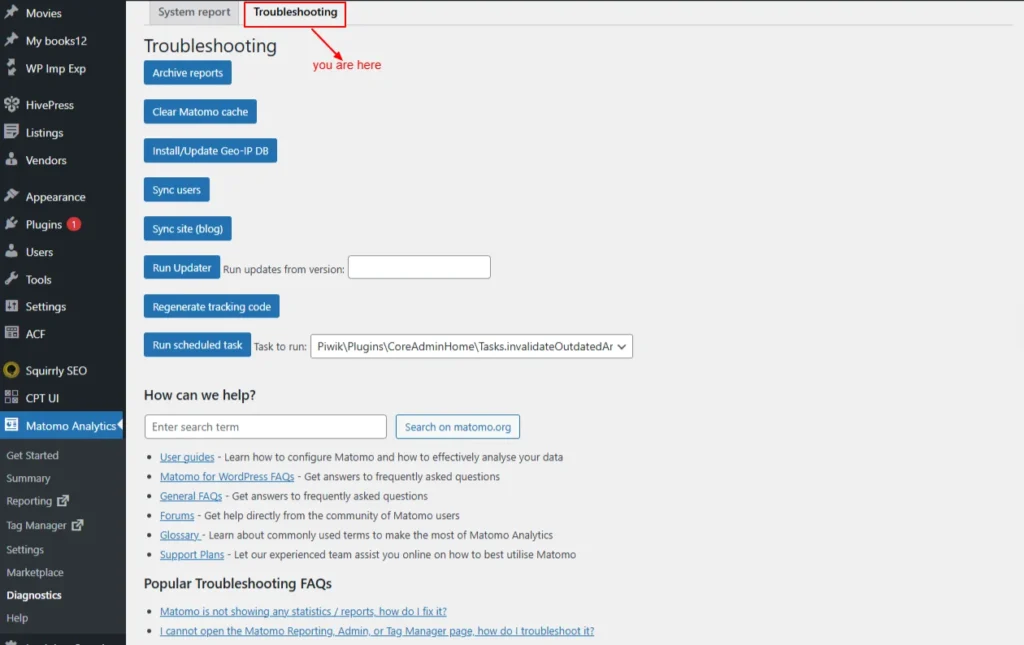
Screenshot 17: Diagnostics → Troubleshooting
Help
This page provides all the resources you need for Matomo.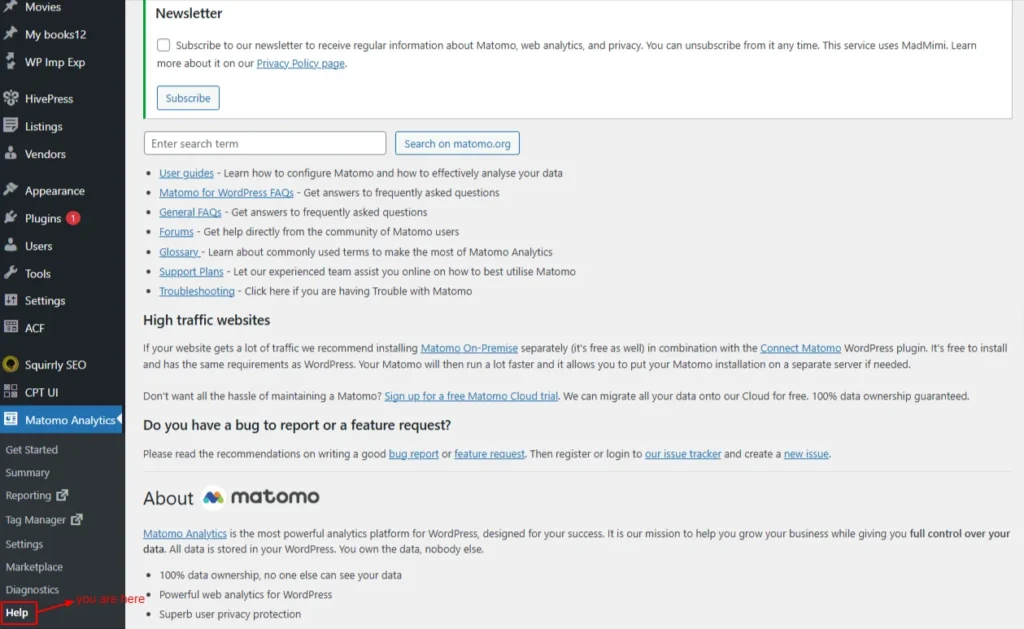
Screenshot 18: Help
Conclusion
Mastering Matomo inside WordPress isn’t a one-time setup; it’s an ongoing optimization process. Each part of this series has taken you step-by-step from installation to insights to advanced configuration and finally to extending Matomo with add-ons and diagnostics. In Part 1, we learned how to install, set up, and update Matomo properly, as well as how to enable accurate tracking and explore the essential visitor reports that provide a clear picture of who visits your site and how they behave. In Part 2, we delved deeper into behavioral analysis, performance metrics, acquisition channels, campaigns, and complete e-commerce analytics. You also learned how to create goals, track conversions, and understand what drives meaningful actions on your site. In Part 3, we configured Matomo’s administrative and technical settings from tracking modes and script tags to GDPR, geolocation, exclusions, and backend container management. This part ensured your tracking is accurate, compliant, and optimized for your site’s structure. We also explored the Matomo Marketplace, where you can install powerful plugins, manage subscriptions, generate system reports, diagnose issues, and access troubleshooting and help resources. These tools extend Matomo’s capabilities and help maintain a stable, scalable analytics environment. Across all these parts, you’ve built a complete, enterprise-grade analytics system that goes far beyond basic tracking. But just like SEO, analytics is never “finished.” You’ll need to continually analyze your data, experiment with improvements, and refine your tracking as your website evolves. With all four parts of this series, you now have a complete roadmap to install, configure, extend, and maximize Matomo inside WordPress, giving you clear insights and long-term measurement power for 2025 and beyond.
Tutorials
19 min read
How to Set Up Matomo in WordPress for Complete Website Tracking (Part 2)
Introduction
In Part 1 of this series on using the Matomo Plugin in WordPress, we focused on building the foundation for accurate, privacy-friendly analytics. We walked through how to get started with Matomo, update your privacy page, and enable tracking to ensure your data collection is fully compliant. We also explored key Matomo reports, Now it’s time to take the next step. In Part 2, we’ll go beyond basic tracking and dive into the deeper reporting features inside Matomo that help you uncover behavior patterns, identify what drives traffic, track conversions, and optimize your site for growth. In this part, we’ll cover advanced insights across:- Behaviour Reports
- Get a detailed view into how people engage with your site
- Acquisition Reports
- Understand exactly where your visitors are coming from
- E-commerce Reports
- Track user journey, revenue sources, and product-level performance
- Goals & Conversions
- Measure actions that matter most to your business
Behavior
The behavior settings let you control how visitor interactions are tracked, including link tracking, downloads, site search, and other engagement actions.”Pages
This screen shows which pages visitors viewed and how often. It shows the following data:- Pageviews
- Unique Pageviews
- Bounce Rate
- Avg. time on page
- Exit rate
- Avg. page load time

Screenshot 1: Behaviour → Pages
Entry pages
This screen shows which pages visitors land on first during a session. It shows the following data:- Entrances (the number of visits that were started on the page)
- Bounces
- Bounce Rate
- Avg. page load time
- Entry Page Titles (Related Report)
- Lists landing pages by page title instead of URL.
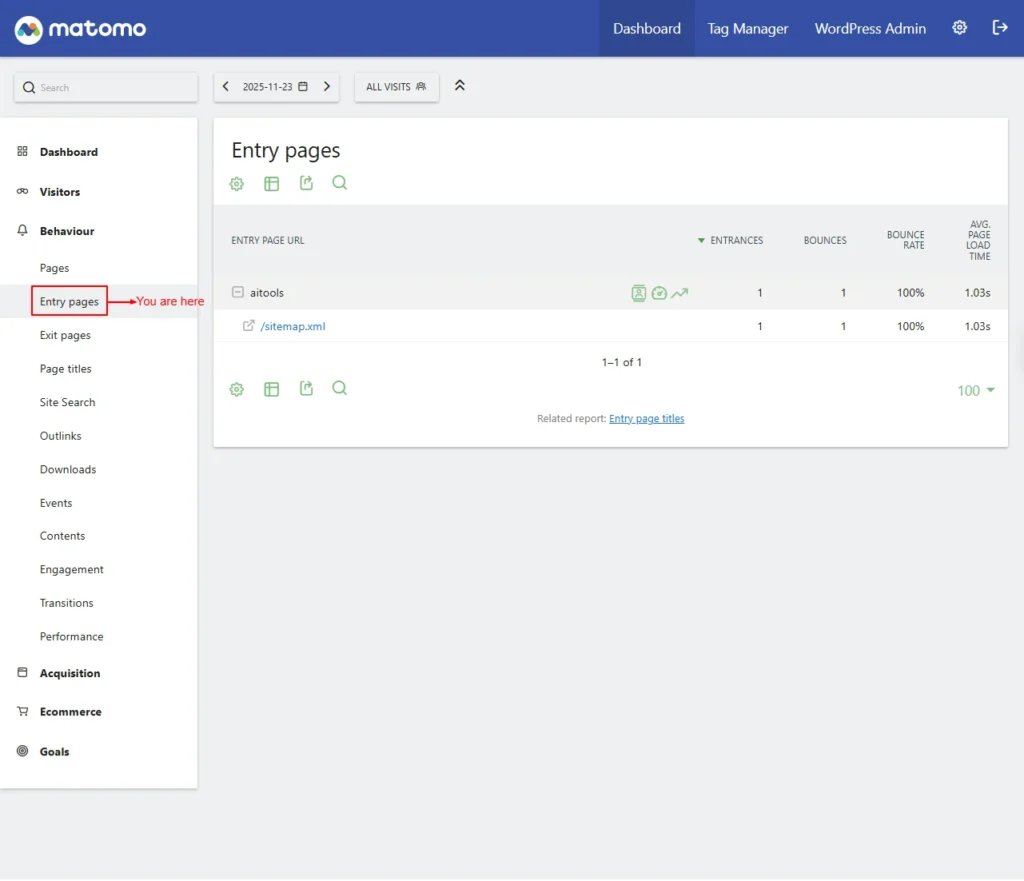
Screenshot 2: Behaviour → Entry Pages
Exit pages
Shows the pages where visitors most commonly leave your site. It shows the following data:- Exits
- Unique Pageviews
- Exit rate
- Avg. page load time
- Exit Page Titles (Related report)
- Displays exit pages by page title instead of URL.
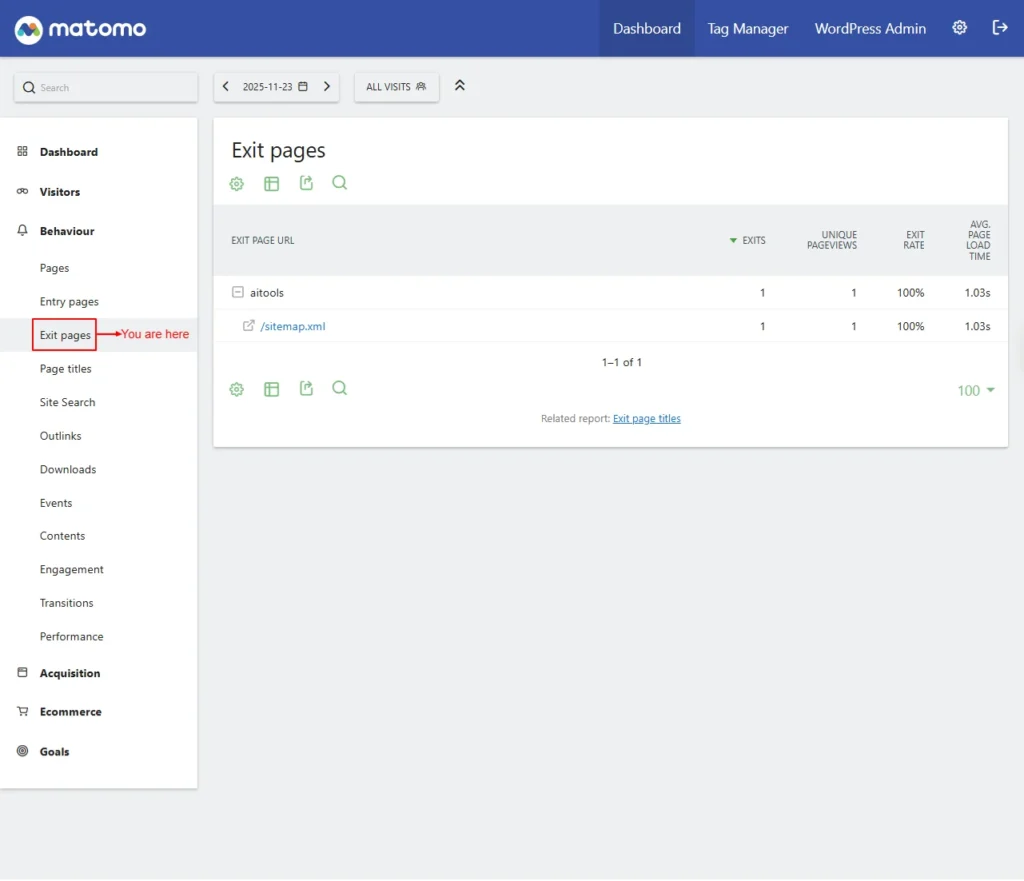
Screenshot 3: Behaviour → Exit Pages
Page titles
Shows how often each page title was viewed. It shows the following data:- Page Title
- Pageviews
- Unique Pageviews
- Bounce Rate
- Avg. time on page
- Exit rate
- Avg. page load time
- Entry Page Titles (Related Report): Shows first-visited pages by title.
- Exit Page Titles (Related Report): Shows last-visited pages by title.
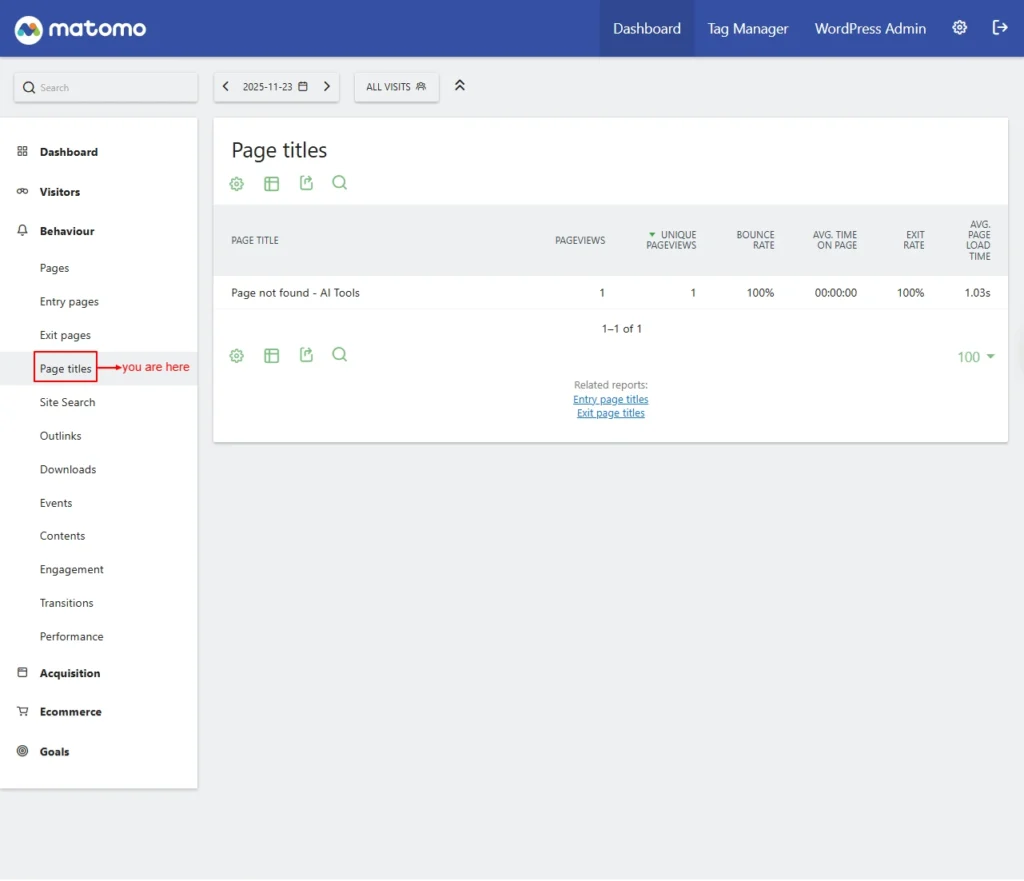
Screenshot 4: Behaviour → Page Title
Site Search
The Site Search settings allow you to track what visitors search for on your website, helping you understand their interests and improve content discovery.- Site Search Keywords: Shows keywords visitors searched for on your site.
- Search Keywords with No Results: Lists search terms that returned no results.
- Pages Following a Site Search: Displays which pages users visited after searching.
- Page Titles Following a Site Search (Related Report): Shows post-search destinations by page title.
- Search Categories: Groups internal searches by category.
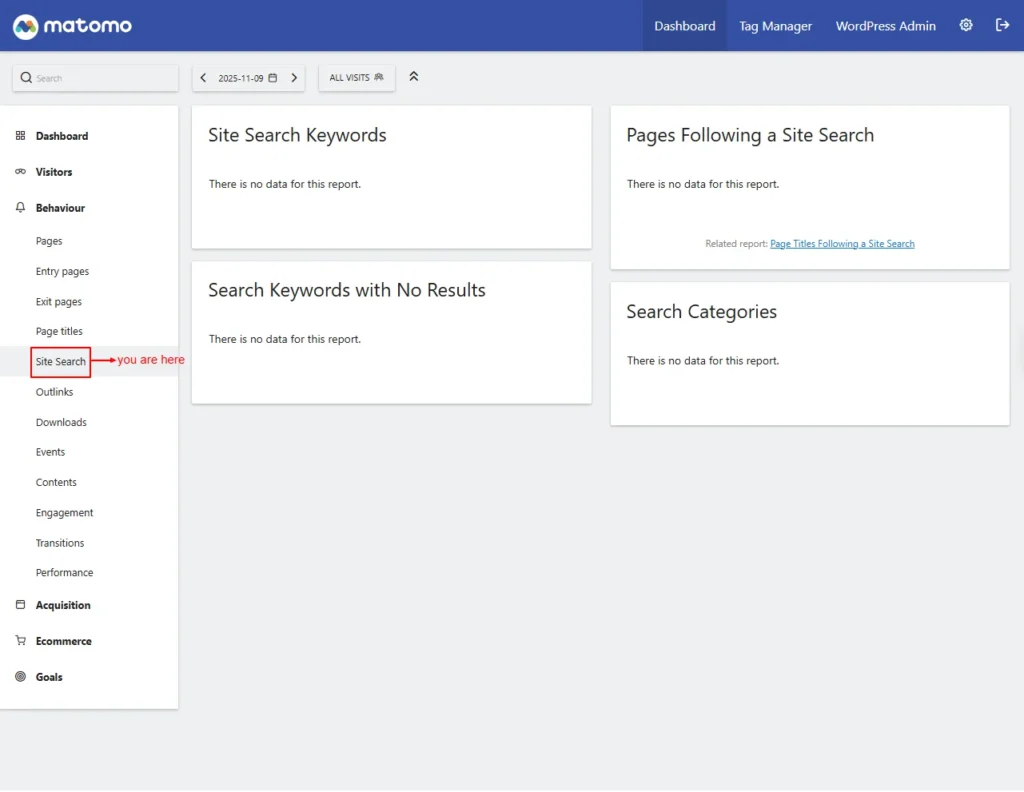
Screenshot 5: Behaviour → Site Search
Outlinks
Shows links clicked that lead visitors to external websites.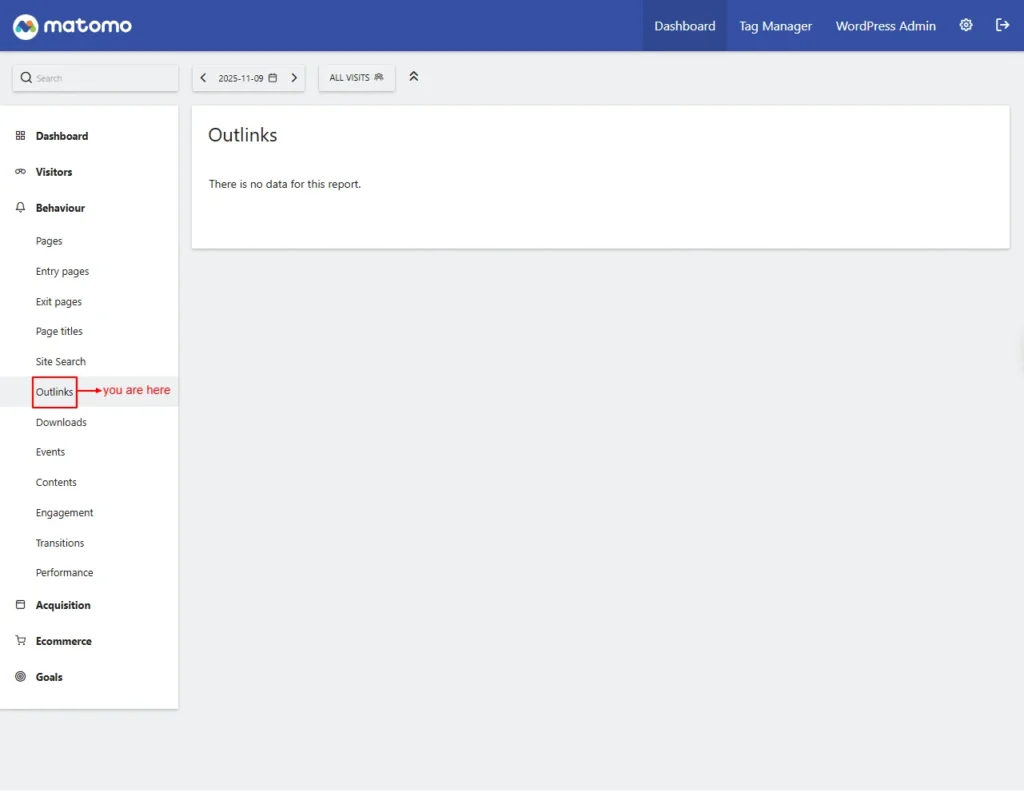
Screenshots 6: Behaviour → Outlinks
Downloads
Shows files that visitors downloaded from your site.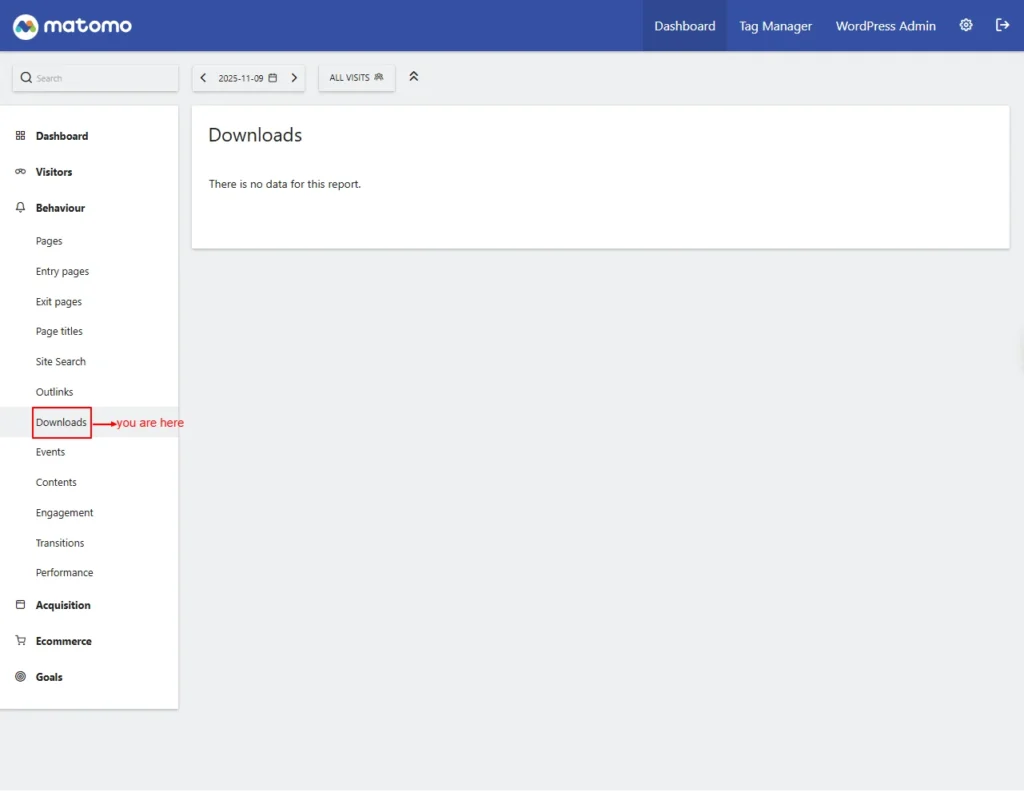
Screenshots 7: Behaviour → Downloads
Events
Tracks user interactions like clicks, video plays, and more.- Event Categories: Groups events by category (e.g., video, button).
- Event Actions: Shows the specific action taken (e.g., play, download).
- Event Names: Provides detailed labels identifying each event.
| Note: Currently, no custom events are configured. You can learn more about setting them in the Event Tracking guide. We’ll cover creating custom events using Matomo Tag Manager in a separate tutorial, since it requires an in-depth explanation and deserves a full blog of its own. |
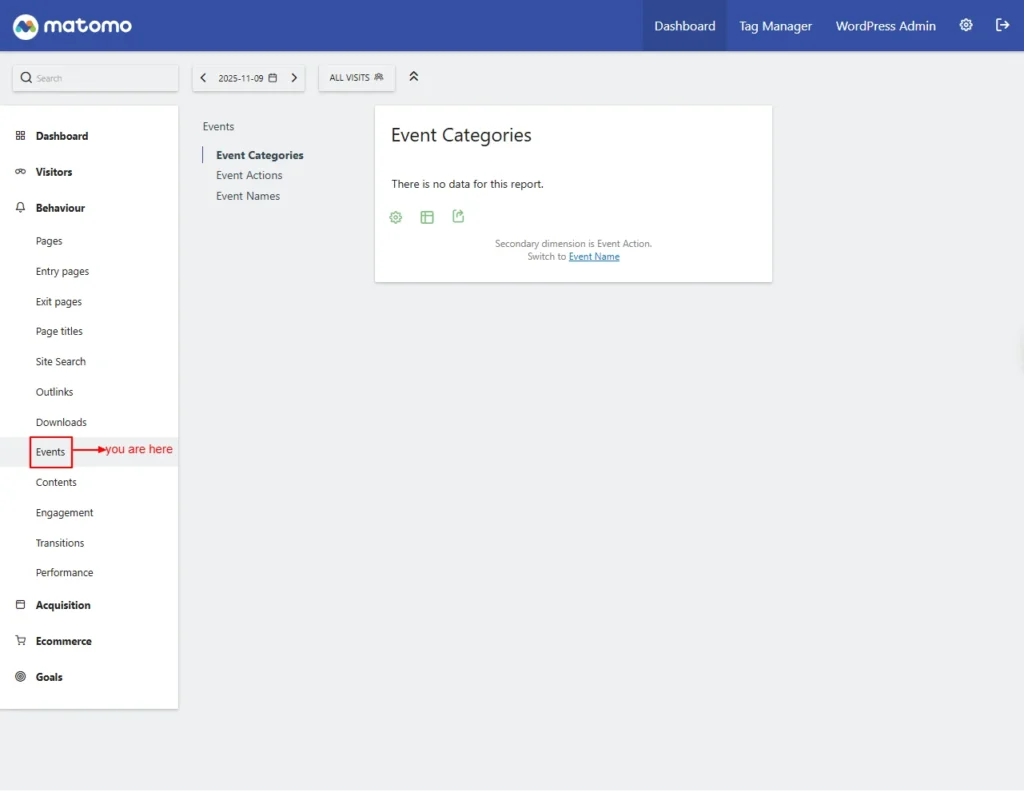
Screenshot 8: Behaviour → Events
Contents
Content tracking helps you understand which pieces of content are most engaging on any page of your website or app. This section shows how often each content element is viewed (impressions) and interacted with.- Content Name: Identifies the specific content block or widget being tracked.
- Content Piece: The actual item displayed (e.g., image, text, button) within the content name.
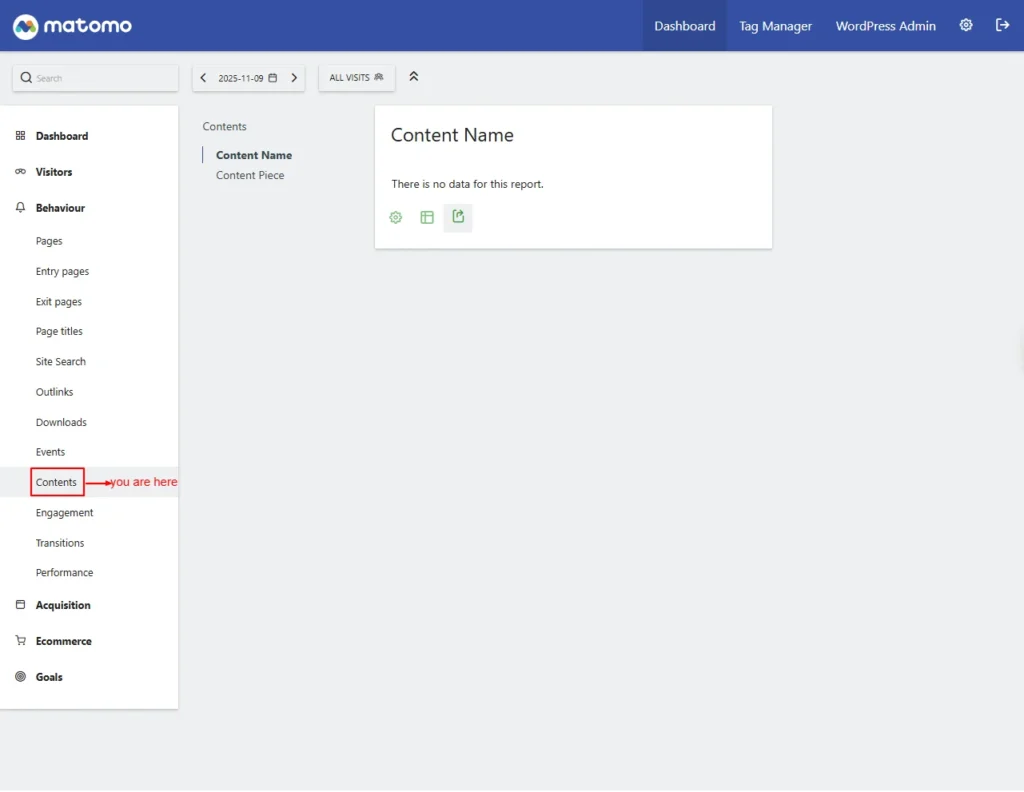
Screenshot 9: Behaviour → Contents
Engagement
The Engagement settings track how visitors interact with your site, including actions like time spent, scroll depth, and repeat visits, helping you measure user involvement.”- Returning Visits Over Time: This chart shows returning visits over time. You can view by day, week, month, or year.
- Frequency Overview: Summary of engagement for new vs returning visitors.
- It shows the following data:
- Returning Visits: Number of visitors returning to the site.
- Avg. Visit Duration (Returning): Average time returning visitors stayed.
- Actions per Returning Visit: Average actions done by returning visitors.
- Returning Bounce Rate: The percentage of returning visitors who left after one page.
- (Total) Actions (Returning): Total actions taken by returning visitors.
- New Visits: Number of first-time visitors.
- Avg. Visit Duration (New): Average time new visitors stayed.
- Actions per New Visit: Average actions done by new visitors.
- New Visitor Bounce Rate: Percentage of new visitors who left after one page.
- (Total) Actions (New): Total actions taken by new visitors.
- Visits per Visit Duration: Shows the Tag cloud of Group visits by time spent.
- Visits per Number of Pages: Shows the Tag cloud of group visits by number of pages viewed.
- Visits by Visit Number: Shows how often visitors return (1st, 2nd, 3rd visit, etc.).
- Visits by Days Since Last Visit: Shows how long it has been since each returning visitor last visited.
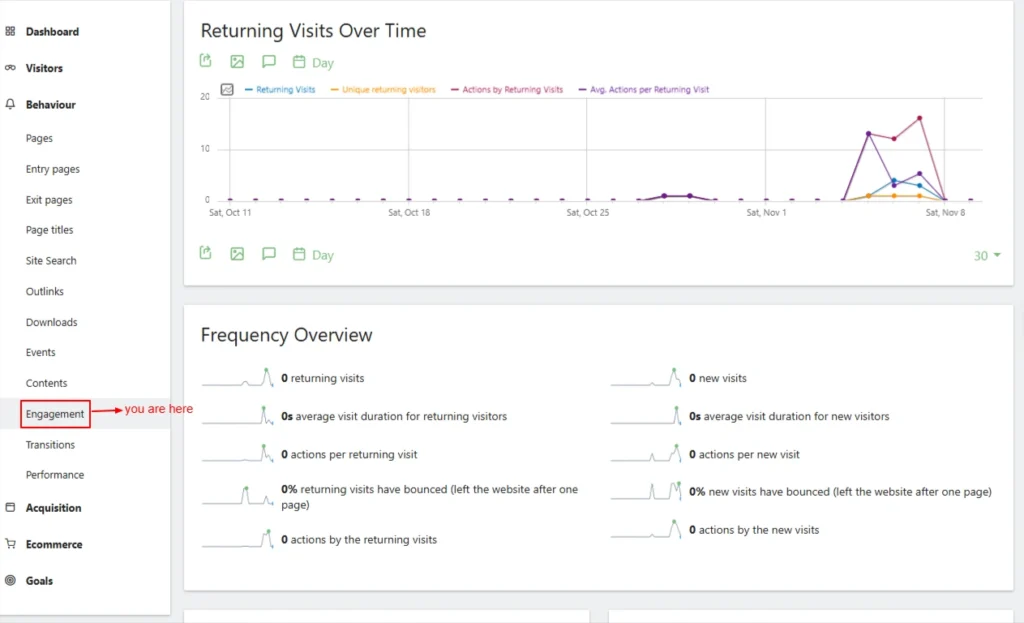
Screenshot 10: Behaviour → Engagement
Transitions
Transitions show what visitors did right before and after viewing a specific page, helping you understand where they came from and where they went next. Action Type- Page URLs: View transitions based on page URLs.
- Page Titles: Shows how users arrived at a page (by title) and where they went next.
- Top 100 Labels: Displays the most common sources and destinations.
Screenshot 11: Behaviour → Transitions
Screenshot 12: Transition before and after viewing a specific page
Performance
The Performance settings help optimize how tracking loads on your site, ensuring accurate analytics- Evolution of Page Performance Metrics: This graph shows how page speed metrics change over time.
- Performance Overview
- Avg. network time: time to establish network connection.
- Avg. transfer time: Time to download page resources.
- Avg. DOM completion time: Time for the HTML document to finish loading.
- Avg. page load time: Total time for a page to fully load.
- Avg. server time: The time the server takes to respond.
- Avg. DOM processing time: Time the browser spends processing the page.
- Avg. on-load time: Time until the browser on-load event finishes.
- Page URLs: Shows performance metrics for individual page URLs.
- Entry pages / Exit pages (Related reports): View load performance for landing and exit pages.
- Page titles: Displays performance metrics by page title.
- Entry page titles / Exit page titles (Related reports): Shows performance for landing/exit pages by title.
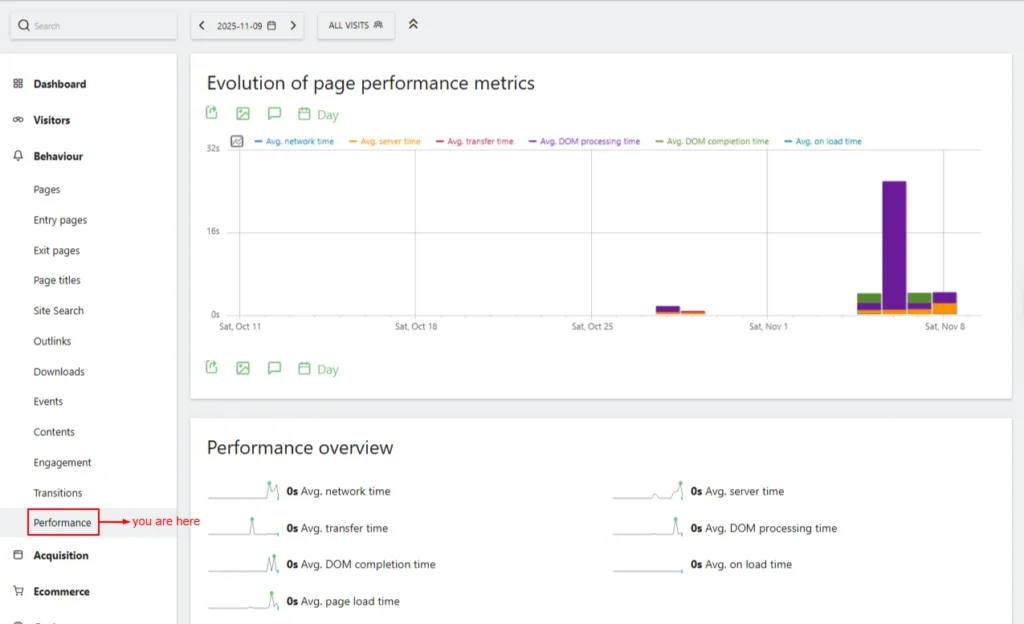
Screenshot 13: Behaviour → Performance
Acquisition
Shows how visitors find your website, including traffic sources like search engines, social media, referrals, campaigns, and direct visits.Overview
This screen shows an overview of the visits channel-wise.- Evolution Over the Period: This graph provides a snapshot of the referral sources that brought visitors to your website.
- Channel Type: Shows which traffic channels (Direct, Search, Social, Referral, Campaigns) are bringing visitors to your site.
- Direct Entries: Visits that came directly (no referrer).
- Search Engines: Visits from search engine results.
- Campaigns: Visits from tracked marketing campaigns.
- Social Networks (Distinct): Number of unique social platforms sending traffic.
- Keywords (Distinct): Number of unique search keywords used.
- Websites: Visits from external websites.
- Social Networks: Traffic from social media sites.
- Search Engines (Distinct): Unique search engines bringing traffic.
- Websites (Distinct): Unique referring external sites.
- Campaigns (Distinct): Unique campaign IDs sending traffic.
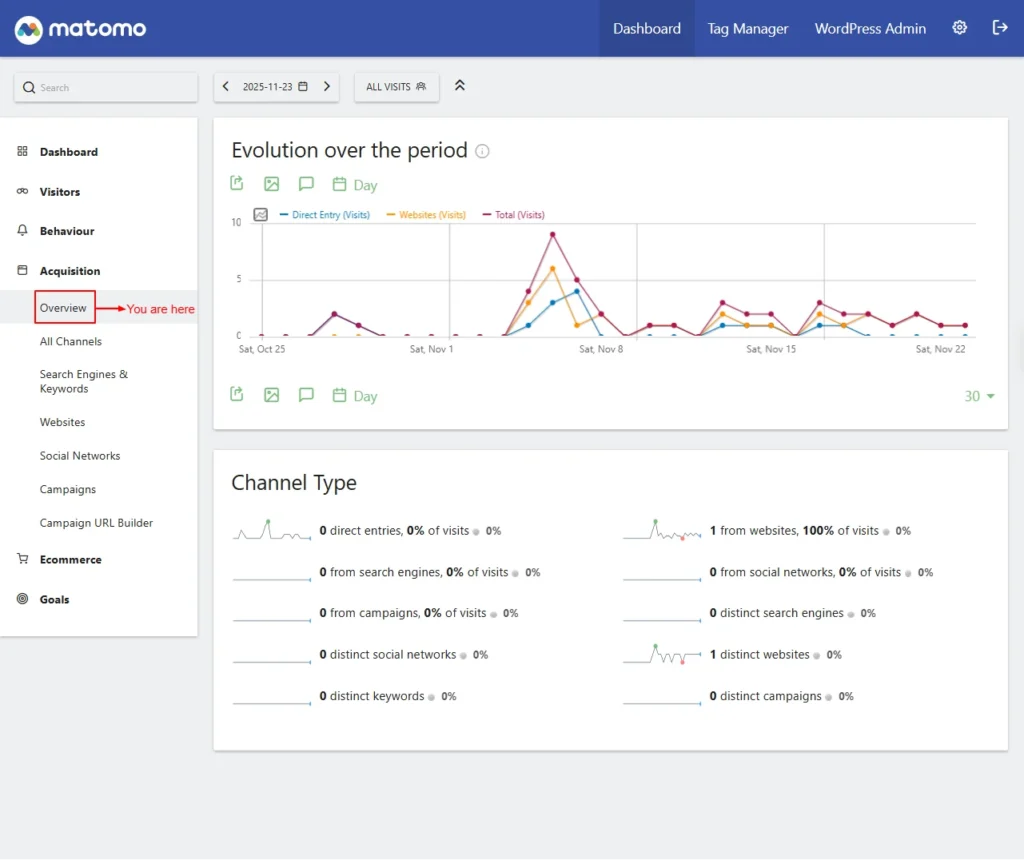
Screenshot 14: Acquisition → Overview
All Channels
Displays a breakdown of all traffic sources, showing how visitors arrived on your site across every channel type.- Channel Types: Displays how visitors arrived (e.g., direct, search, social, campaigns).
- Referrers: Shows external websites or sources that sent visitors to your site.
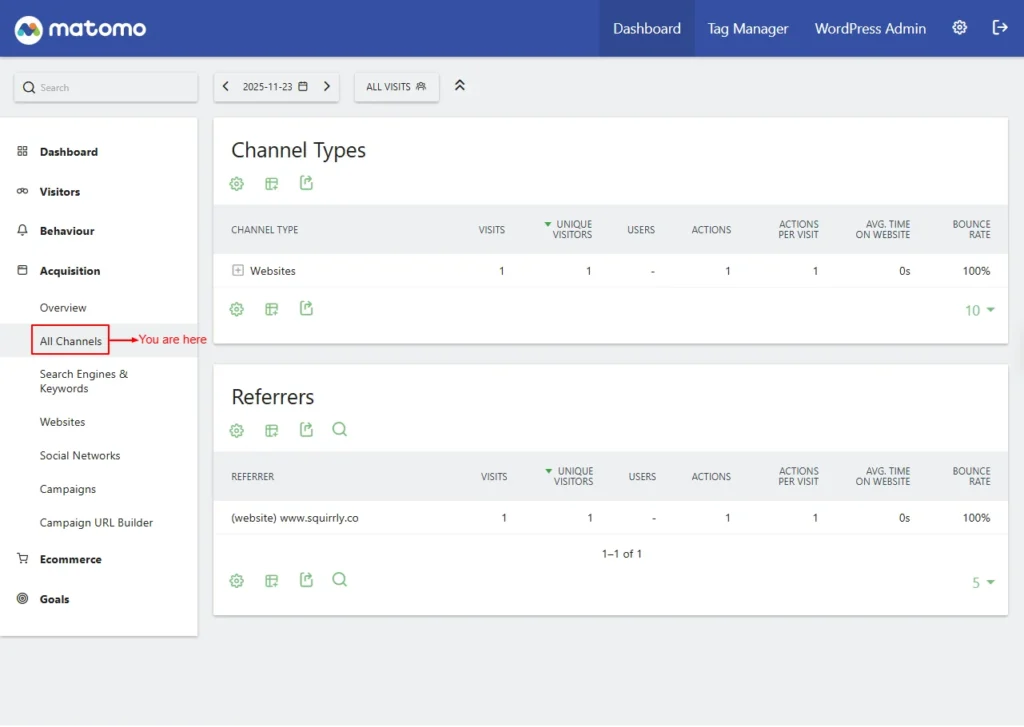
Screenshot 15: Acquisition → All Channels
Search Engines & Keywords
Shows which search engines send traffic to your site and which keywords visitors use to find you.- Keywords: Shows search terms users typed to find your website in search engines.
- Search Engines: Lists which search engines (Google, Bing, etc.) brought visitors to your site.
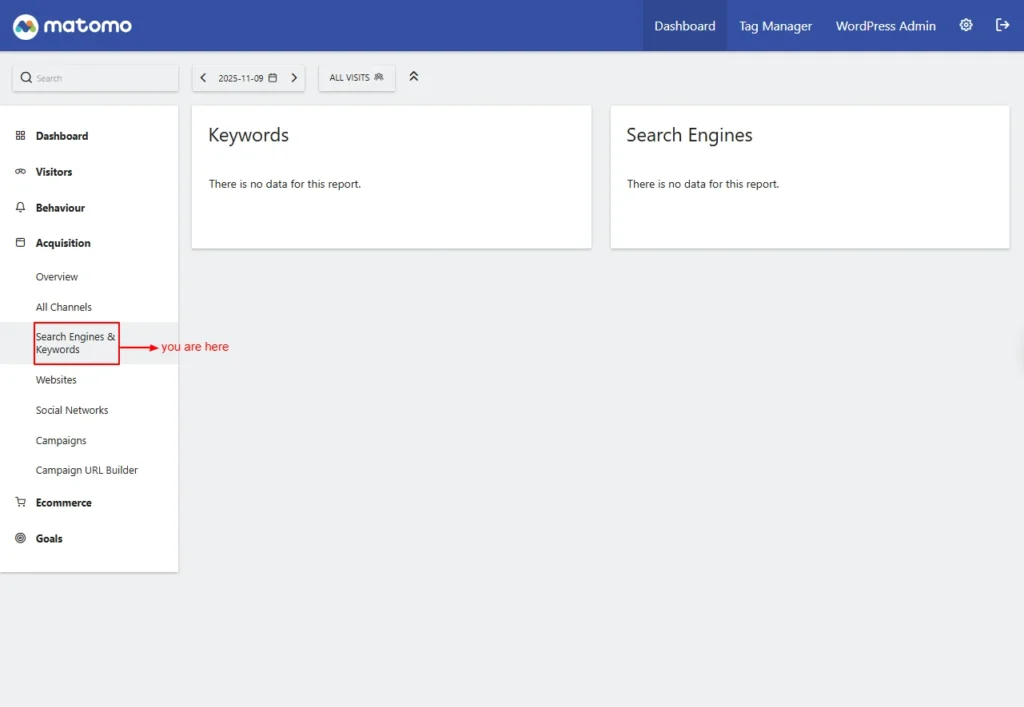
Screenshot 16: Acquisition → Search Engines and Keywords
Websites
Shows which external websites sent traffic (referrals) to your site.
Screenshot 17: Acquisition → Websites
Social networks
Displays traffic coming from social platforms like Facebook, LinkedIn, or Twitter.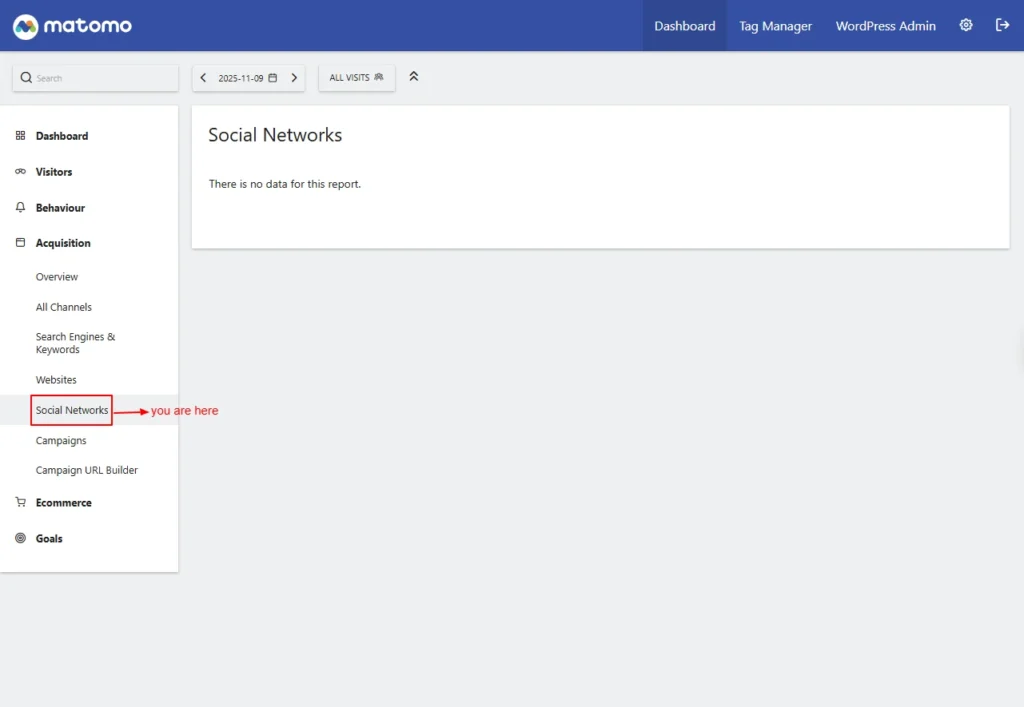
Screenshot 18: Acquisition → Social Network
Campaigns
Shows visits generated through marketing campaigns tracked using campaign parameters.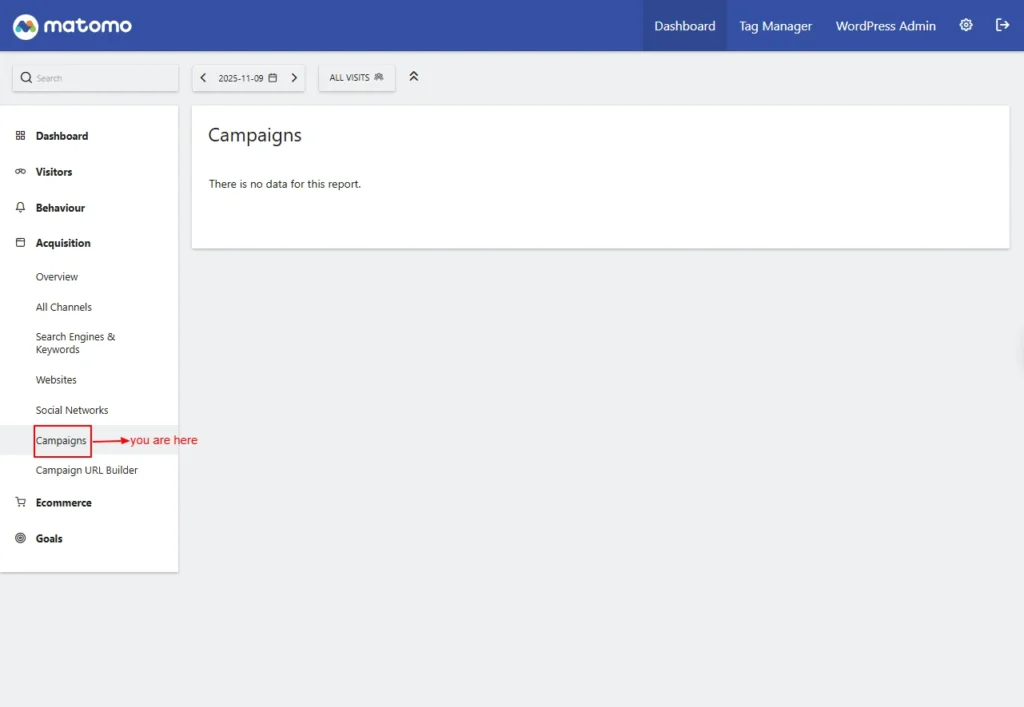
Screenshot 19: Acquisition → Campaigns
Campaign URL Builder
A tool to create trackable URLs for measuring campaign performance in Matomo.- Page URL: The landing page address where users will arrive through the campaign.
- Campaign Name: A unique identifier used to label and differentiate the campaign.
- Campaign Keyword: An optional tag to classify or distinguish multiple campaigns under the same campaign name.
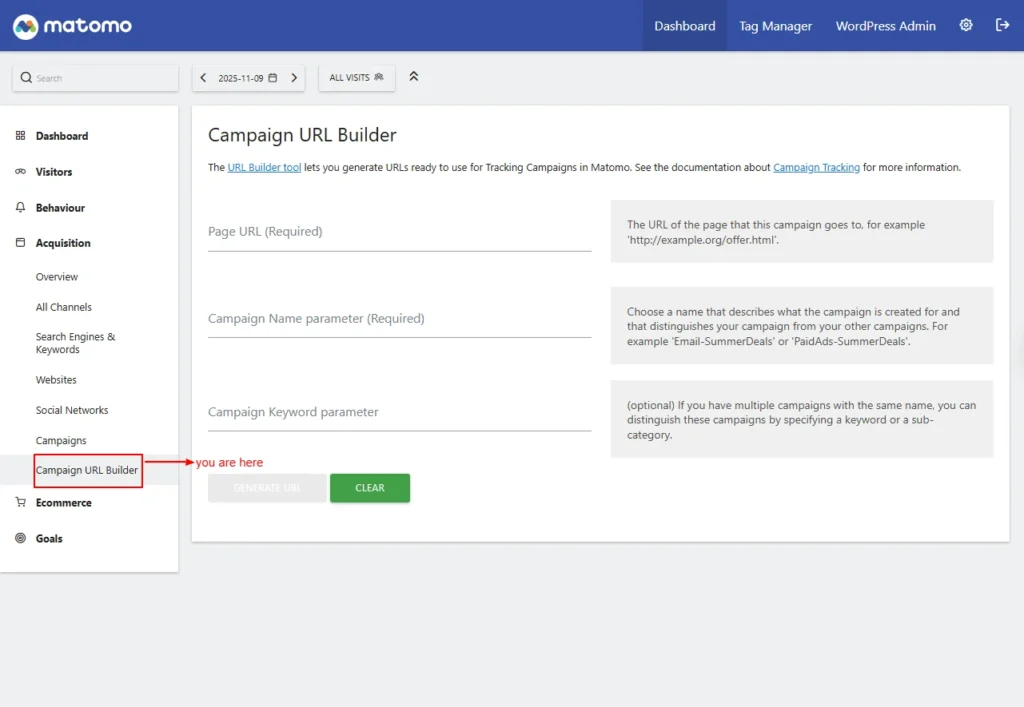
Screenshot 20: Acquisition → Campaign URL Builder
E-commerce
The E-commerce settings allow you to enable and configure tracking for online sales, product views, and customer actions to measure your store’s performance.| Note: This blog was written specifically for website tracking, not e-commerce (hence, no data available in the reports). However, we’ve included the basics for continuity with the Matomo WordPress plugin dashboard. E-commerce tracking is more advanced and will require a dedicated blog. |
Overview
The E-commerce Overview shows key sales metrics, product performance, and customer behaviour to help you monitor and optimize your online store’s results.- Evolution over the period: This graph shows a snapshot of the conversions generated for a specific goal. A selected date range.
- The widget card shows the following data:
- E-commerce Orders: Total orders placed during the selected period.
- Total Revenue: The overall revenue generated from completed orders.
- Average Order Value: The average value of each completed order.
- E-commerce Orders Conversion Rate: Percentage of visits that resulted in an order.
- Purchased Products: Total number of items bought.
- Abandoned Carts: Carts created but not completed.
- Visits with Abandoned Cart: Total visits where a cart was abandoned.
- Revenue Left in Cart: Total value of abandoned carts.
- Visits with Abandoned Cart: The percentage of visits that resulted in cart abandonment.
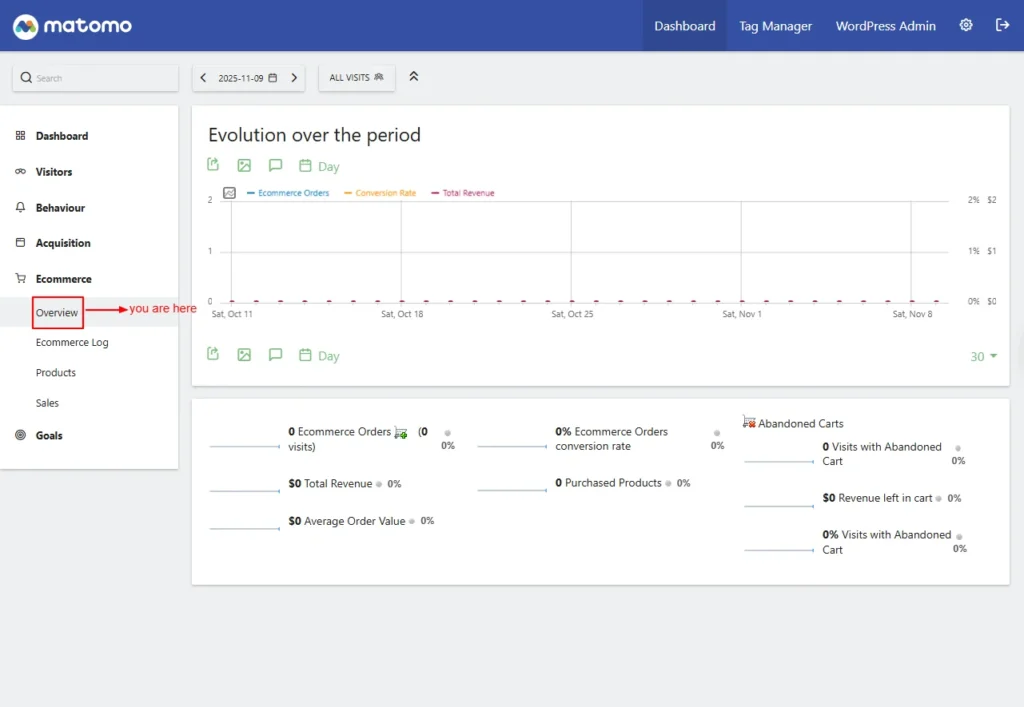
Screenshot 21: E-Commerce → Overview
E-commerce Log
Displays a detailed list of all e-commerce actions and transactions recorded on your site.- Order & Cart Activity: Shows individual orders, abandoned carts, and related visitor interactions.
- Visitor-Level Insights: Let you review which users purchased, what they viewed, and how they reached checkout.
- Product & Revenue Details: Includes product names, revenue generated, quantities, and order values.
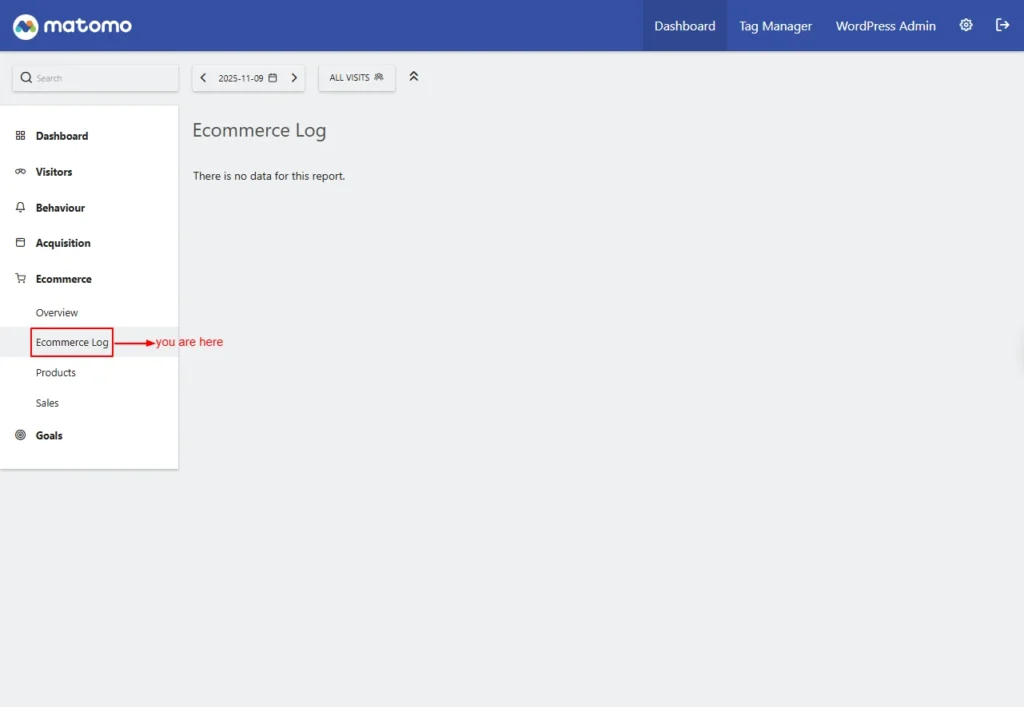
Screenshot 22: E-Commerce → E-Commerce Log
Products
Displays detailed statistics for each product sold or viewed on your site.- Product Name: Lists all products with metrics like views, purchases, and revenue.
- Product SKU: Tracks e-commerce performance using unique product identifiers.
- Product Category: Group products by category to analyse which sections perform best.
- Performance Insights: Helps understand popular products, sales trends, and conversion rates.

Screenshot 23: E-Commerce → Products
Sales
The Sales settings let you track completed orders, revenue, and transaction details so you can measure your store’s overall sales performance.”Sales by Referrers
Shows which traffic sources (direct, search, campaigns, websites, social) led to purchases.- Channel Type: Breaks down revenue by acquisition channel, such as direct, search, referral, or campaigns.
- Keywords: Shows search keywords that resulted in sales.
- Search Engines: Displays which search engines drove visitors who made purchases.
- Websites: Shows external websites that referred users who completed a purchase.
- Campaigns: Tracks sales generated from marketing or advertising campaigns.
Sales by Pages
Shows which pages generate sales and how much revenue each page contributes.- Page URLs: Lists the pages customers viewed before converting and tracks revenue per page.
- Entry Pages: Shows the first page users viewed before making a purchase.
- Entry Page Titles: Displays product-related page titles that started a converting visit.
- Page Titles: Shows page titles associated with purchases and the total revenue influenced.
Sales Engagement
Shows how visitors interact with your products, including views, cart actions, and purchase behaviour.- Visits to Conversion: Shows how many visits it took for a user to convert.
- Days to Conversion: Displays the time (in days) from first visit to purchase.
Sales by User Location
Shows sales performance based on where your customers are located, including countries, regions, and cities.- Country / Continent / Region / City: Breaks down sales performance by geographical location to identify strong markets.
- Device Type: Which devices (desktop, mobile, or tablet) did users purchase from?
- Device Model: Identifies specific device models that generated sales.
- Device Brand: Shows which device manufacturers drove e-commerce conversions.
- Browsers: Displays visitor browser types that resulted in purchases.
Sales by User Attribute
Shows sales grouped by customer attributes such as user roles, segments, or defined profile characteristics.- Visits per hour in the site’s timezone: Shows at what hours sales typically occur.
- Channel Type: Shows which user attributes contributed to sales (e.g., traffic source). No data may appear if tracking has not yet captured e-commerce conversions.

Screenshot 24: E-Commerce → Sales
Goals
Allows you to create and manage goals to track important visitor actions such as sign-ups, downloads, purchases, or form submissions.Overview
The Goals Overview provides insights into how each of your website’s goals is performing. It displays conversion rates and total revenue generated and gives you access to detailed reports for every goal.- Evolution Over the Period: This graph shows how goal completions and revenue change over a selected timeframe.
- The card widgets show.
- Conversions: Displays the total number of times defined goals were completed.
- Overall Revenue: Shows total revenue generated from goal completions.
- Overall Conversion Rate: Indicates the percentage of visits that completed at least one goal.
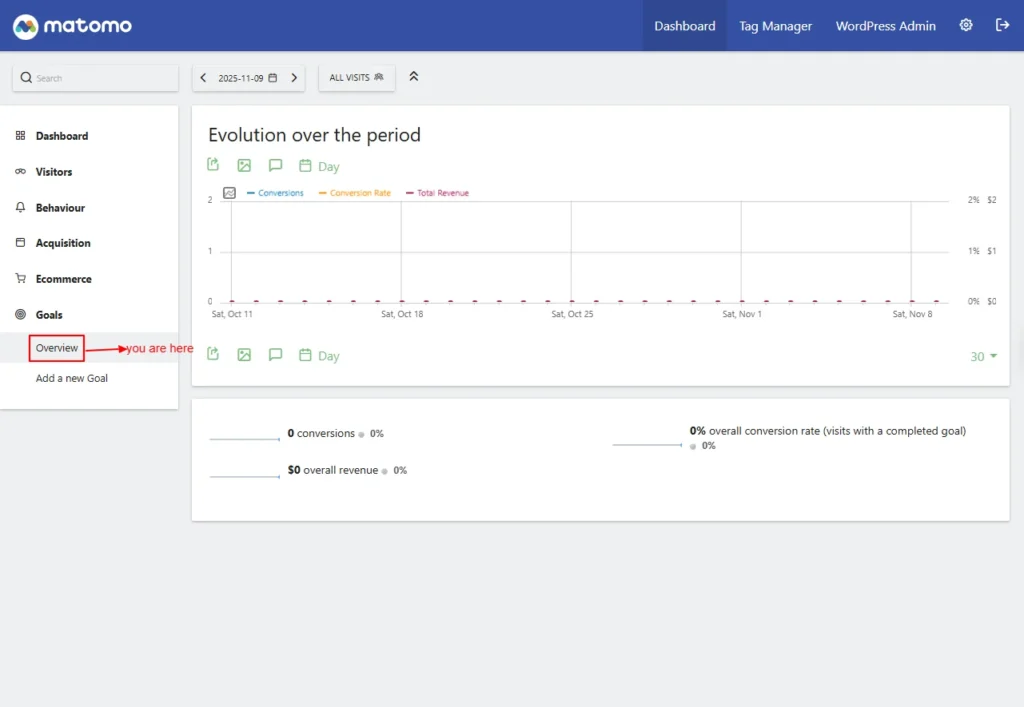
Screenshot 25: Goals → Overview
Add a New Goal
Create a new conversion objective to measure important visitor actions.- Goal Name: Enter a title to identify the goal (e.g., “Newsletter Signup”).
- Description: Optional text explaining the purpose of the goal.
- Goal is Triggered When: Defines what visitor action should count as a conversion.
- when visitors (do some action)
- manually
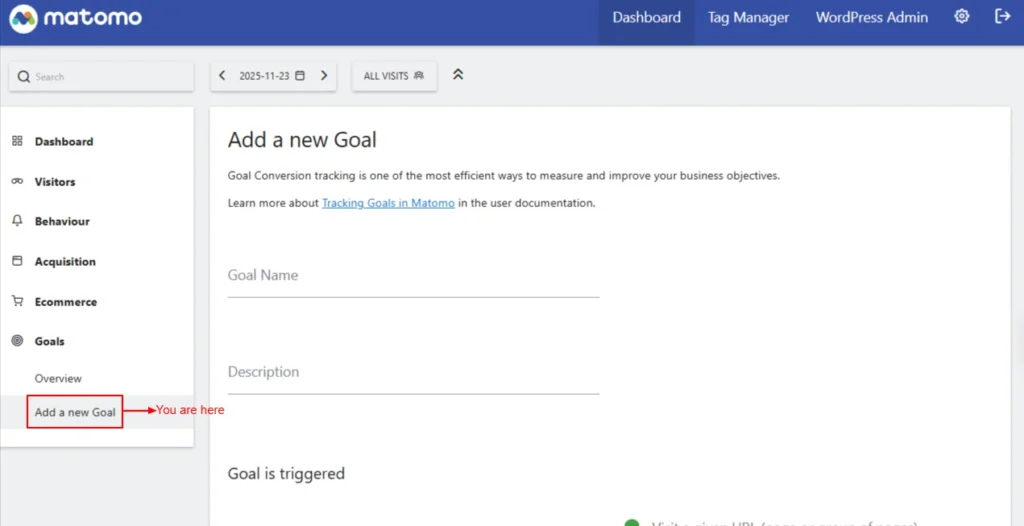
Screenshot 26: Goals → Add a new Goal
When Visitors
- Visit a given URL (page or group of pages)
- Contains: add the pattern for the URL.
- is exactly
- matched by the expression
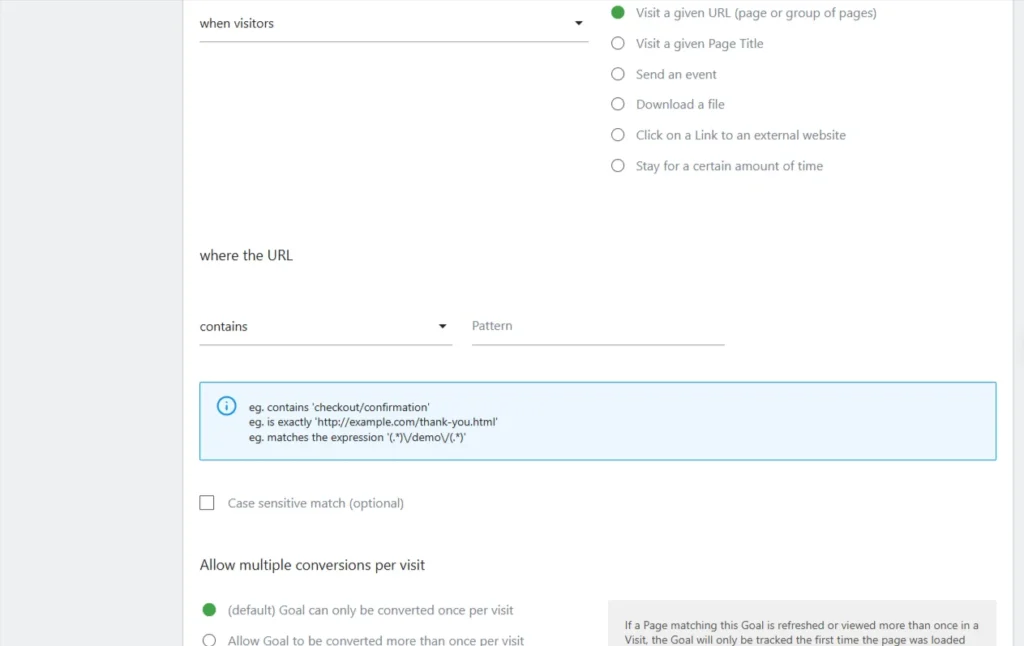
Screenshot 27: When Visitors → Visit a given URL
- Visit a given Page
- Where the Page title
- contains: add the pattern for Title
- is exactly
- matches the expression
- Where the Page title
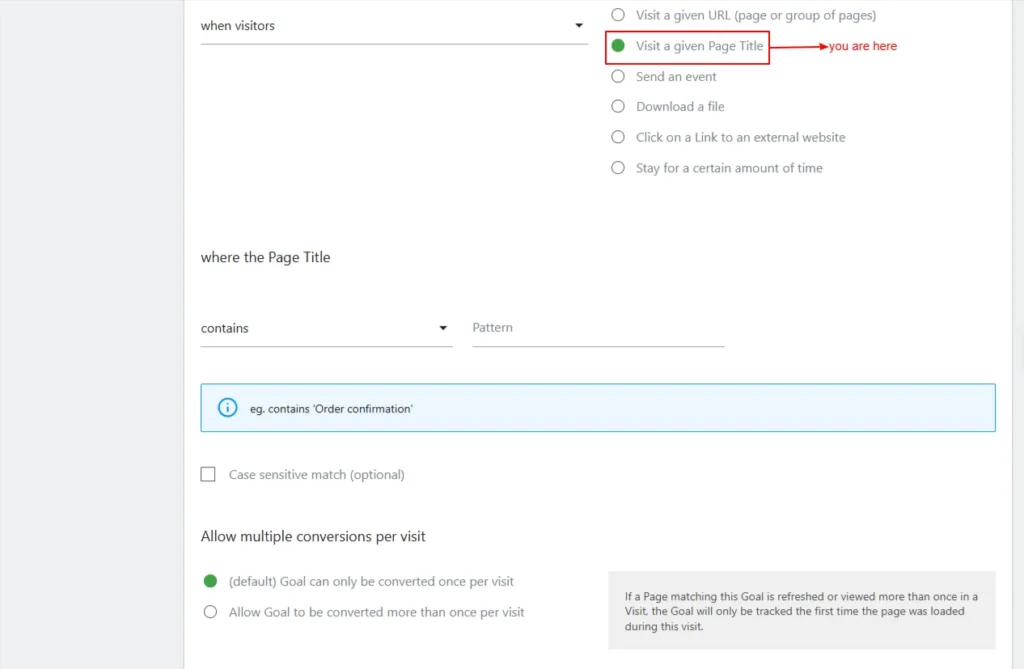
Screenshot 28: When Visitors → Visit a given page title
- Send an event
- Where the
- Event category / Event Action / Event Name
- Contains ('video': Triggers when “video” appears in the event category)
- is exactly (‘'click': triggers only if the event category matches the exact word click.)
- matches the expression ('(.*)_banner': uses regex to match advanced event) patterns.
- Where the
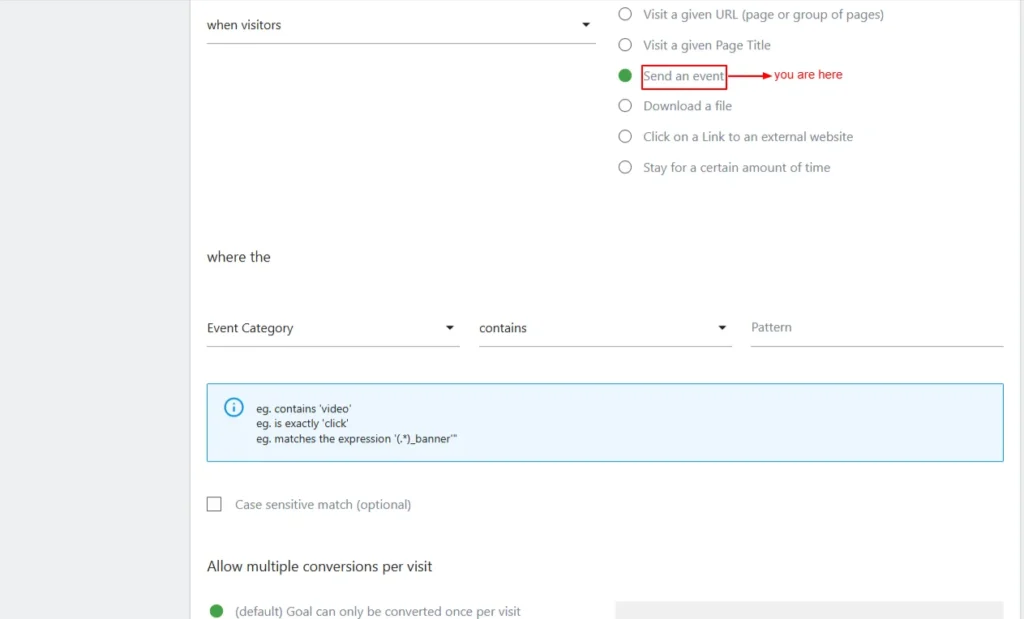
Screenshot 29: When Visitors → Send an event
- Download a file
- Where the filename
- contains (files/brochure.pdf': triggers when visitors download a file containing this path or name)
- is exactly ('http://example.com/files/brochure.pdf': triggers only if the file URL is an exact match.)
- matches the expression ('(.*)\.zip': uses regex to match any .zip file download.)
- Where the filename

Screenshot 30: When Visitors → Download a file
- Click on a link to an external website
- where the external website URL
- Contains (‘amazon.com': tracks outbound clicks to Amazon-related links).
- is exactly ('http://myaffiliate.com/landing.html': tracks clicks only to this exact URL.)
- matches the expression ('http://www.amazon.com/(.*)/yourAffiliateId': uses regex to match affiliate or structured outbound URLs.)
- where the external website URL
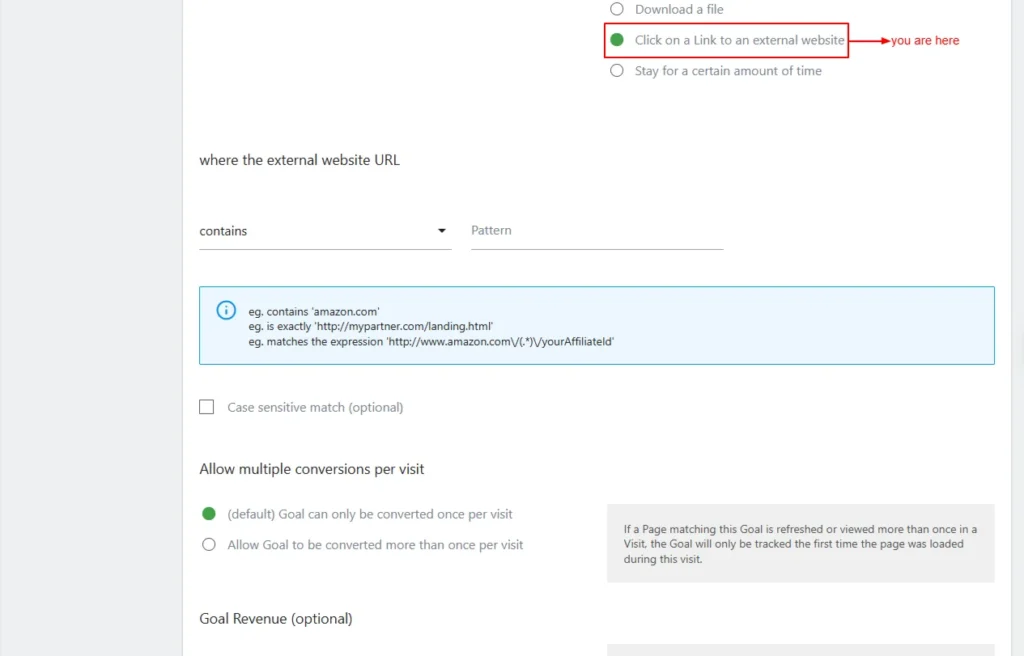
Screenshot 31: When Visitors → Click on a Link to an External Website
- Stay for a certain amount of time
- where the visit duration is
- Greater than time in minutes
- Example: Enter 5 to trigger a conversion after 5 minutes. Supports decimals. e.g., 0.5 = 30 seconds
- Greater than time in minutes
- where the visit duration is
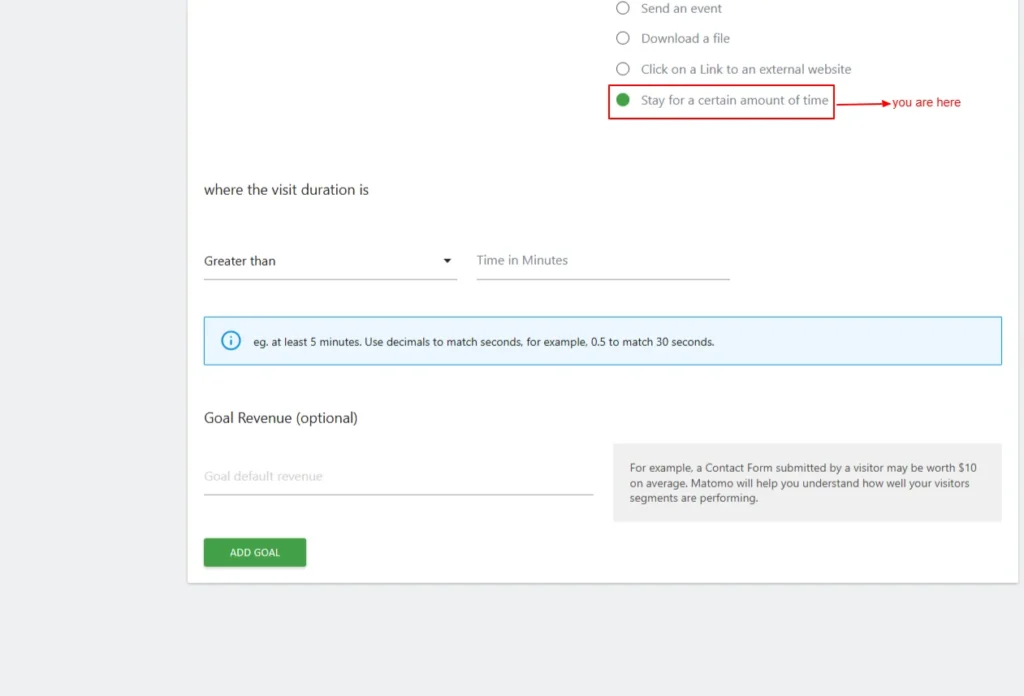
Screenshot 32: When Visitors → Stay for a certain amount of time
Manually
Let's you trigger the goal manually. You must add trackGoal() in your site’s JavaScript to record the conversion event.
Screenshot 33: The goal is triggered manually
- Case-sensitive Match (optional): Matches the URL exactly as typed, treating uppercase and lowercase letters as different values.
- Allow multiple conversions per visit.
- Goal can only be converted once per visit (default): Let the same visitor trigger a goal more than once during a single session.
- Allow Goal to be converted more than once per visit: Goal will be tracked for every time the page is loaded during the visit.
- Goal Revenue (optional): Assigns a monetary value to each completed goal for revenue reporting.
- Example: A whitepaper download could be valued at $50 for lead-generation measurement.
Tag Manager
| Note: This blog was written specifically for the Matomo basic analytics setup. Matomo Tag Manager is advanced and would require a dedicated blog to explore all the functionality in it. Still, we have covered just the basics of containers in the upcoming section. |
Manage Containers
With Matomo Tag Manager (MTM), you can update your tracking configurations without modifying your website’s code. These configurations are stored in containers. Typically, one container is used per site, but you can create multiple containers for complex setups involving multiple domains or teams. Matomo automatically sets up the first container for your site. This section lists all your containers with their ID, name, description, and creation date, along with quick actions to manage or edit each container.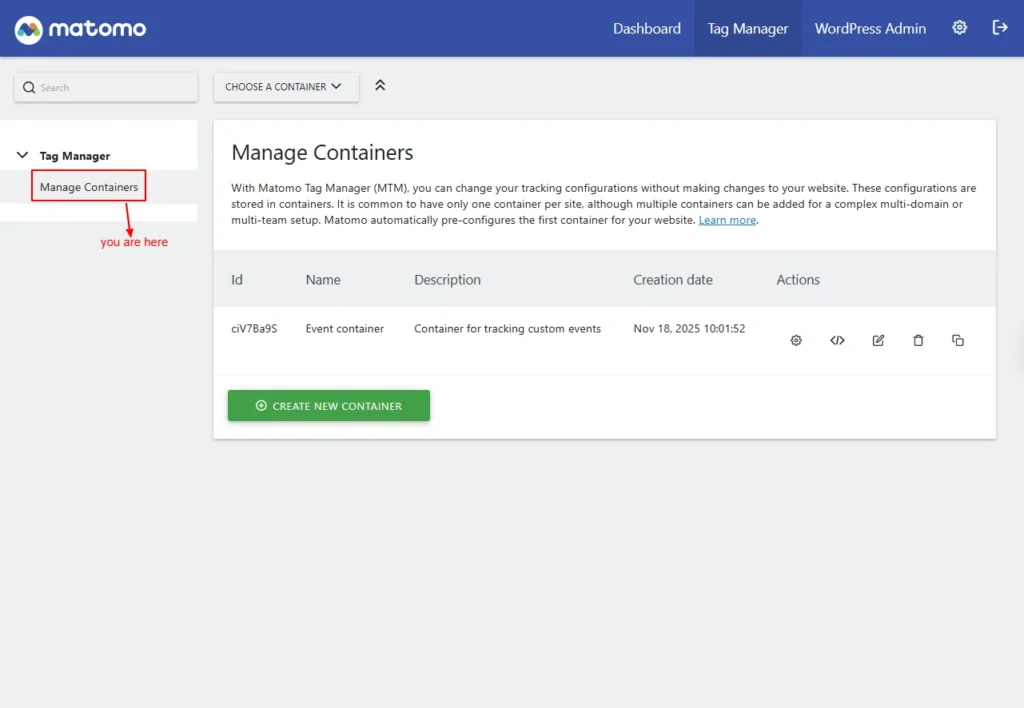
Screenshot 34: Tag Manager → Manage Containers
Click On Create New Container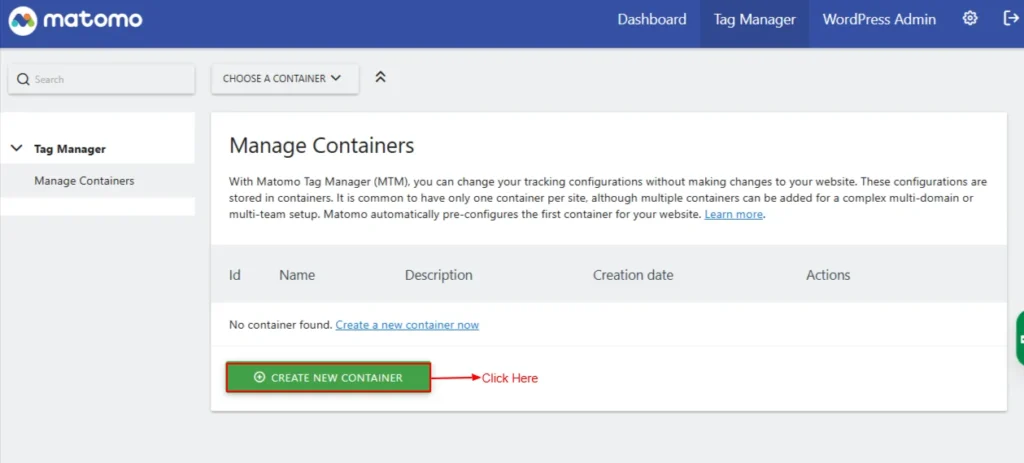
Screenshot 35: Manage Containers → Click on Create New Container
- Context: Web
- Specifies the context in which the container will be used. Currently, only “Web” containers are supported.
- Name: The name of the container
- Set a unique identifier for this container. Note that this name can be accessed as a variable and is publicly visible in the analytics tag’s source code.
- Description (Optional): The description of the container
- You can optionally add a description to explain the purpose of this container, which is particularly helpful when managing multiple containers on a single site.
- Ignore Google Tag Manager Data Layer: (Check / Uncheck)
- When enabled, Matomo Tag Manager will ignore data layer values previously defined by Google Tag Manager. By default, these values are retained for compatibility purposes.
- Actively Synchronise From the Google Tag Manager Data Layer: Check/Uncheck
- When enabled, any new values added to the Google Tag Manager data layer will automatically sync with the Matomo Tag Manager data layer.
- Enable tag fire limits to work in preview mode: Check/Uncheck
- Enable this option to check if fire limits, such as once-per-lifetime, work as expected when preview mode is enabled.
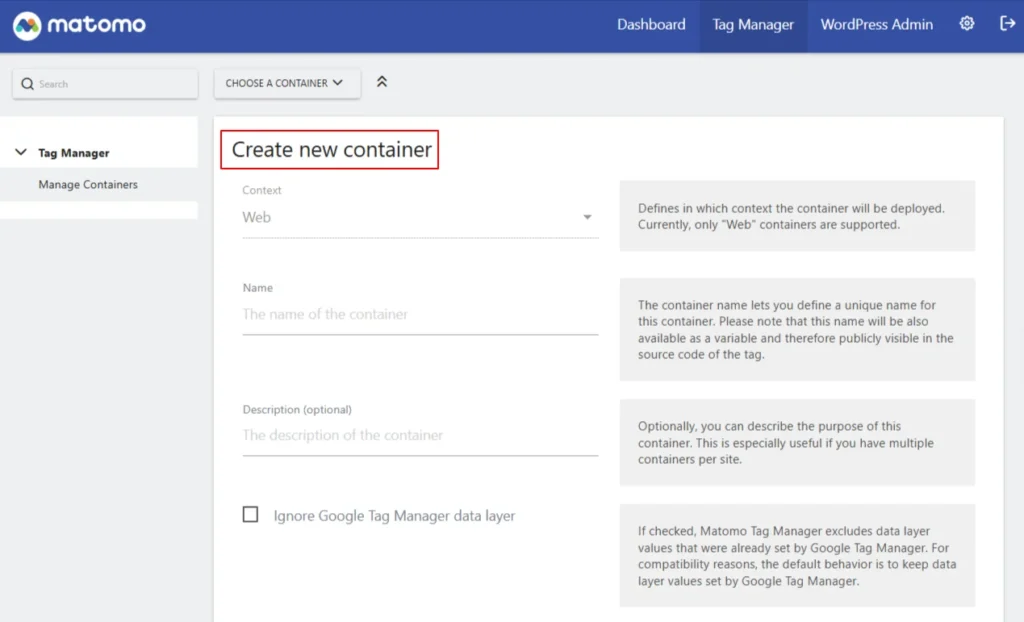
Screenshot 36: Manage Containers → Create a new container
Settings (WordPress backend)
| Note: There are two settings: one in the WordPress backend dashboard (Matomo Analytics → Settings) and one in the Matomo Analytics admin dashboard. We are discussing the first one in the upcoming section. |
Tracking
Here you can customize how visit tracking works on your site. You can either enable tracking using the default settings or adjust the configuration to fit your needs. Tracking Mode Options:- Auto (Recommended): Matomo automatically generates and embeds the tracking code based on your Auto Tracking settings. This is the best option for most users.
- Manual: Write your own custom tracking JavaScript below, and Matomo will insert it into your website.
- Tag Manager: If you’ve created containers in the Tag Manager, you can use this mode to automatically embed one or more of them on your site. This option will only be available once containers exist.
- Disabled: Matomo won’t add any tracking code. Choose this if you prefer to insert the tracking code manually into your template files or use another plugin for e-commerce.
Screenshot 37: Settings → Tracking
General Tracking Settings
Here you can adjust visit tracking as you prefer, or just enable tracking and use the default settings.Tracking mode:
You have to select one of the following- Auto (recommended): Select/deselect
- Manual: Select/deselect
- Tag Manager: Select/deselect
- Disabled: Select/deselect
E-commerce Tracking
E-commerce Tracking enables Matomo to record product views, cart updates, and completed orders, giving you detailed insights into your store’s sales activity.Enable E-commerce
Turn this on to track e-commerce activity, such as orders and abandoned cart views, for platforms like WooCommerce, Easy Digital Downloads, MemberPress, and others. Disabling this option will stop e-commerce and remove related reports from Matomo. Currency: The Options are- Us Dollar
- Euro
- Japanese yen
- British pound and many more
- When enabled, Matomo will assign a temporary server-generated visitor ID if no Visitor ID cookie is found. This ensures e-commerce events are correctly linked to visits, even when cookies are blocked or cookieless tracking is active. The ID remains valid only for that session.
Other Tracking
Other Tracking provides additional options to record extra visitor actions and behaviours, giving you more flexibility in how analytics data is collected.- Track Admin Pages: Enable/Disable
- Enable this option to track user activity within the WordPress admin area. Be sure to configure the tracking filter to suit your needs.
- Track WordPress User ID:
- When enabled, Matomo records the logged-in user’s “User ID.” You can choose which field from the user’s profile should be used as the ID. The options to choose from are
- WP User ID
- Email Address (The user might change their email address.)
- User name (chose this since this is unique for every user in WordPress)
- Display Name (Not recommended)
- When enabled, Matomo records the logged-in user’s “User ID.” You can choose which field from the user’s profile should be used as the ID. The options to choose from are
- Track Search:
- Activate Matomo’s advanced Site Search Analytics to monitor what visitors search for on your website.
- Track 404 Pages:
- Matomo can automatically categorize and track visits to “Page Not Found” (404) errors to help you identify broken links.
- Track RSS Feeds:
- Enable this setting to insert a tracking pixel that monitors how often your posts are viewed in RSS feed readers.
- Track RSS Feed Links as Campaigns:
- Adds Matomo campaign parameters to links in your RSS feeds so you can track traffic coming from those links more accurately.
Create Matomo annotations on a new post of type:
This option automatically creates Matomo annotations whenever a new post of the selected type is published, helping you track content-related events in your analytics.- Posts
- Pages
- Media
- Revisions
- Navigation Menu Items
- Custom CSS
- Changesets
- oEmbed Responses
- User Requests
- Patterns
- Templates
- Template Parts
- Global Styles
- Navigation Menus
- Font Families
- Font Faces
- Taxonomies
- Custom Post Types
Advanced
The Advanced settings let you fine-tune technical tracking options, offering more control over how Matomo collects and processes analytics data.- Add <noscript → to track visitors without JavaScript: Enable/Disable.
- Adds a <noscript → tracking code to your site’s footer. This code is automatically generated or can be manually defined, depending on your selected tracking mode. It helps capture visits from users who have disabled JavaScript.
Screenshot 38: Settings → Tracking → General Tracking Settings
Conclusion
Exploring Matomo’s advanced reporting features gives you a complete, data-rich understanding of how visitors behave on your WordPress site. In this part, we covered the full set of behaviour, acquisition, e-commerce, and goals reports that help you evaluate performance, identify opportunities, and measure your most important outcomes. You now have a deeper view into the following:- Behaviour Reports
- Acquisition Reports
- E-commerce Reports
- Goals & Conversions
- Tag Manager
- Settings


