
Introduction
Visitors expect a smooth experience on your website, but broken links and 404 errors can disrupt that, harming your brand, conversions, and SEO.
When users encounter dead links, they’re likely to leave your site, increasing bounce rates and reducing conversions.
In this guide, we’ll walk you through the steps on how to find 404 errors and dead links in Google Analytics 4.
We find 404 links using these three methods
- Method 1: Using GA4 Engagement Reports
- Method 2: Using GA4 Custom Reports
- Method 3: Using GA4 custom events via Google Tag Manager
So let’s get started!
What is a broken link?
A broken link, commonly referred to as a 404 error, is a hyperlink that leads to a web page that no longer exists or cannot be found.
These pesky errors can occur for various reasons—maybe the page was moved or deleted, or the URL was entered incorrectly.
For example, if you try to access a page with the URL yourwebsite.com/blog/how-to-find-broken-links but the page no longer exists, you’ll encounter a 404 error.
Types of broken links
Hard Broken Links
A hard 404 error happens when a page doesn’t exist, and the server correctly shows a “Page Not Found” message with a 404 error code. This tells users and search engines the page is gone.
Soft Broken Links
Soft 404 occurs when a non-existing page still loads, but instead of showing a proper 404 error, it might redirect to the homepage or a custom “Not Found” page without the right error code. This can confuse search engines and impact your site’s SEO.
What Impact Do Broken Links Have on Your Website?
Broken links frustrate visitors, leading to poor user experience, reduced trust, and lost conversions. They negatively affect website SEO by signaling to search engines that your site isn’t well-maintained, which can lower rankings.
Additionally, broken links disrupt the flow of navigation, making it harder for visitors to engage with your content or complete desired actions. Fixing them is essential for maintaining a professional, functional, and search engine-friendly website.
How to set up Google Analytics 4 to track broken links
Method 1: Using GA4 Engagement Reports
In this method, we use the default reports tab under the main menu.
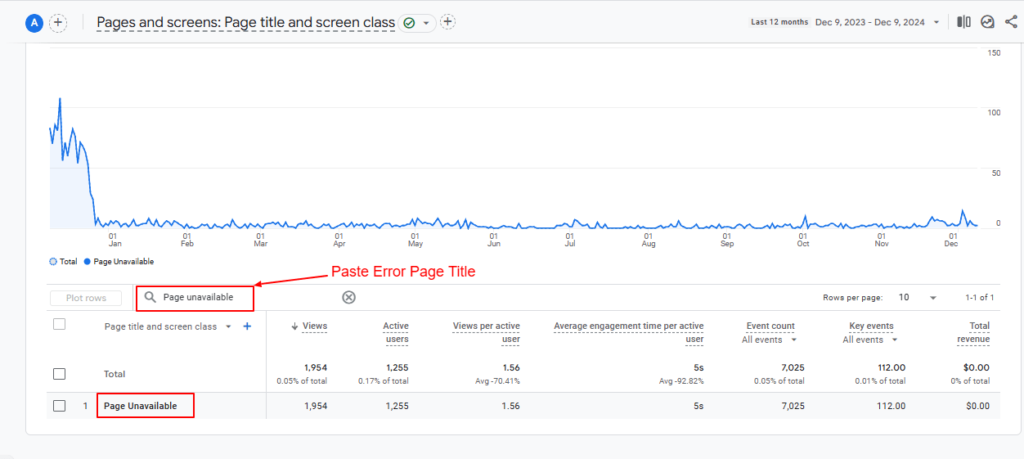
Step 1: Check the Page title of your website’s 404 Page
- First, find out the page title of your website’s 404 page.
- For this method, we use the Analytics account of Google Merchandise Store
- Enter the URL https://shop.merch.google/xyz and note down the 404 Page Title
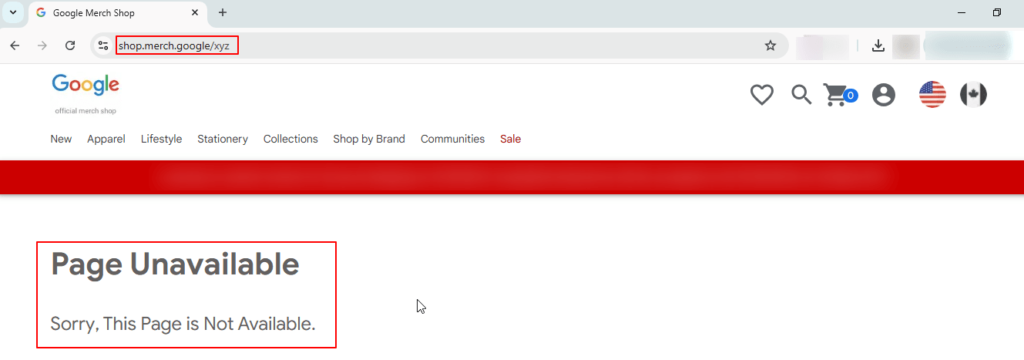
Screenshot 1: Google Merchandise Store Page Unavailable
- The title of the page says Page Unavailable.
- Check the page title of your website’s 404 web page. Page not found is a common page title of 404 error pages.
Step 2: Setup and engagement report in Google Analytics 4
- Login to Google Analytics 4 GA4
- Navigate to Reports.
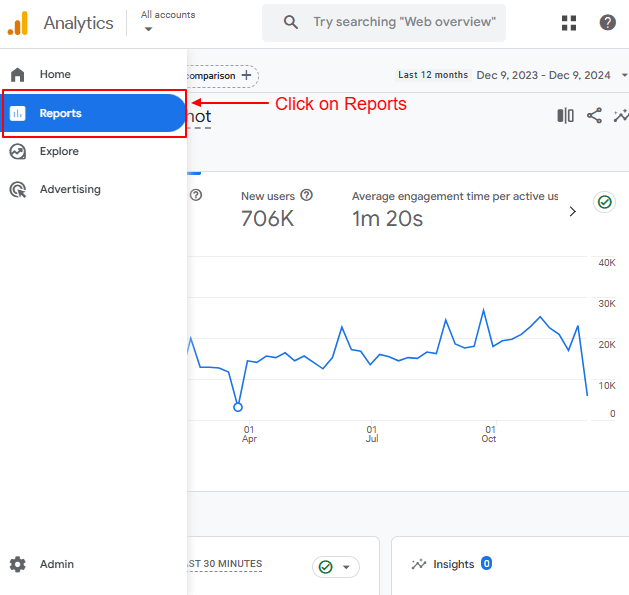
Screenshot 2: Click on reports
- Click on the Engagement dropdown and select Pages and Screens.
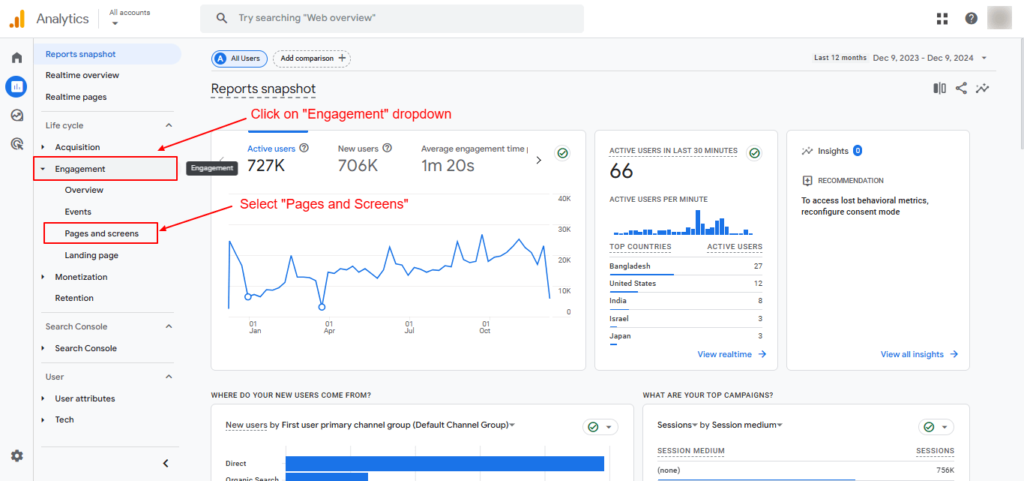
Screenshot 3: Select Pages and Screens
- After clicking on Pages and Screens the following report will appear, as shown in the screenshot below.

Screenshot 4: Pages and Screens Report
- Select the Page title and screen class.
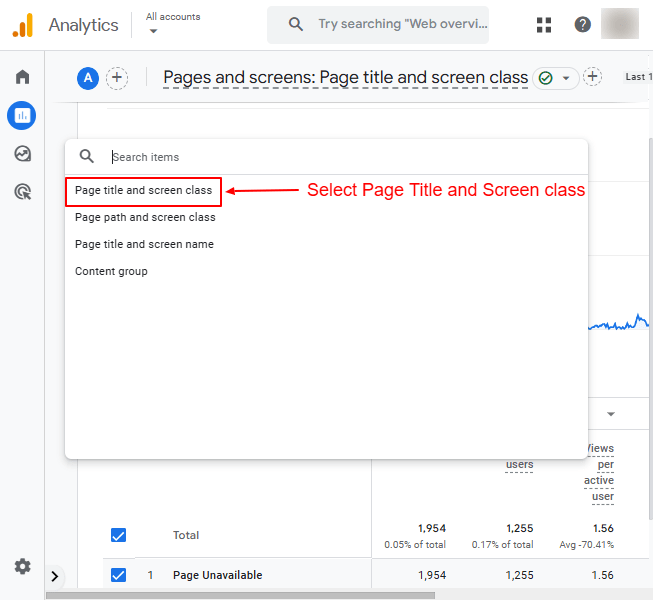
Screenshot 5: Select Page Title and Screen Class
- Click on the search bar as shown in the screenshot below.
- Type the page title of the 404 page, which is “Page Unavailable,” and press enter.
Screenshot 6: Paste the Page Title of the 404 page
- At this step, we got aggregated data of 404 pages.
- Click on the “+” icon as shown in the screenshot below and add a secondary dimension to the Page path and screen class.
Screenshot 7: Click on the “+” Icon
- Select the Page path and screen class as shown in the screenshot below.
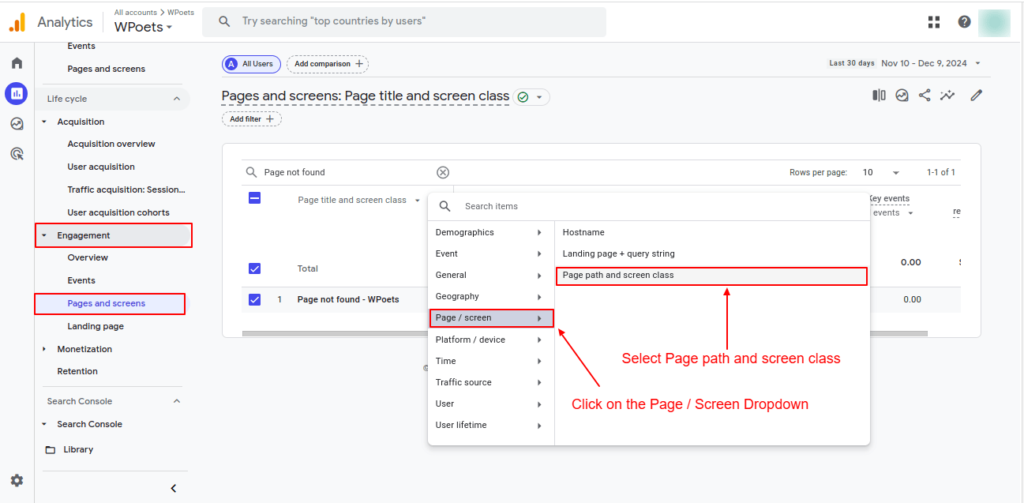
Screenshot 8: Select Page path and screen class
- Once it’s done, you will see the list of 404 pages with the URLs shown in the screenshot below.

Screenshot 9: Ga4 engagement report List of 404 Pages with URLs
Method 2: Using GA4 free form exploration technique
In this method, we use the free from exploration report tab under the explore menu.
Step 1: Create a free from exploration
- Logging in to your Google Analytics account
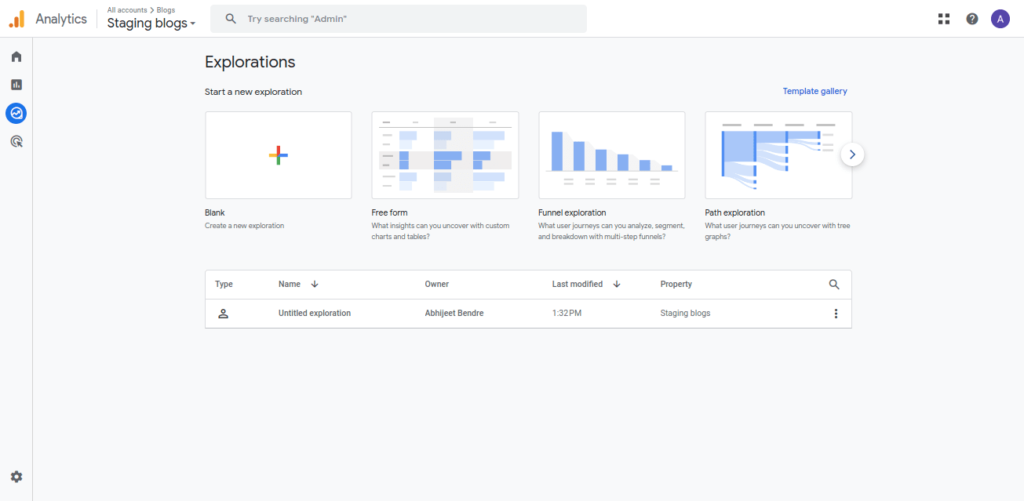
- To start a custom report, click on the Exploration tab on the left-hand side
- Click on the blank Exploration to start a new exploration.
Screenshot 10: Blank Exploration Report
Step 2: Add Dimensions
- Let’s add Dimensions by clicking on the “+” icon.
- On the search bar, type Page.
- Select the following Dimensions and add it to Rows
- Page path and screen class
- Page title
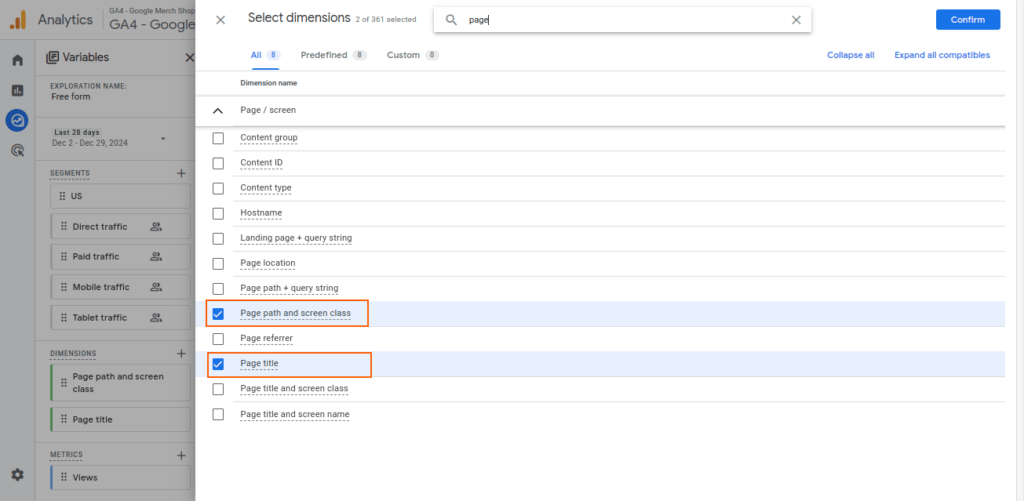
Screenshot 11: Select Dimensions
- Now drag and drop or select the Dimensions from the Variable Tab to Rows in the Settings Tab.
Screenshot 12: Drop the Dimensions In Rows
Step 3: Add Metrics
- We will now head over to the Metrics, and add the view metric
- As we added the Dimensions do the same for the Metrics by clicking the “+” icon and then clicking on Confirm.
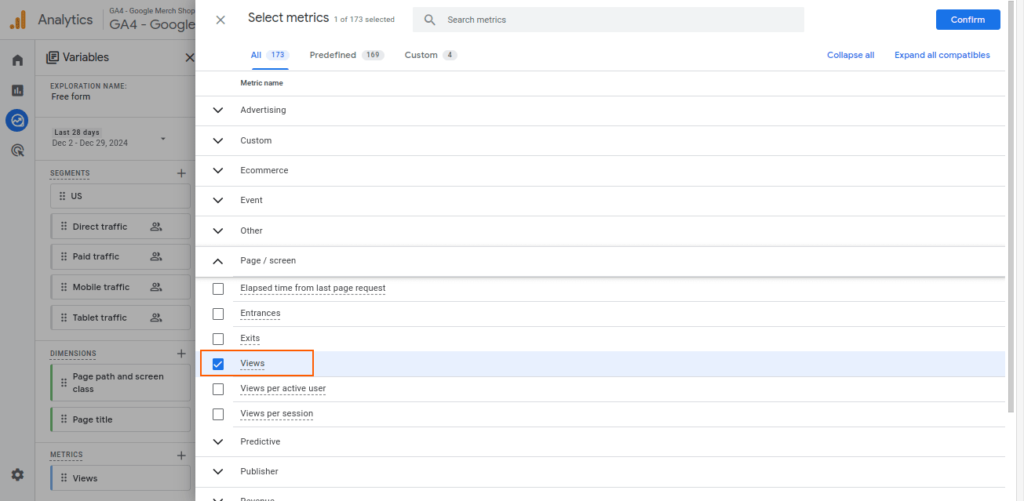
Screenshot 13: Select Views Metrics
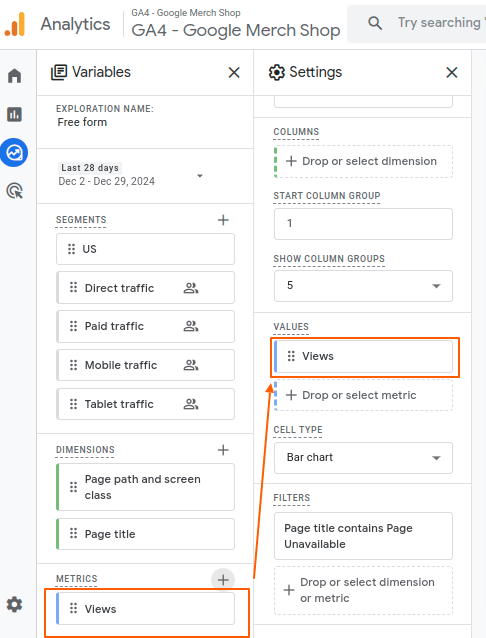
Screenshot 14: Drop the Views metrics in Values
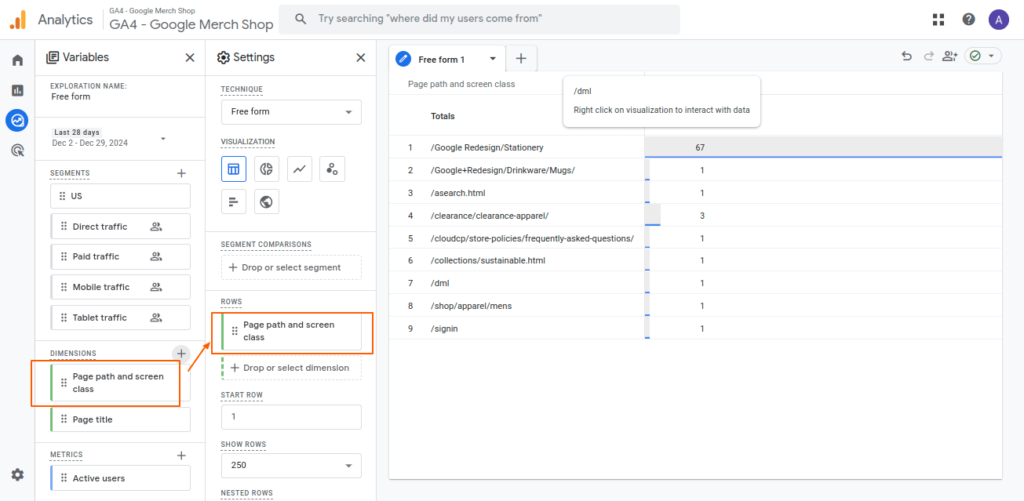
Step 4: Filter Data
- Next, we will filter the report by using Filters.
- Select the Page Title in Filters. Select match type as contains.
- In Enter expression text box, type the error page title. GA4 will autocomplete the text, and you will get a drop-down list of pages.
- Select Page unavailable and click Apply.
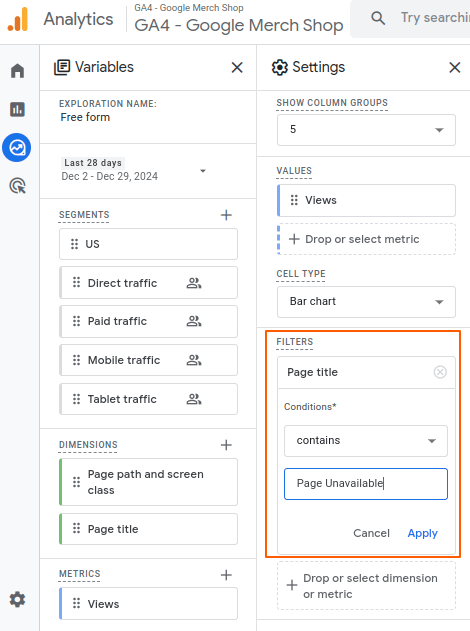
Screenshot 15: Apply filters
- Below we will get the Final Custom Report of the Exploration.
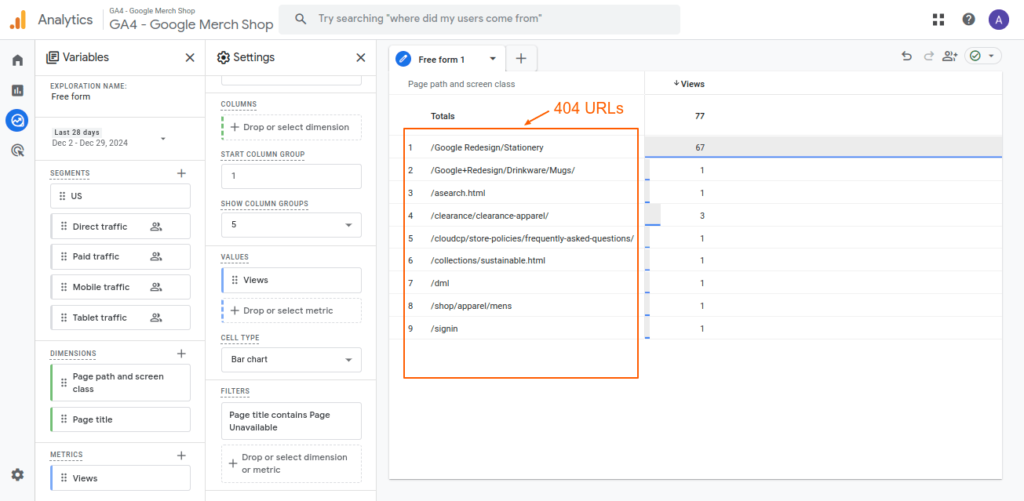
Screenshot 16: 404 URLs in free form reports
Method 3: Using GA4 custom events via Google Tag Manager (GTM)
- This method uses the Google Tag Manager data layer to send a custom event to GTM.
- A few pre-requirements are that you must have installed GTM on your website and configured it. You can use Google Sitekit WordPress plugin to install GTM.
Step 1: Push a custom 404 event to the Google Tag manager
- First, let’s push a custom event to Google Tag Manager (GTM) to track 404 errors.
- To do that first, we have to add a custom script to the functions.php file in the WordPress theme. For this tutorial, we are using the WordPress Twenty Twenty-four theme.
- A few things to consider when adding custom code to your theme
- We recommend adding custom code to the child theme’s functions.php file instead of the parent theme’s functions.php.
- To know more about creating a child theme, go through the Themes Handbook.
- Before making any changes to your site we recommend, that you should always back it up.
- At the minimum, you should make a copy of your child theme’s functions.php (if you have already created it and edited it) since we are modifying it. If something goes wrong when you are adding code to it, then you can restore it.
- Here is a script to add to your WordPress child theme‘s functions.php
- An add_404_custom_event callback function is added to the wp_head hook. The script below will be added to the HTML head tag.
<?php add_action( ‘wp_enqueue_scripts’, ‘theme_enqueue_styles’ ); function theme_enqueue_styles() { $parenthandle = ‘twentytwentyfour-style’; $theme = wp_get_theme(); wp_enqueue_style( $parenthandle, get_template_directory_uri() . ‘/style.css’ ); wp_enqueue_style( ‘child-style’, get_stylesheet_uri(), array( $parenthandle ) ); } add_action( ‘wp_head’, ‘add_404_custom_event’ ); // Code for sending custom event to data layer function add_404_custom_event() { // Ensure the script runs only on 404 pages if (is_404()) { ?> <script> wiindow.dataLayer = window.dataLayer || []; window.dataLayer.push({ ‘event’ : ‘page_not_found_404’ // Name it whatever you like }); </script> <?php } // is_404 check } |
- Inside the function, we first check if the page is a 404 page. If yes, we push a custom event page_not_found_404 to the data layer of GTM.
- Once you have added the above code in the functions.php file, save it and upload it to the child themes folder.
- Next, head over to your Google Tag Manager’s Overview tab.
- Click on the preview button on the toolbar, as shown in the following screenshot below.
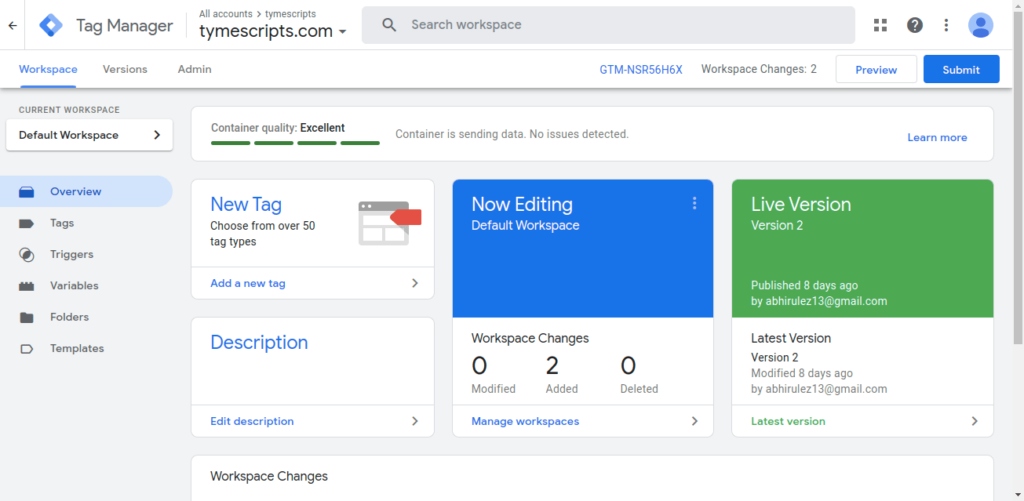
Screenshot 17: Click on the Preview button
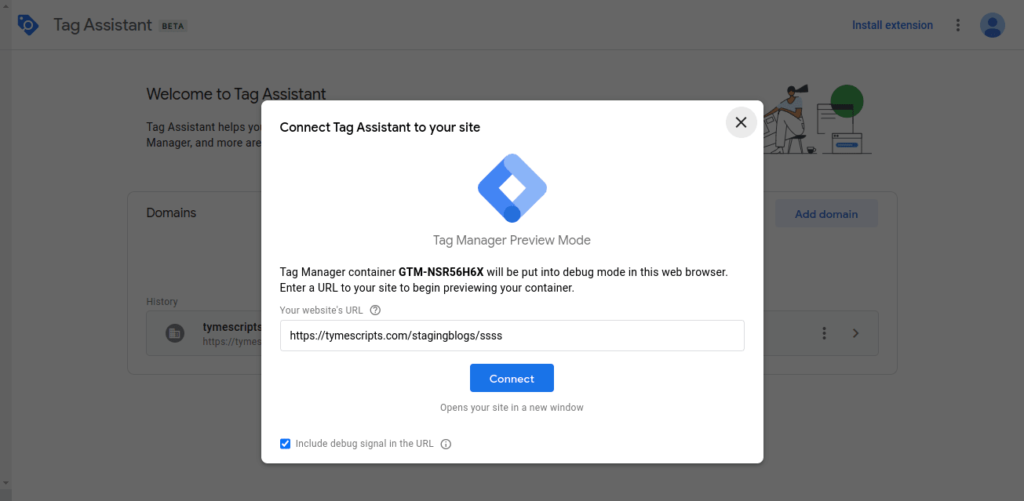
Screenshot 18: Tag Manager Preview Mode
- In the Your website’s URL textbox, enter the 404 error URL; for example, add ssss to your base URL, for e.g. yourwebsite.com/ssss
- Uncheck the checkbox; include a debug signal in the URL.
- Click on Connect. This will open the entered URL in a new window, as shown in the below screenshot (number)
- Note : Ensure you are not logged in as a WordPress user since the Google Sitekit plugin excludes logged-in users from tracking in Google Analytics 4 and GTM. Hence the custom event will not be fired and will not be available in Datalayer.

Screenshot 19: Tag assistant connected page in New Window
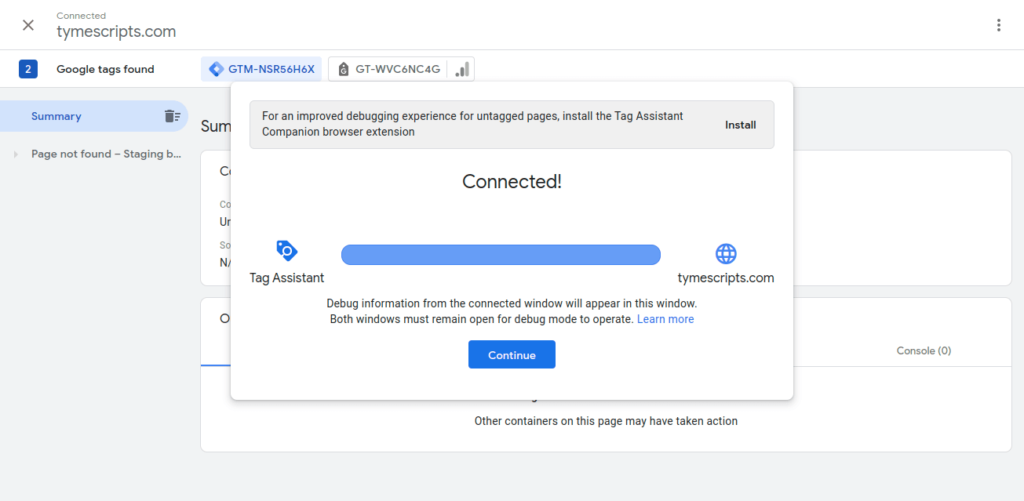
Screenshot 20: Tag manager connected Dialog box
- Once Tag assistant is connected, click on the Continue button
- On the summary pane of the tag assistant screen, you will see the custom event fired.
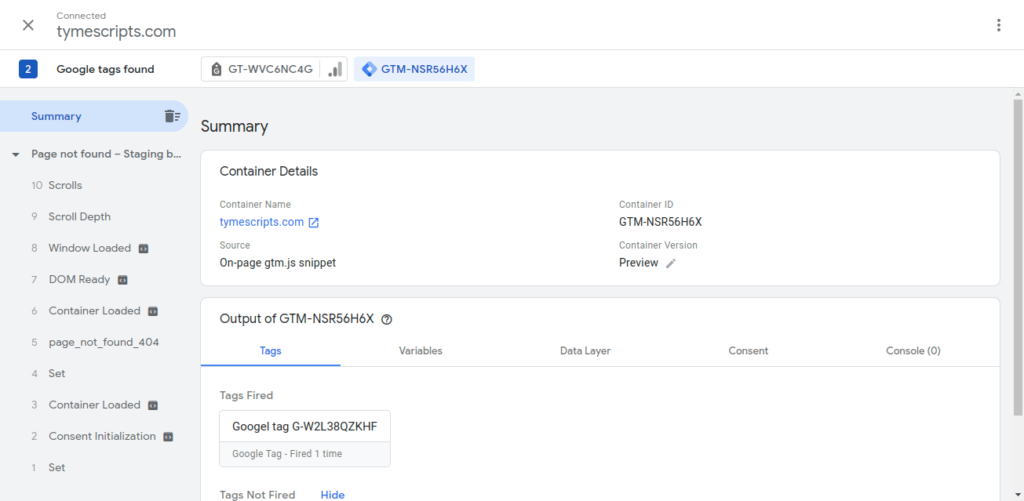
Screenshot 21: page_not_found_404 event
Step 2: Send the 404 custom event to GA4 using the trigger
- Go to the Trigger menu in the Google Tag Manager
- Click on the New Button to create a trigger
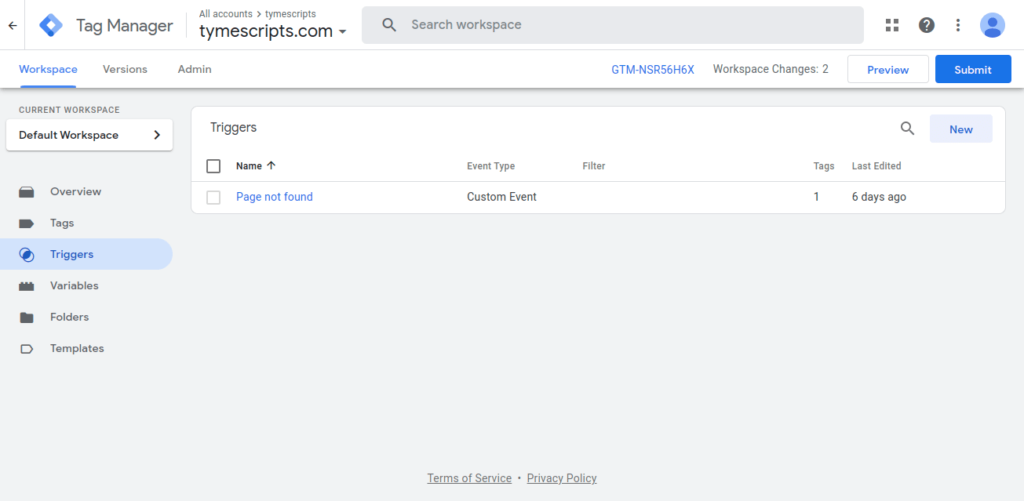
Screenshot 22: GTM Workspace Triggers
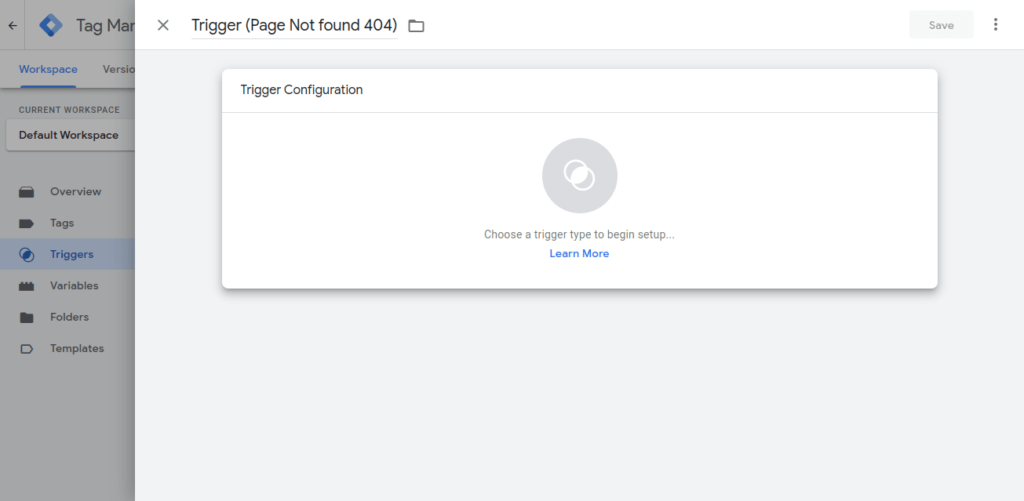
Screenshot 23: Name the Trigger
- First, name the Trigger something descriptive. For example, Trigger (Page Not Found 404)
- Next, click anywhere on the Trigger Configuration section to enable edit mode.
- A Choose trigger type overlay panel will open up. Scroll down to the Other event group and select Trigger Type as Custom Event.
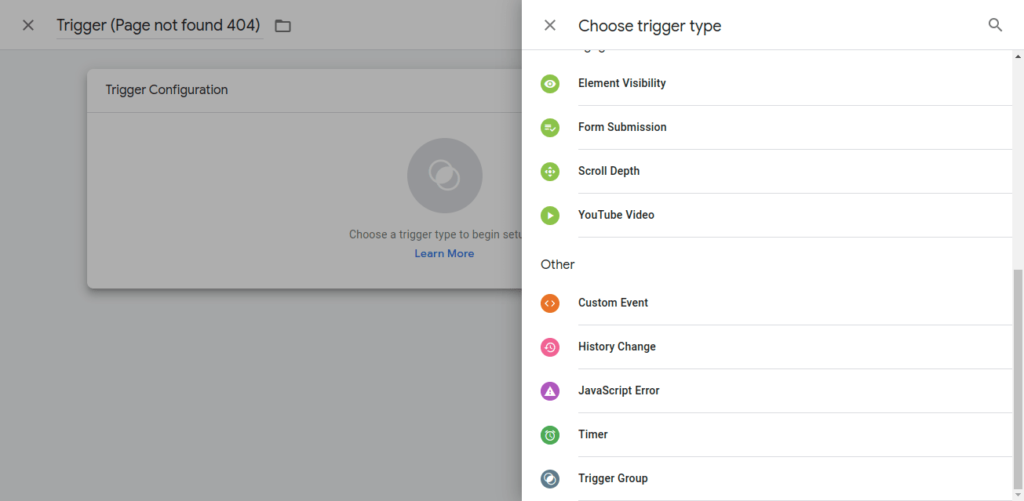
Screenshot 24: Set Trigger Type as a custom event
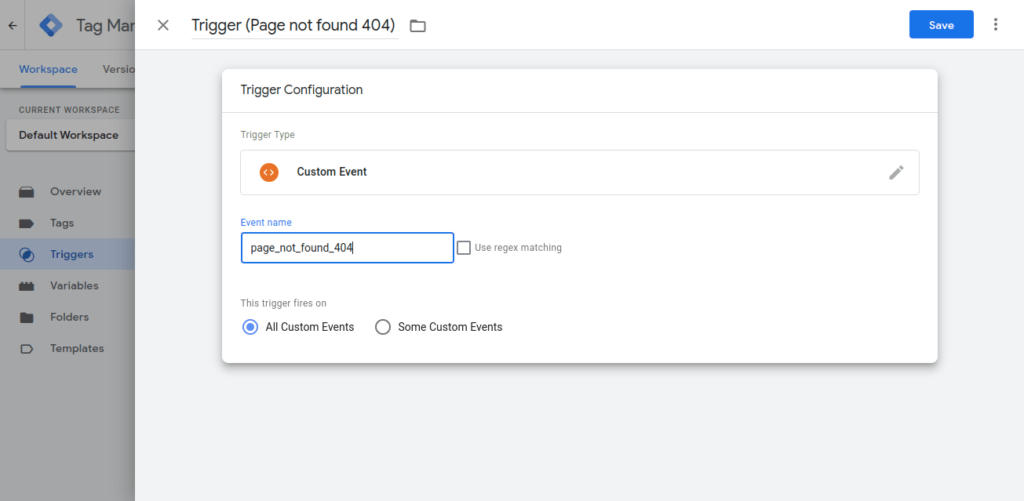
Screenshot 25: Trigger event as page_not_found_404
- Enter the event name that you have added in the data layer (page_not_found_404).
- Keep the radio selection of trigger fires on to All custom Events.
- Click on the Save button.
- Note: This step is crucial; make sure the event name you enter here exactly matches the event name that you pushed using the data layer push function.
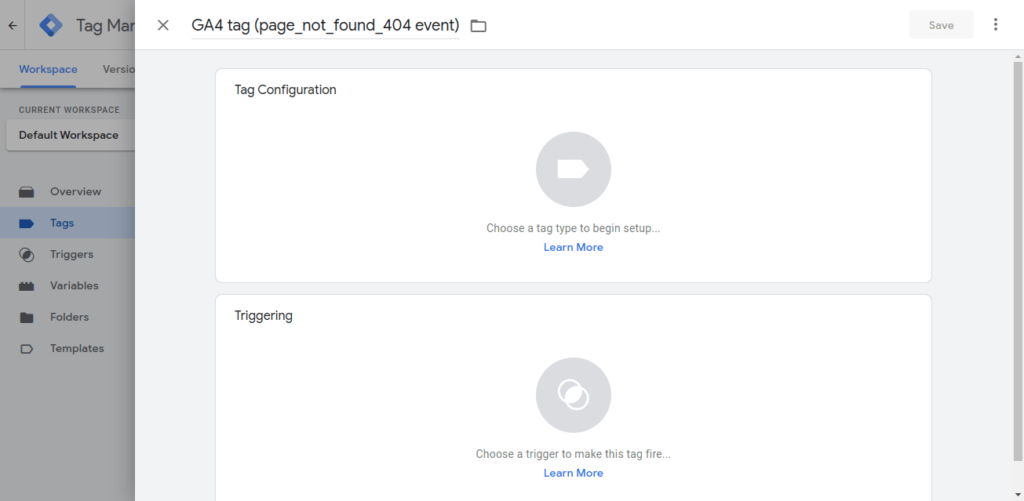
Step 3: Setup a GA4 Event tag to send the custom event to Google Analytics 4
- Head over to the tags sub-menu in the Tag Manager
- Click on the new button to create a new tag
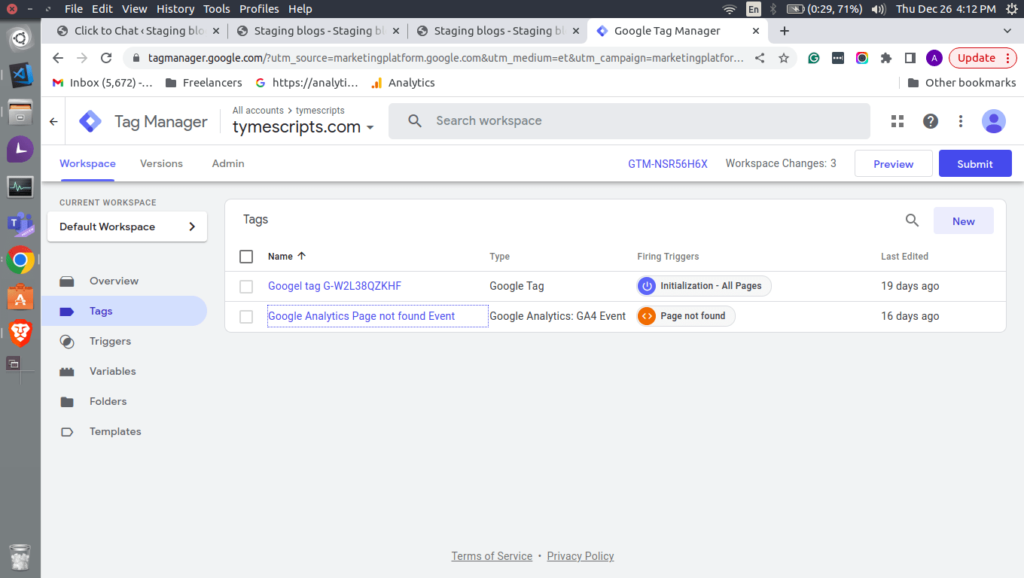
Screenshot 26: Create a new Ga4 event Tag
- Name the tag to something relevant. For e.g GA4 tag (page_not_found_404 event)
- Next, click anywhere on the Tag Configuration section to enable edit mode.
Screenshot 27: Click on the Trigger Configuration section to enable edit mode.
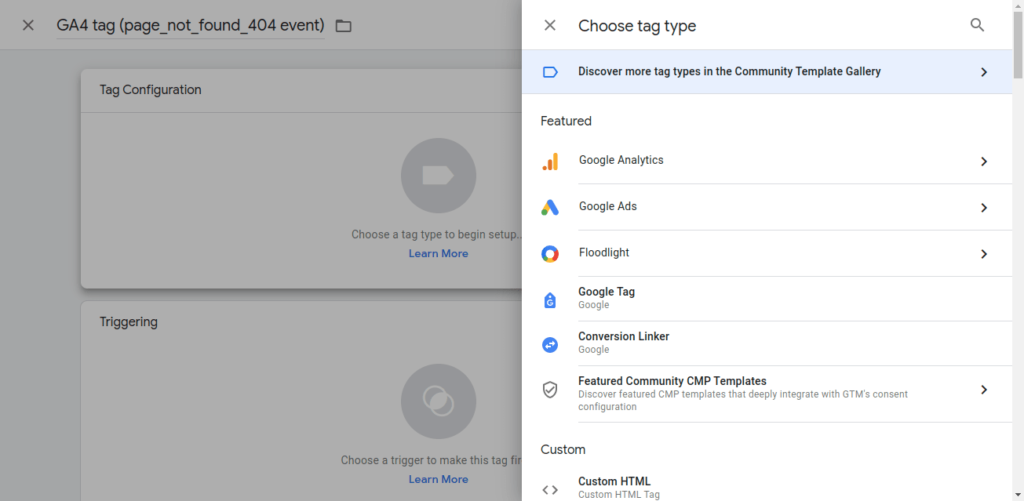
Screenshot 28: Choose tag type Google Analytics

Screenshot 29: Select Google Analytics: GA4 Event tag
- Enter the measurement ID of the Google Analytics Web stream to which you want to send the custom event.
- Enter the event name, as page_not_found_404
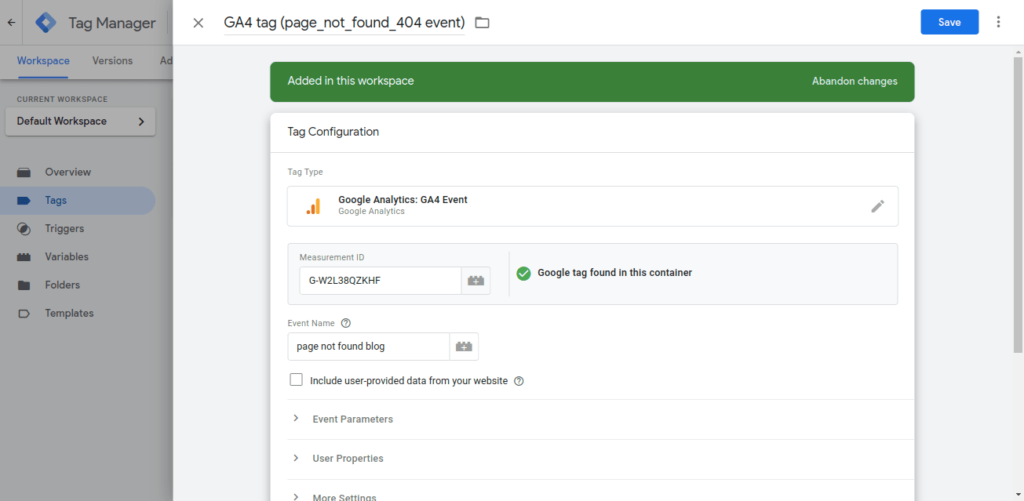
Screenshot 30: Enter the measurement Id of the GA4 web stream
- Choose the trigger that we created in Step 2. To do that, click anywhere on the Trigger section to enable edit mode.
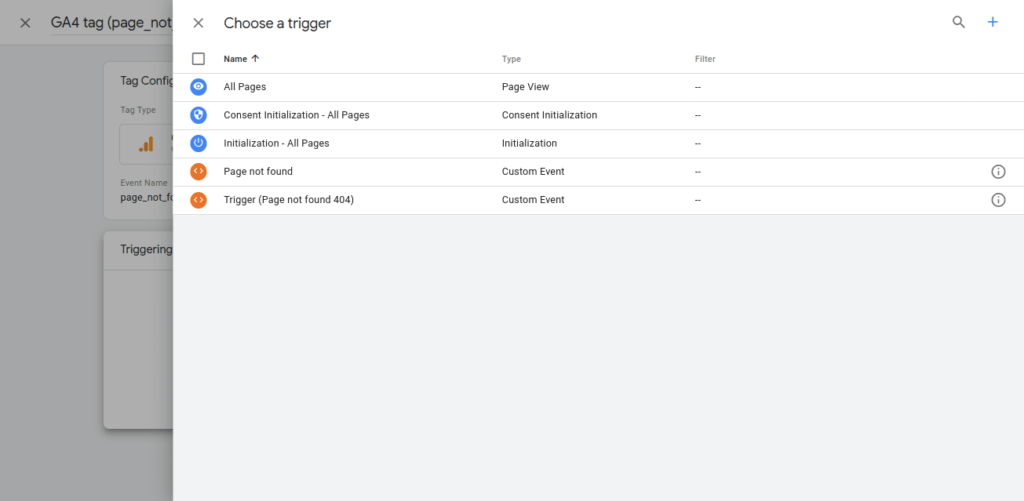
Screenshot 31: Choose a trigger
- Once the trigger is added, click on the Save button.
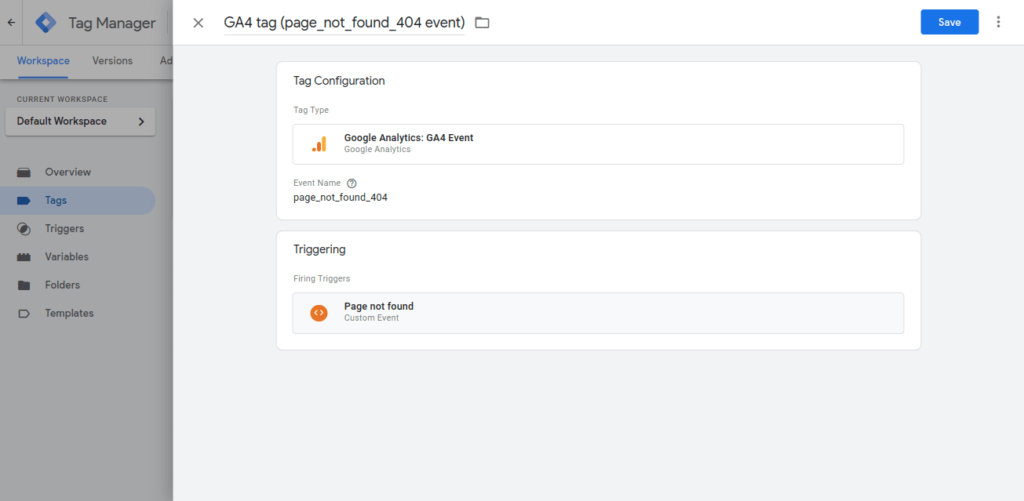
Screenshot 32: Page not Found trigger
Step 4: Test the custom GA4 event tag in the debug view
- Go to the Admin menu.
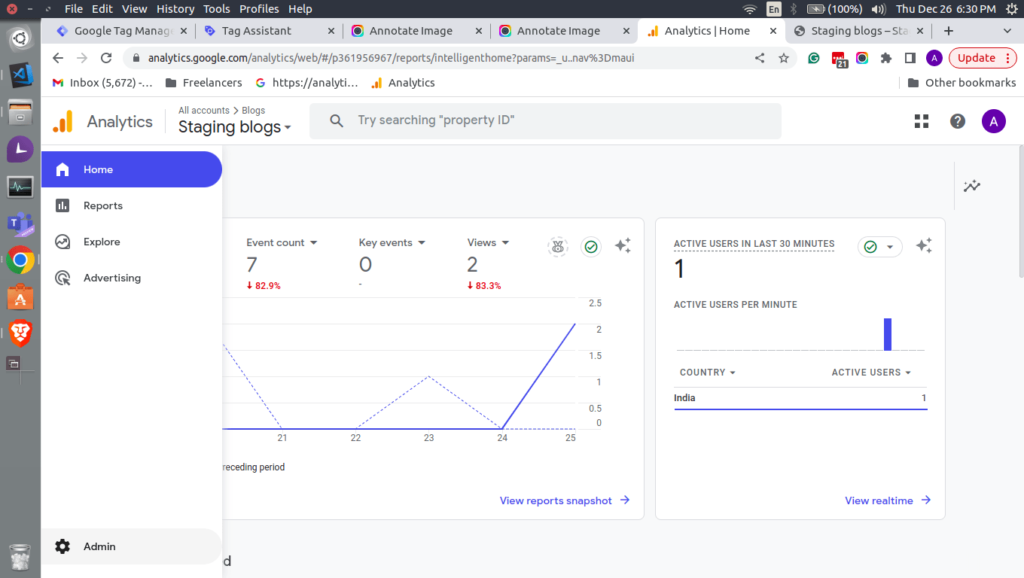
Screenshot 33: Admin menu of Google Analytics 4
- Next, head over to Data Display > DebugView. You will see the newly custom event page_not_found_404.
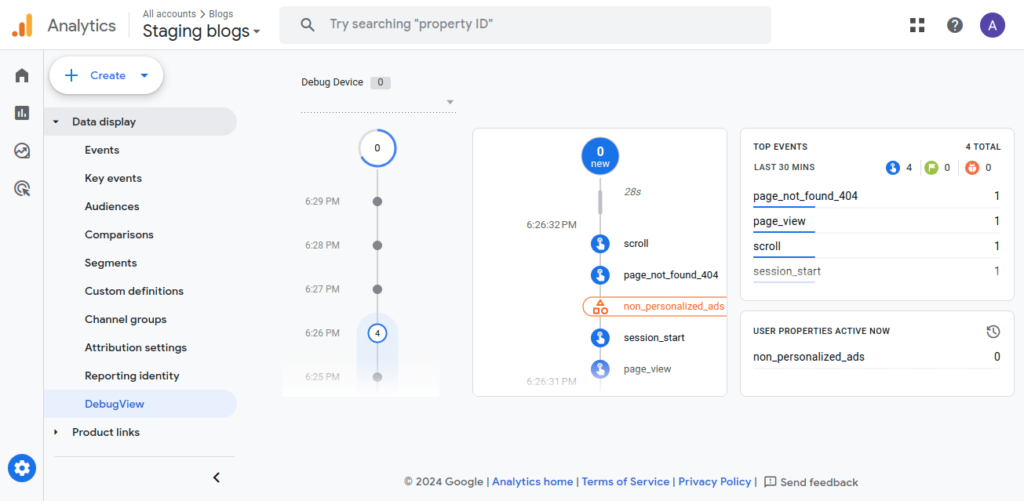
Screenshot 34: page_not_found_404’ event DebugView
- If everything works fine, publish your changes in Google Tag Manager by clicking the Submit button in the top right corner.
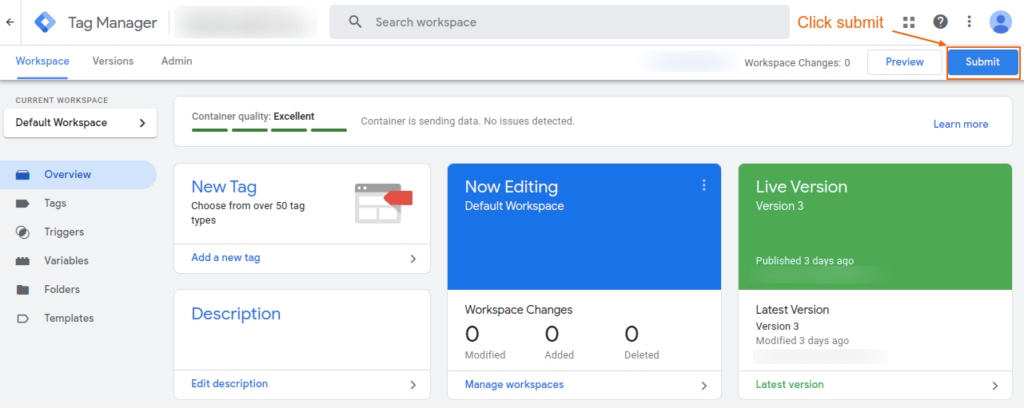
Screenshot 35: Submit workspace changes
- A Submit Changes overlay panel will show up.
- Enter the version name for e.g. Workspace version (Page not found) along with the description.
- Click on the Publish button.
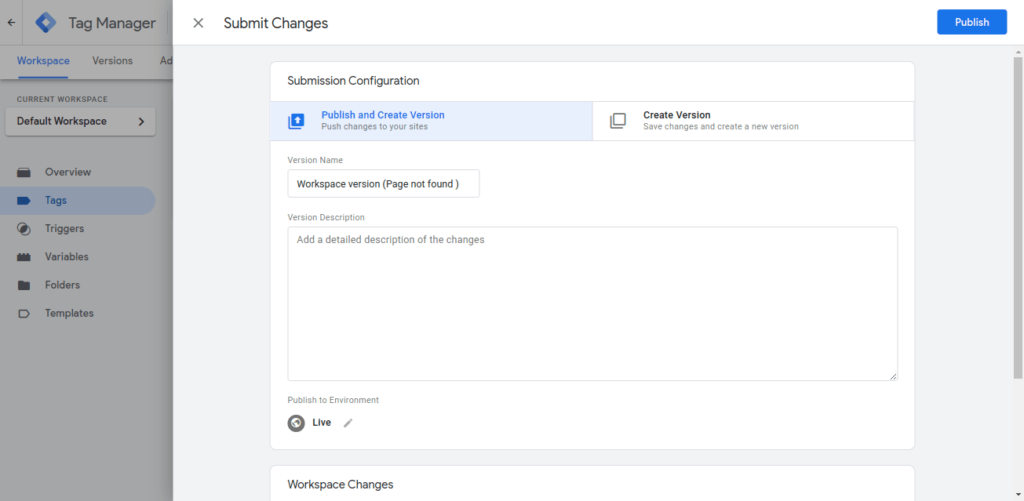
Screenshot 36: Save Submission configuration
- When the changes are submitted, you will see a Version Summary slide over panel, as seen in the screenshot below.
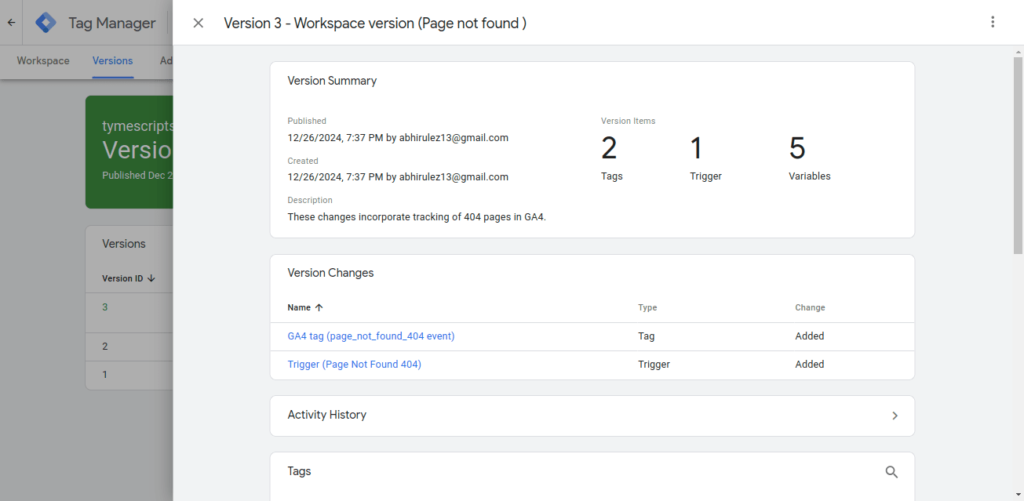
Screenshot 37: Version Summary of Published Workspace changes
- That’s it. You have now added a custom event for 404 and sent it to the Google tag manager. Whenever a 404 page is hit, it will send a custom event, and we will use it to create reports for 404 links.
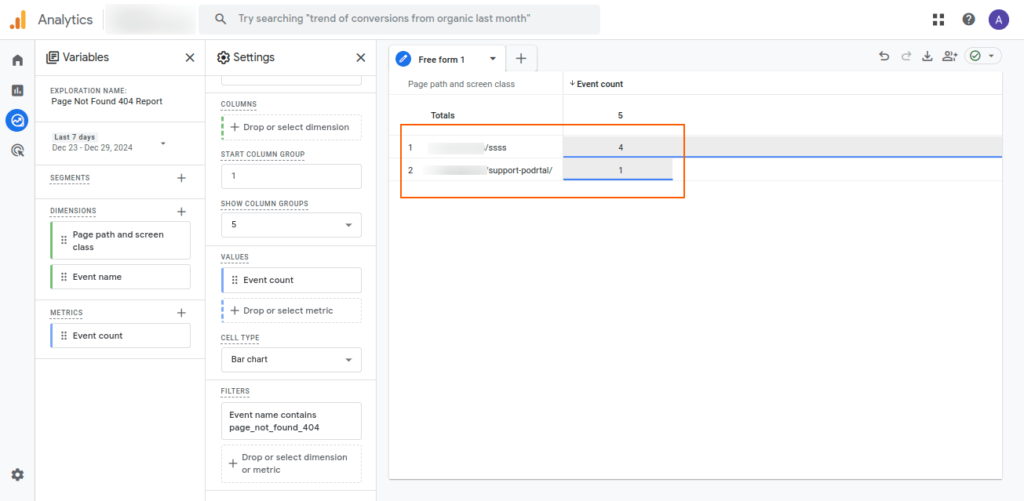
Step 5: Create a free form report in GA4 to view 404 pages
Screenshot 38: Explore menu in Google Analytics 4
- Click on Explore menu in Google Analytics 4.
- Choose Free Form Exploration.
Screenshot 38: Free form Exploration
- Name the exploration for e.g. Page Not Found 404 Report
- Add the Dimension to the Rows
- Page path and screen class
- Event Name
- Add Metrics to the Values
- Event Count
- Add filter
- Dimension: Event Name
- Condition: exactly matches
- Expression: page_not_found_404

Screenshot 39: GA4 GTM 404 variables and settings URLs
Screenshot 40: Page not found 404 links report
- That’s it we can see page not found URLs in the Free Form report.
Conclusion
In Method 1 and Method 2, we found 404 errors using the Page title of the 404 error page, and in Method 3, we pushed a custom event to the Data layer of Google Tag Manager, which is then sent to GA4 using triggers whenever a 404 error page is found.
By regularly monitoring for broken links, you ensure that every visitor enjoys a frustration-free experience. An error-free website isn’t just good for your users—it’s great for your business.
Published on Jan 7, 2025 | Updated on Jan 16, 2026
Author

Abhijeet Bendre
Author
|
Reviewer

Savita Soni
Reviewer
|