Whether you own a blog, an online store, or a corporate site, having a website means wanting to know as much about visitor analytics data as possible. It’s essential to track how many visitors are there, from where they are coming, what activities they are doing on your website, and how to enhance their website visit.
Oh! Don’t worry; Factors AI tackles all of these questions.
With the help of an advanced analytics tool like Factors AI, you can now understand more than just visitor counts. It allows you to know where interactivity dips and what keeps customers engaged. The insights offered definitely help you exercise better judgment, which leads to improving your metrics and customer experience.
Integrating Factors AI with WordPress can be done in two ways:
- With Plugin: Simply download the plugin and enjoy all that Factors AI has to offer, no coding required!
- Without Plugin (Custom Code): This one is a bit more tricky but preferred by users who love having a leaner version of their websites, and it is customizable.
In this guide, let us explore both methods step by step.
Pre-requisites
Before you can install Factors AI on your WordPress website, there are a few things you’ll need to have ready.
A Factors AI Account
You begin by creating an account at Factors AI. If you don’t have an account yet, here’s how you can create one:
- Go to the Factors AI website.
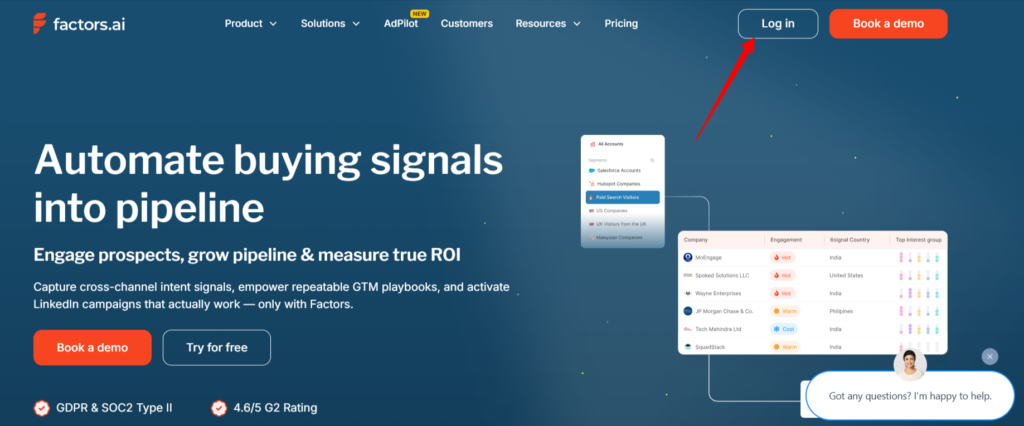
Screenshot 1: Factors AI Website
- Click the Log in button. If you already have an account, enter your login credentials. If you don’t have an account, click on Sign up.
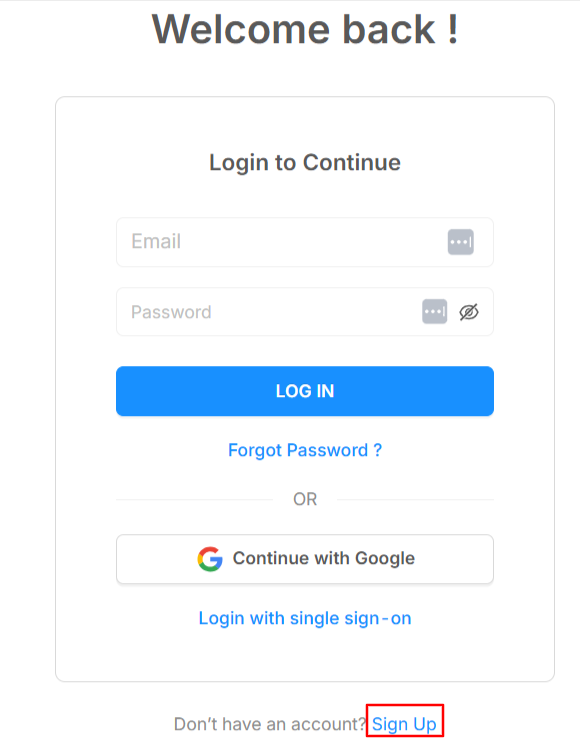
Screenshot 2: Create an Account at Factors AI
- Enter your email address. Make sure you only use your work email, as Factors AI does not accept personal email addresses.
- Follow the setup instructions, like filling out your name and phone number to create your account.
Connect Factors AI with Your Website
Next, you have to connect your website to Factors AI.
Create a New Project: This tab will gather information about your Project Name, display by default your company’s domain, and your preferred time zone. You can also upload your company’s logo to get a more professional look. Click on Create and continue to proceed.
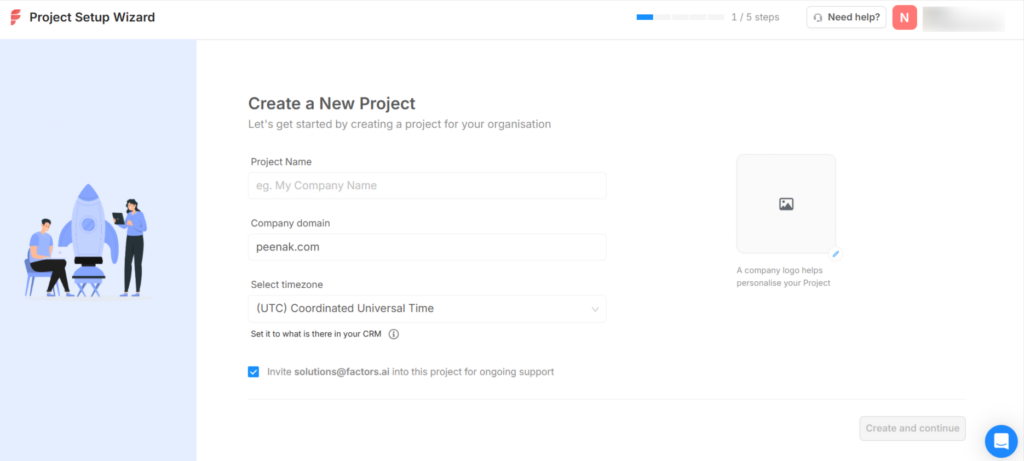
Screenshot 3: Enter your Company Details
Connect With Your Website: This step is about integrating Factors AI with your website so that it can start tracking visitor activity. You have three ways to do this:
- Using Google Tag Manager (GTM): Recommended (Easier)
- Manual Setup: Adding the script directly to your site’s code
- Using a Customer Data Platform (CDP) like Segment or RudderStack
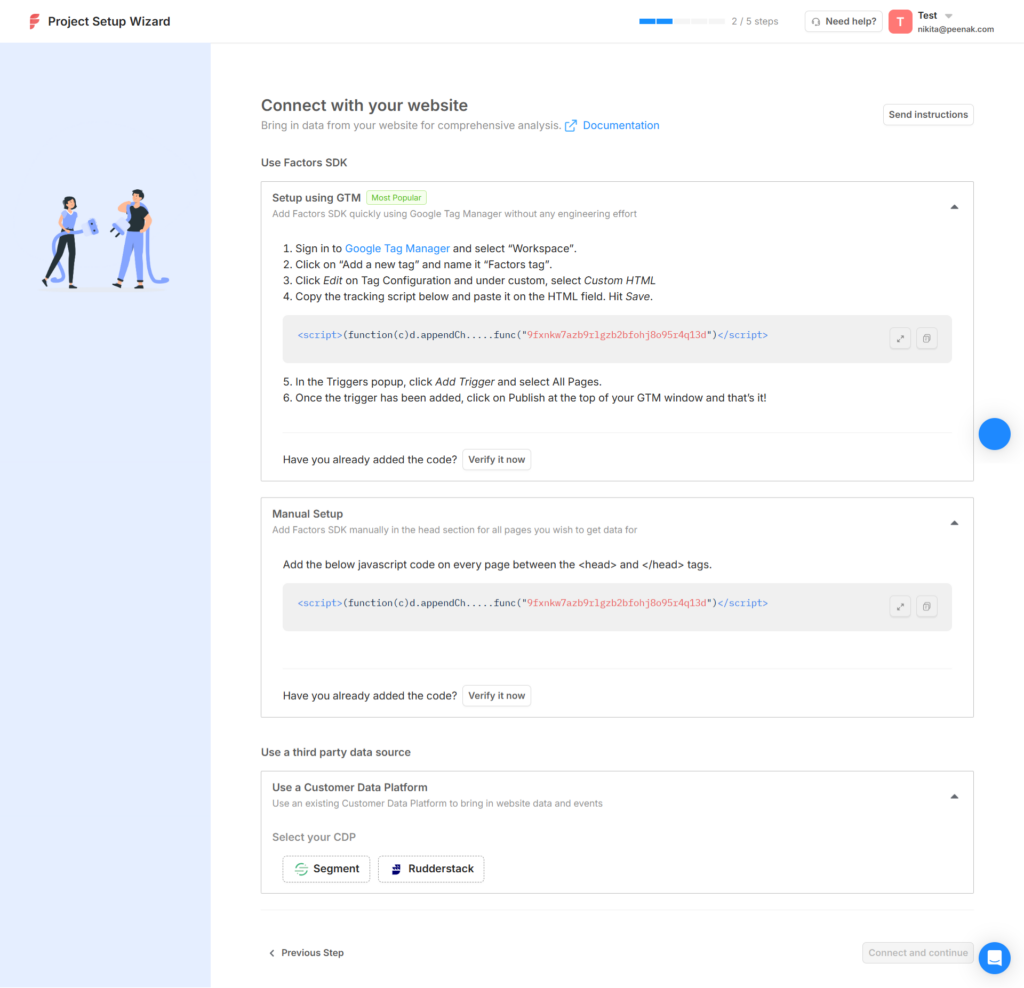
Screenshot 4: Ways to Connect Factors AI with Your Website
You can select any one option to connect your website.
We’ll cover connecting your website to Factors AI in the coming sections of the blog.
Method 1: Installing Factors AI With WPCode Plugin
For this, go to your WordPress Admin Dashboard.
Install the WPCode plugin, which allows for the insertion of code snippets.
Go to Code Snippets> Add Snippet > Add Your Custom Code (New Snippet) > Select Javascript > Add Factors SDK.
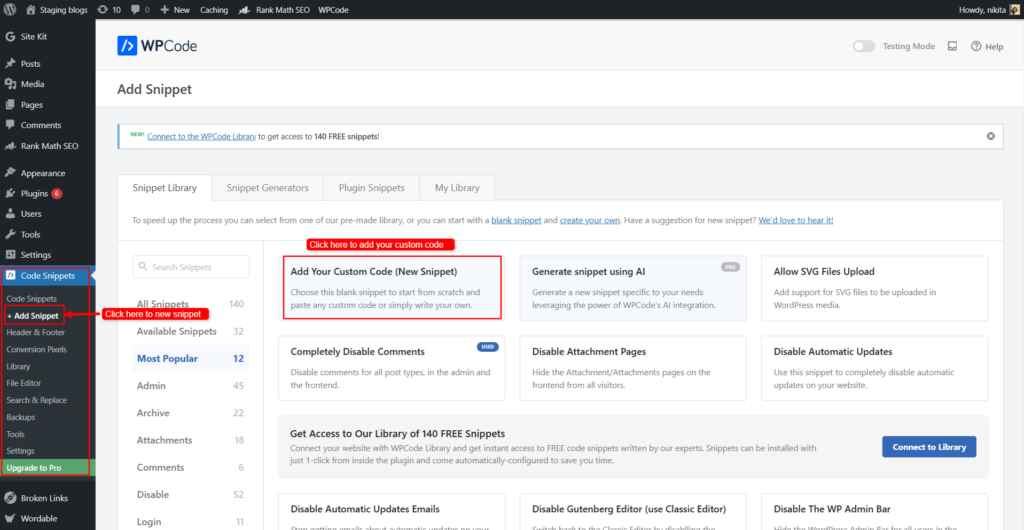
Screenshot 5: Select Add Snippet
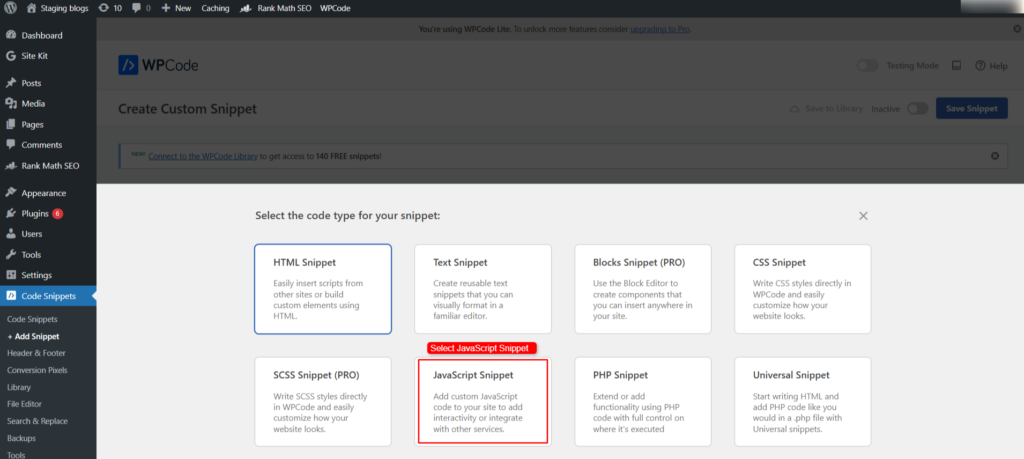
Screenshot 6: Select Javascript Snippet
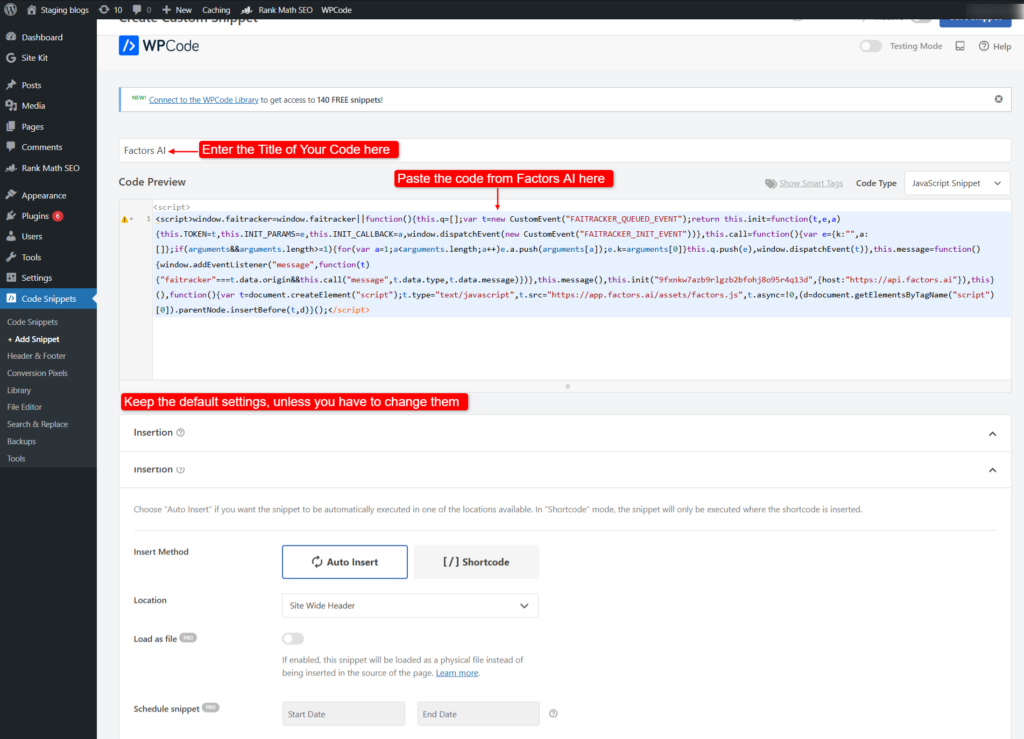
Screenshot 7: Add Factors SDK
Make sure the button is Active.

Screenshot 8: Set the Active Button
Click on Save Snippet.
Go back to the Factors AI website- Connect with Your Website page.
Please click ‘Verify Now’ to verify the connection of your website to Factors AI, irrespective of the integration method used.
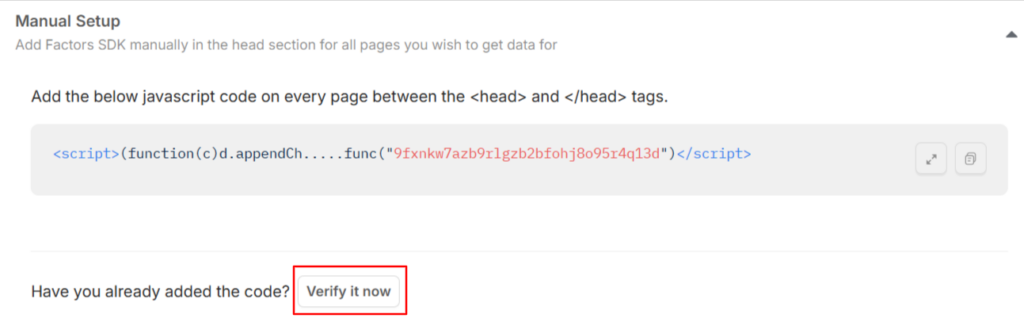
Screenshot 9: Click on Verify it Now
You’ll get the message “Verified. Your script is up and running.”
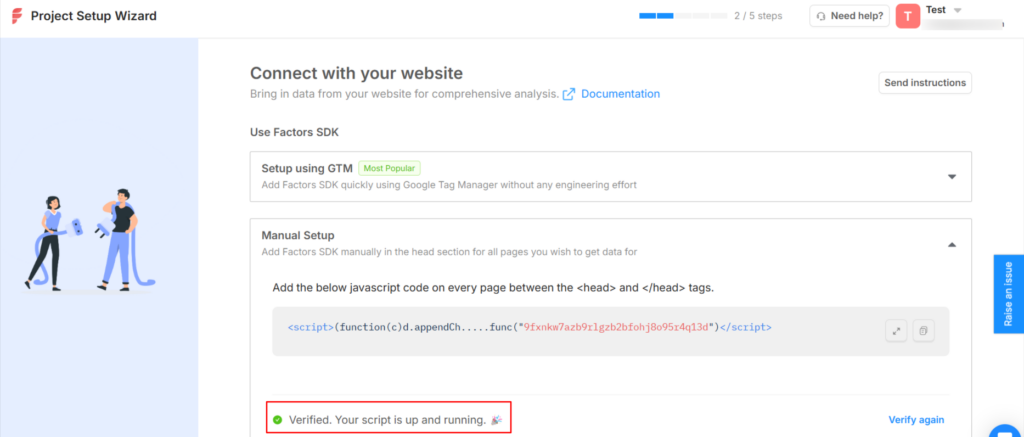
Screenshot 10: Script is Verified
Click on Connect and Continue.
Method 2: Installing Factors AI on your WordPress Without a Plugin (manually adding code)
You already have the Factors SDK code. Now, just manually place this code in your website’s header section.
Here are a few things to keep in mind when manually adding code:
- Use a Child Theme: It’s best to add the FActors AI code to your child theme instead of the parent theme. If you don’t have a child theme installed, follow this tutorial to create one.
- Back Up Your Website: Before making any changes, always back up your site. Check out this blog on how to back up a WordPress website. At a minimum, create a copy of your child theme’s header.php or functions.php file since these will be modified. This ensures you can restore your site if anything goes wrong.
- Technical Expertise Recommended: Manual code installation is recommended only if you have the necessary technical skills to handle the code.
Option 1) Installing Factors AI by adding SDK to the header.php file (recommended for developers)
Note: This method will work only on Legacy Themes and not on Block Editor Themes.
- Access your website’s WordPress dashboard. Go to Appearences> Theme File Editor.
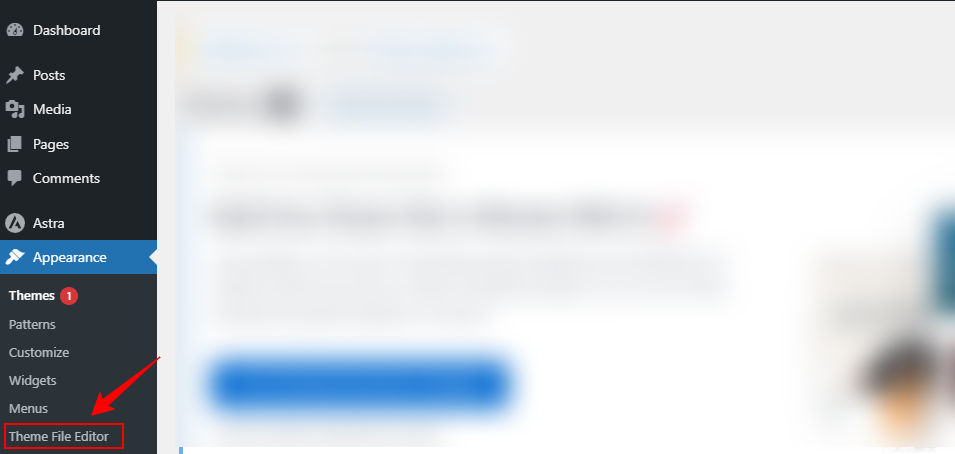
Screenshot 11: Select Theme File Editor
- Locate the header.php file in the right sidebar (choose header.php of the child theme).
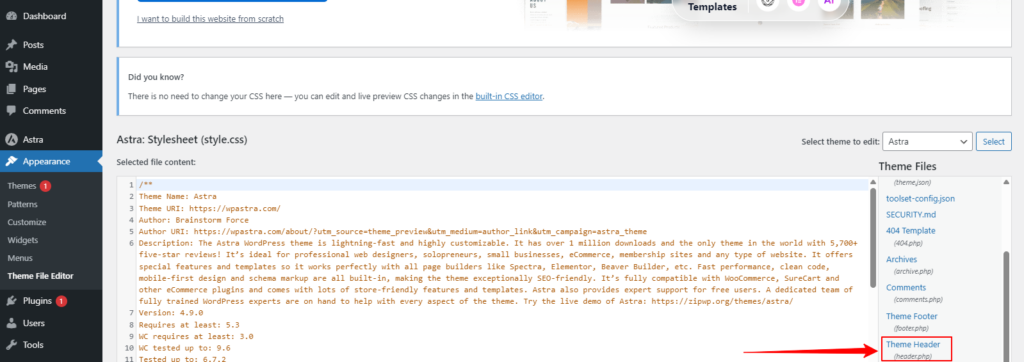
Screenshot 12: Locate header.php file
- Paste the copied SDK code snippet just before the closing </head> tag.
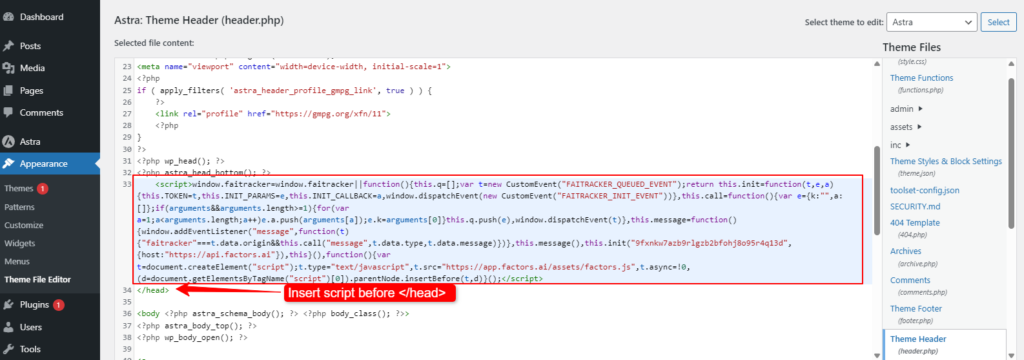
Screenshot 13: Insert Script
- Save the changes and publish or update your website to ensure the SDK is active.
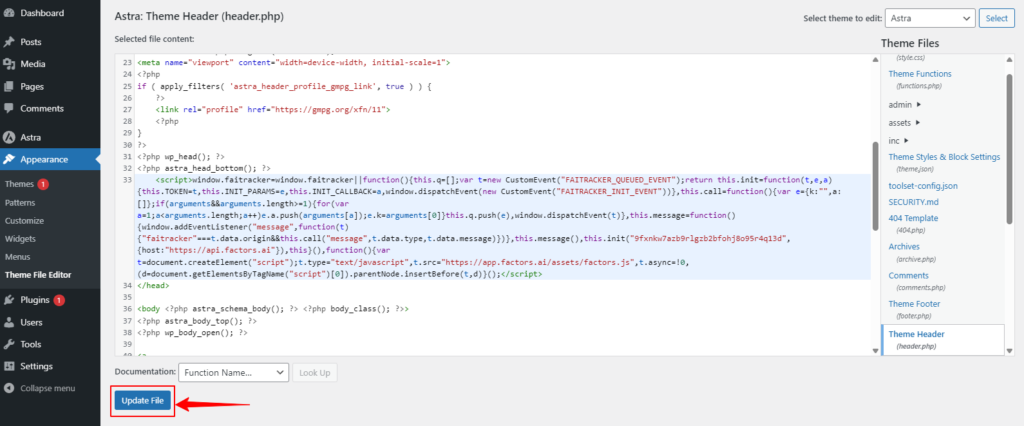
Screenshot 14: Update File
After installation, complete the verification process by following the same procedure as mentioned above.
Option 2) Adding the Factors AI Code via the functions.php File (Best for Developers)
- Open your child theme’s functions.php file using a code editor. For more details about the functions.php file, refer to this blog.
- Paste the Factors AI code snippet (copied from the previous step) at the end of the file.
| <script>window.faitracker=window.faitracker||function(){this.q=[];var t=new CustomEvent(“FAITRACKER_QUEUED_EVENT”);return this.init=function(t,e,a){this.TOKEN=t,this.INIT_PARAMS=e,this.INIT_CALLBACK=a,window.dispatchEvent(new CustomEvent(“FAITRACKER_INIT_EVENT”))},this.call=function(){var e={k:””,a:[]};if(arguments&&arguments.length>=1){for(var a=1;a<arguments.length;a++)e.a.push(arguments[a]);e.k=arguments[0]}this.q.push(e),window.dispatchEvent(t)},this.message=function(){window.addEventListener(“message”,function(t){“faitracker”===t.data.origin&&this.call(“message”,t.data.type,t.data.message)})},this.message(),this.init(“SAMPLE_UNIQUE_ID“,{host:”https://api.factors.ai”}),this}(),function(){var t=document.createElement(“script”);t.type=”text/javascript”,t.src=”https://app.factors.ai/assets/factors.js”,t.async=!0,(d=document.getElementsByTagName(“script”)[0]).parentNode.insertBefore(t,d)}();</script> |
Code snippet: Sample Factors AI code added through functions.php file
- Note unique SDK ID is replaced with SAMPLE_UNIQUE_ID.
- Save the changes and refresh your webpage.
Option 3) Installing Factors AI With Google Tag Manager
Integrating Factors AI with your website via Google Tag Manager (GTM) is an efficient method that requires minimal coding. Follow these steps to set up the integration:
- Access your GTM account associated with your website.
- In the GTM dashboard, go to the Tags section.
- Click on New Tag to create a new tag.
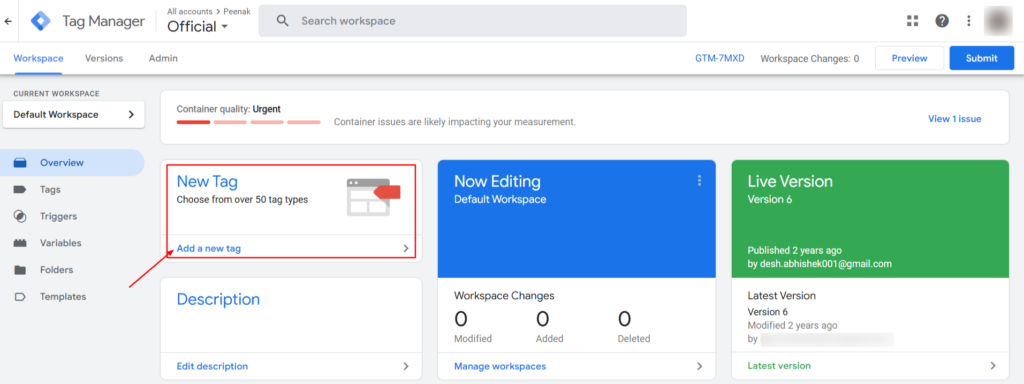
Screenshot 15: Access your GTM
- Name the tag (e.g., “Factors AI”).
- Click on Tag Configuration and choose Custom HTML as the tag type.
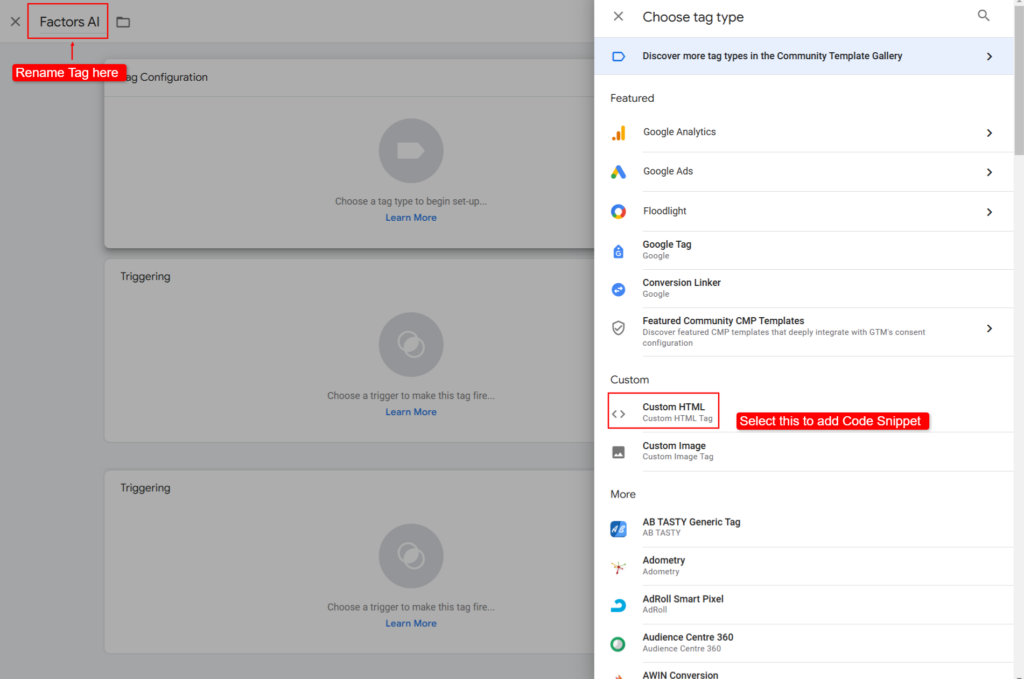
Screenshot 16: Name the New Tag and Select Custom HTML
- Paste the Factors AI SDK code snippet into the HTML field.
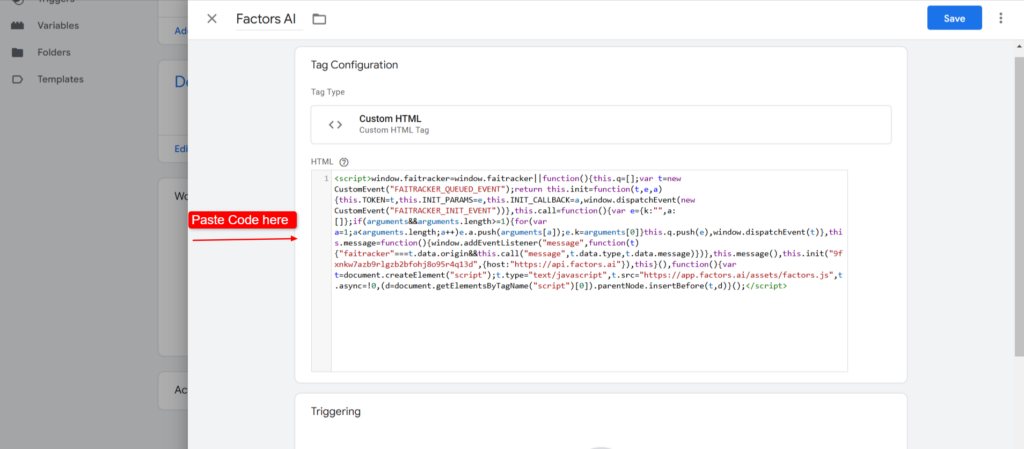
Screenshot 17: Paste Factors AI SDK Code Snippet
- Click on Triggering and select All Pages to ensure the SDK loads on every page of your website.

Screenshot 18: Choose Trigger
- Click Save to store the new tag configuration.
- In the GTM workspace, click Submit and then Publish.
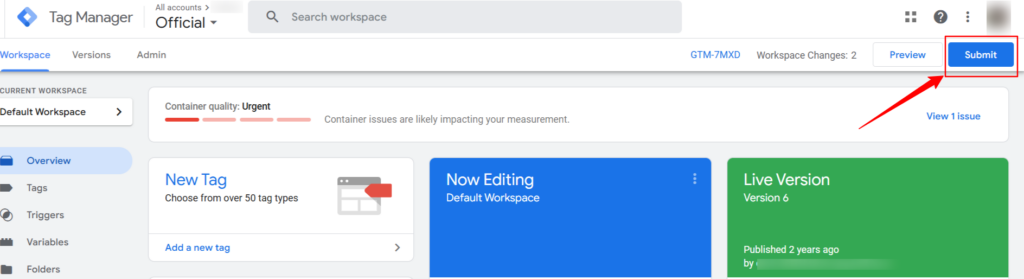
Screenshot 19: Click on Submit
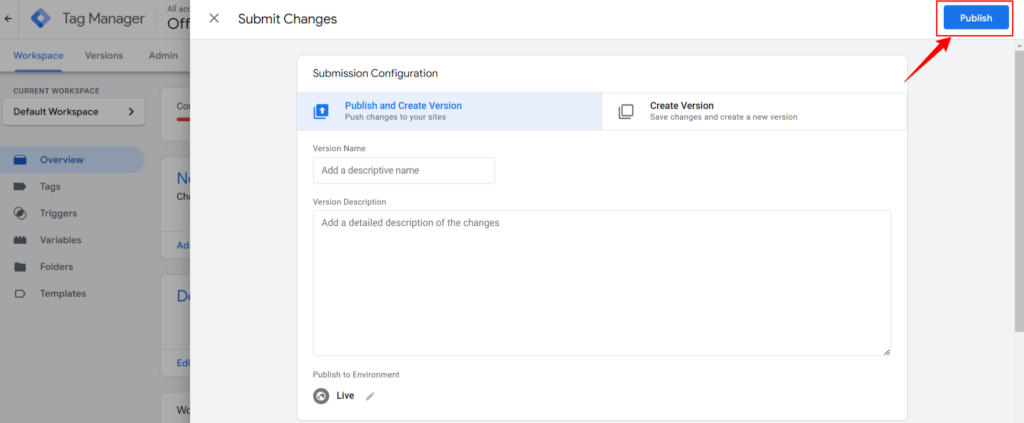
Screenshot 20: Click on Publish
Follow the same steps for verification as described in Method 1.
Post Installation Step: Activate Deanonymisation
Visitors coming to your website are usually anonymous—you don’t know which company or account they belong to. Deanonymization helps identify some of these visitors by linking them to known company data.
This step allows you to control how many accounts Factors AI should try to identify, which impacts your monthly quota.
Now, you have two options:
- Identify All Accounts: Factors AI will identify all website visitors, providing maximum company data but potentially consuming your monthly quota quickly. This is best suited for businesses needing complete visitor insights.
- Set Custom Rules: Choose specific conditions to identify only relevant visitors based on pages or locations, helping you conserve your monthly quota.
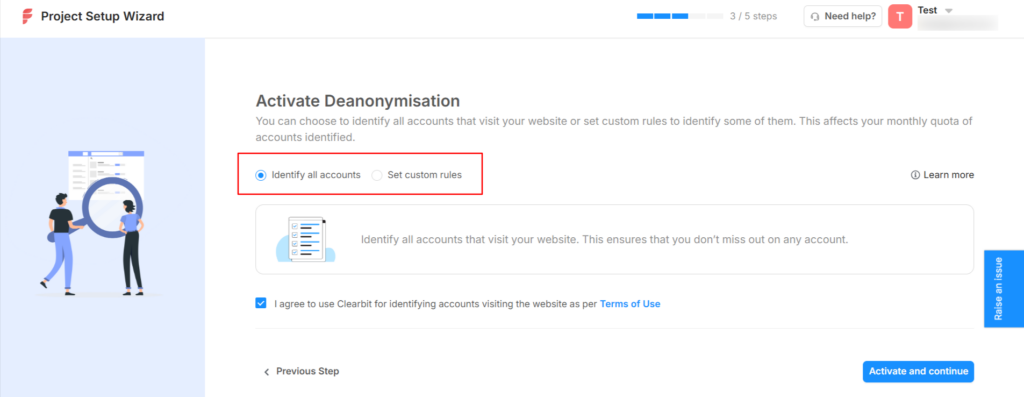
Screenshot 21: Select preference for Deanonymisation
If you select Set Custom Rules, you’ll get two more options:
- By Page: Identify visitors who visit key pages (e.g., pricing, signup, or contact pages) to focus on high-intent leads.
- By Location: Track visitors from specific countries, ignoring irrelevant regions (e.g., limit to US and UK if your business serves only those markets).
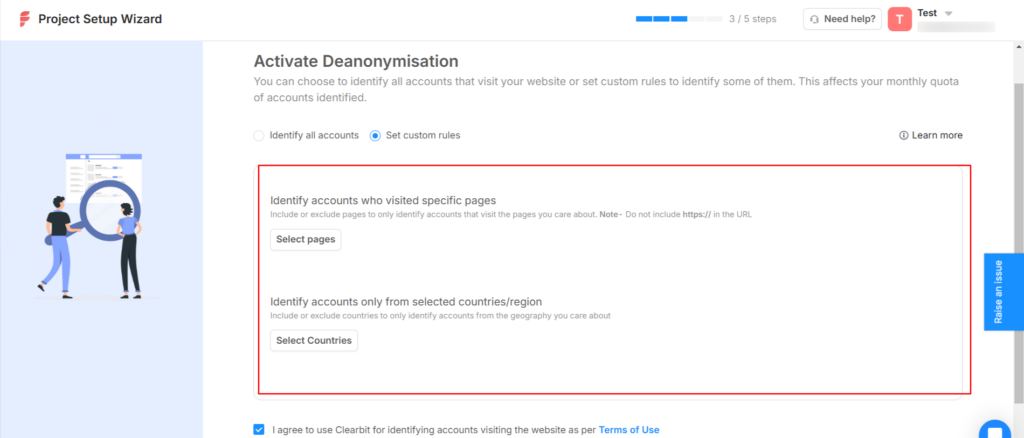
Screenshot 22: Set Custom Rules
Click on Activate and Continue.
Tada! You are almost done!
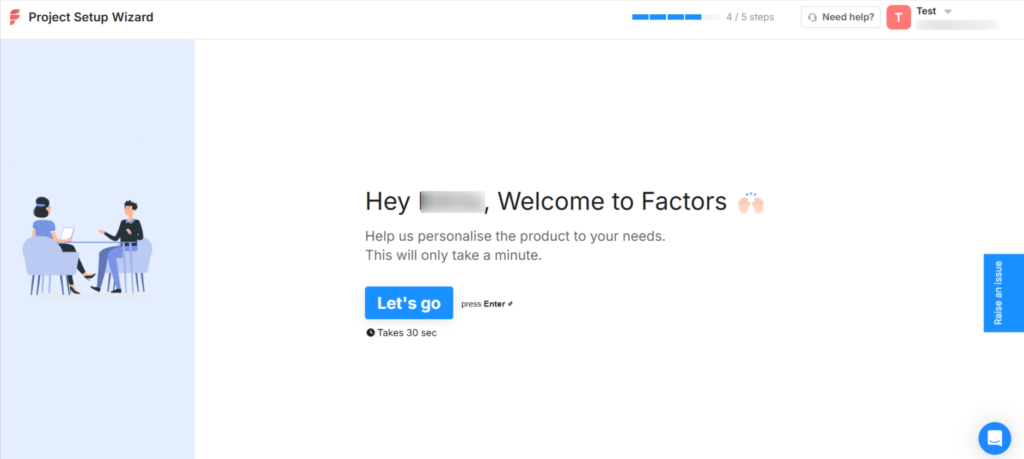
Screenshot 23: Welcome to Factors
Select what you want to achieve with Factors AI. The options help Factors AI tailor its analytics and insights to match your needs.
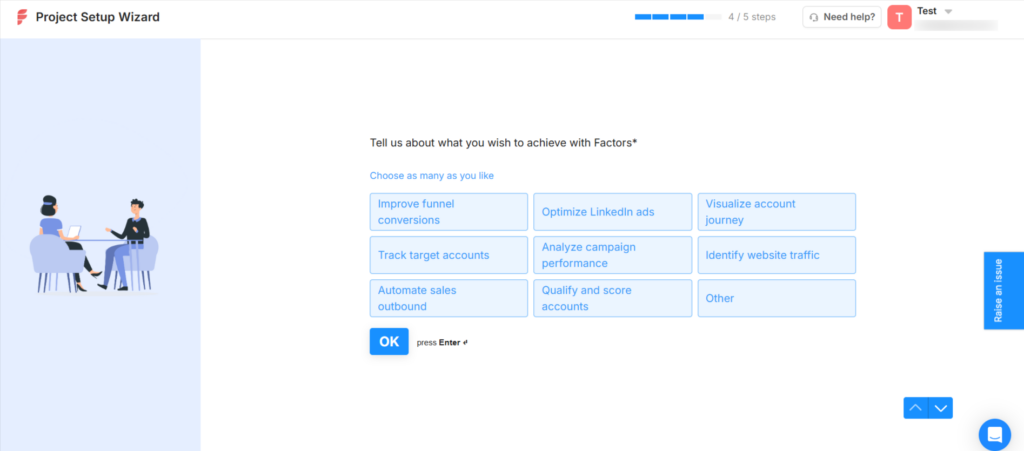
Screenshot 24: Choose Options
You’ll have to answer a mandatory question: From where did you learn about Factors AI?
Answer the question and click on Submit to complete the process.

Screenshot 25: Click on Submit after Answering the Question
Your Project is Ready!
Click on Continue to Project.
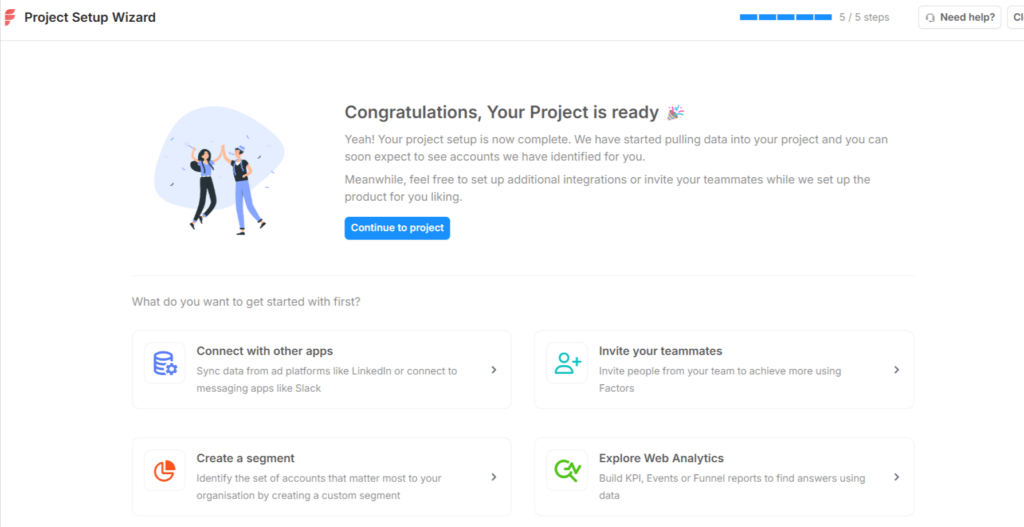
Screenshot 26: Project is Ready
You are all set up to use Factors AI!
Verifying That Factors AI Is Working on Your Site
Once you’ve installed Factors AI on your WordPress website, you’ll want to confirm that it’s working. Here is a simple way to check:
Check if the Script is Running Correctly
The Factors AI script needs to load properly on your website to start tracking visitors.
- Visit your WordPress site in the search engine.
- Right-click anywhere on the page and select Inspect.
- Go to the “Network” Tab.
- If it’s empty, refresh your page.
- In the search bar (inside the Network tab), type “factors“.
- If the script is installed correctly, you’ll see a request loading from Factors AI’s servers.
- Click on it to check the details—if it loads with a status like 200, the script is working.
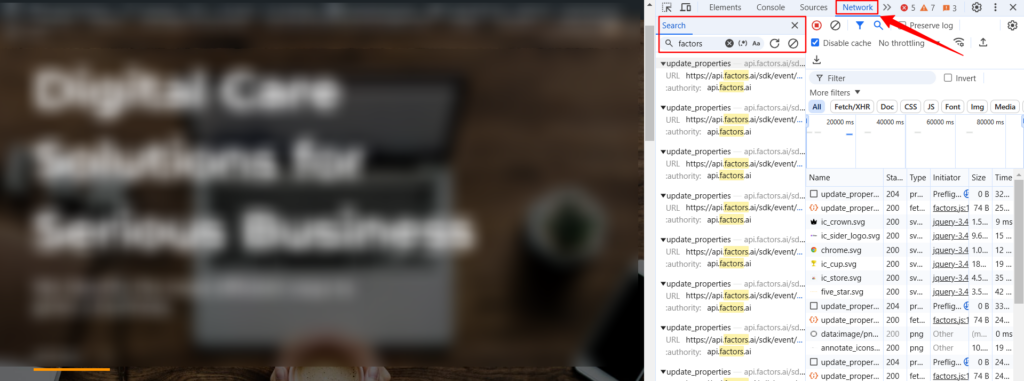
Screenshot 27: Checking if the Script is Running
What if you don’t see the script?
- Make sure you’ve pasted the script in the right place (the header section).
- Clear your website’s cache and refresh the page.
- Try using Incognito Mode to check if caching is the issue.
Conclusion
Congrats! You’ve successfully installed Factors AI on your WordPress site, unlocking powerful insights into visitor behavior.
We hope you have chosen a favorable method of installing Factors AI.
Now it’s time to dive into your dashboard, explore the data, and make smarter marketing decisions.
Published on Mar 27, 2025 | Updated on Jan 16, 2026
Author

Abhijeet Bendre
Author
|
Reviewer

Savita Soni
Reviewer
|