If you’re a blogger, content creator, or part of a marketing team, chances are you’re drafting your posts in Google Docs.
And why wouldn’t you? It’s easy to use, allows for real-time collaboration, and auto-saves everything—no more “I lost my work” horror stories.
What if you could, with a click of a button, have your fully formatted Google Doc instantly appear in WordPress, complete with images, links, and proper headings?
That’s exactly what one-click import solutions like Wordable help. They take the tedious work out of publishing so you can focus on what matters—creating great content.
In this guide, we’ll walk you through how to seamlessly import Google Docs into WordPress with just one click, saving you time, frustration, and energy. Let’s dive in!
Using Wordable to Import Blog Posts from Google Docs to WordPress in One Click
Step 1: Installation and Activation
Install the Wordable plugin on your site or create an account here.
To install the plugin on your WordPress, go to:
WordPress Dashboard > Plugins > Add New Plugin > Wordable
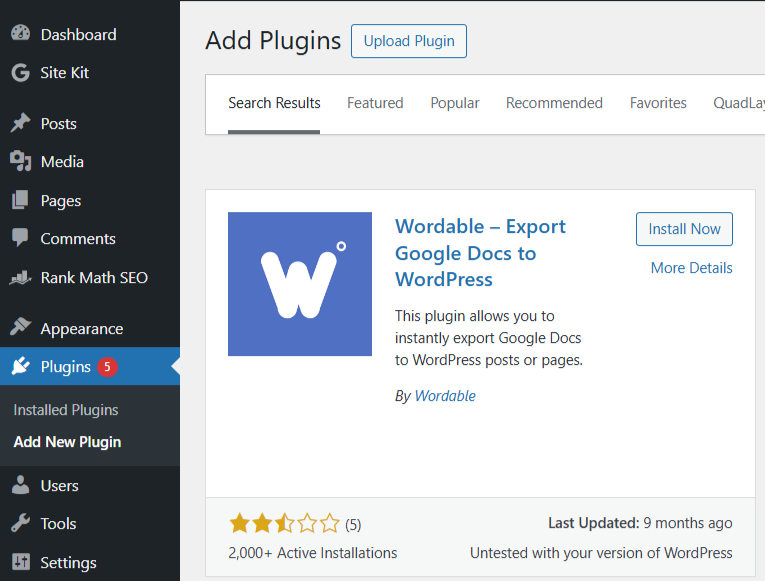
Screenshot 1: Add Wordable Plugin on Your Dashboard
You can also visit the official site of Wordable and sign up.

Screenshot 2: Wordable Plugin Official Site
Step 2: Connect Your Account
Connect your Google Drive account.
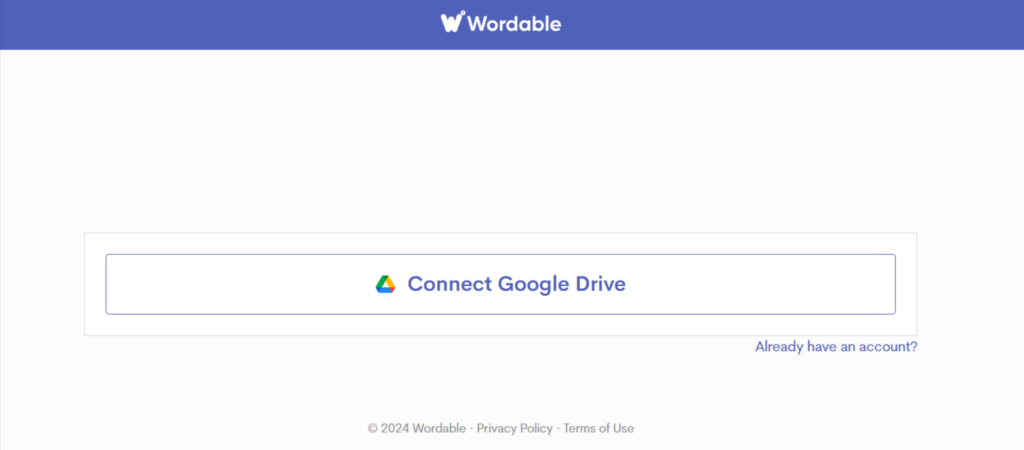
Screenshot 3: Connect Google Drive
You’ll be prompted to choose the Google account that you want to use.
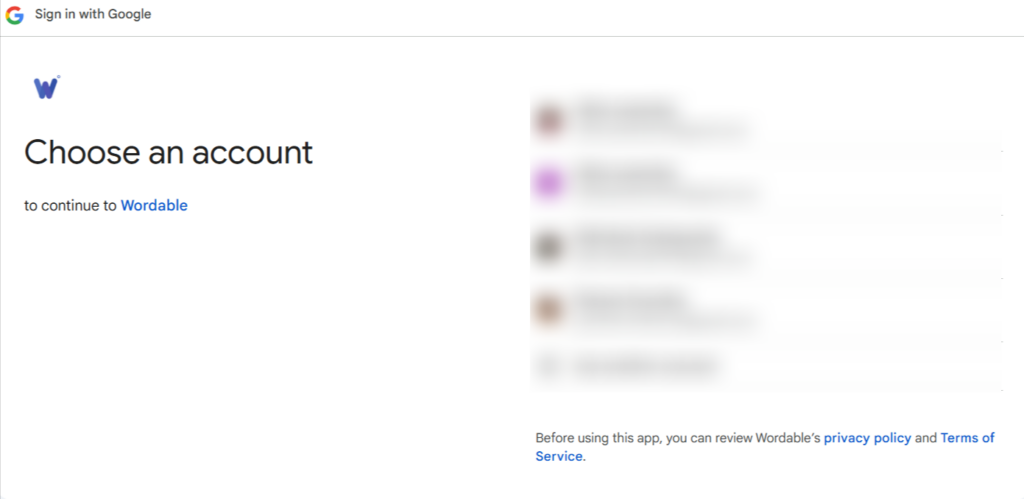
Screenshot 4: Choose Google Account
Check the box according to your requirement.
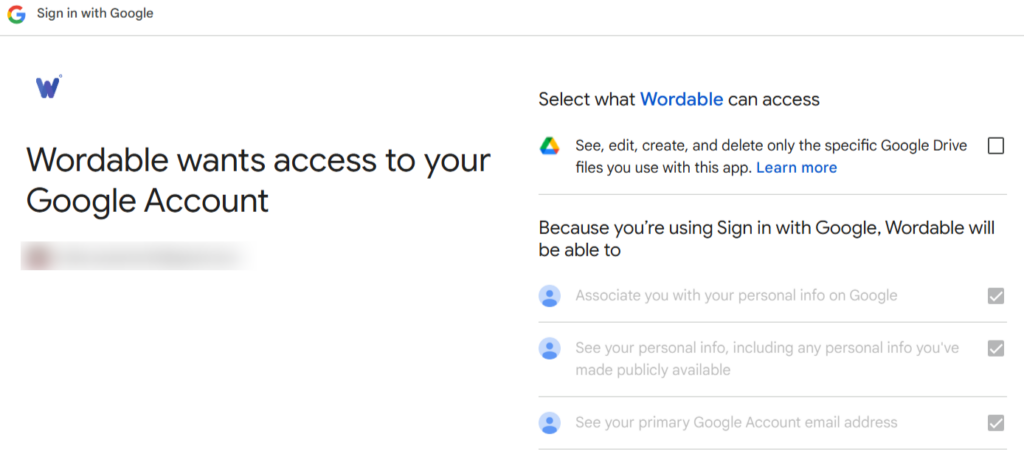
Screenshot 5: Wordable Asks for Permissions
Step 3: Import File
You will then be prompted to import your file from Google Drive.

Screenshot 6: Use the Google Picker
Select the file you want to import.
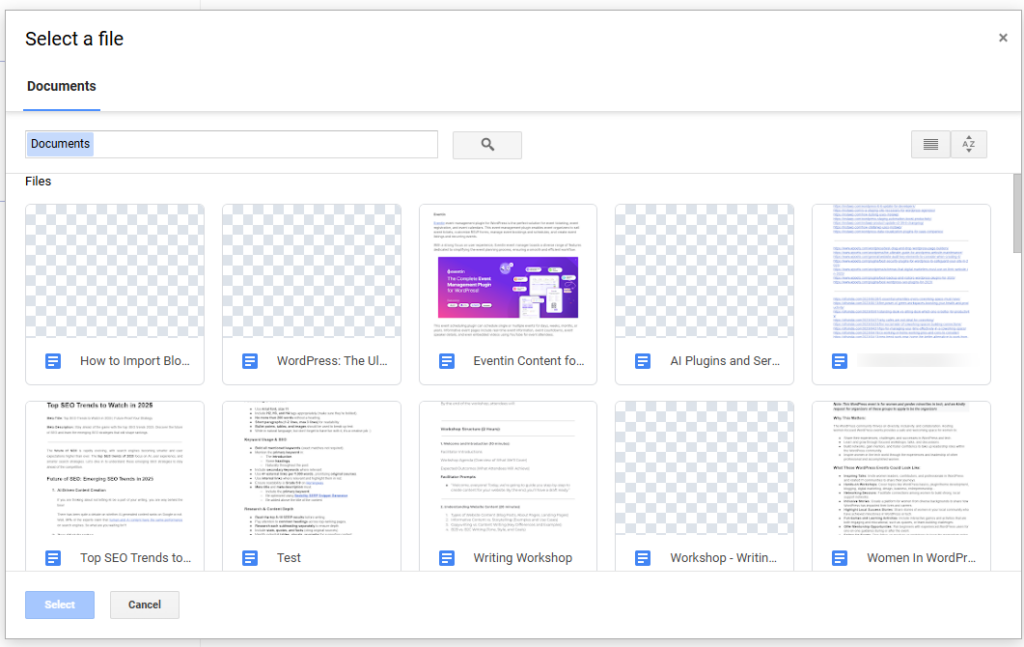
Screenshot 7: Select the file to Import
Step 4: Export File
Your selected documents will be added to the export queue. Select the document you want to export. Then, click on Export.

Screenshot 8: Click on Export
You can also view and change the document settings, such as Post Title, Post Slug, and Meta Description. Click on Done to save the changes.
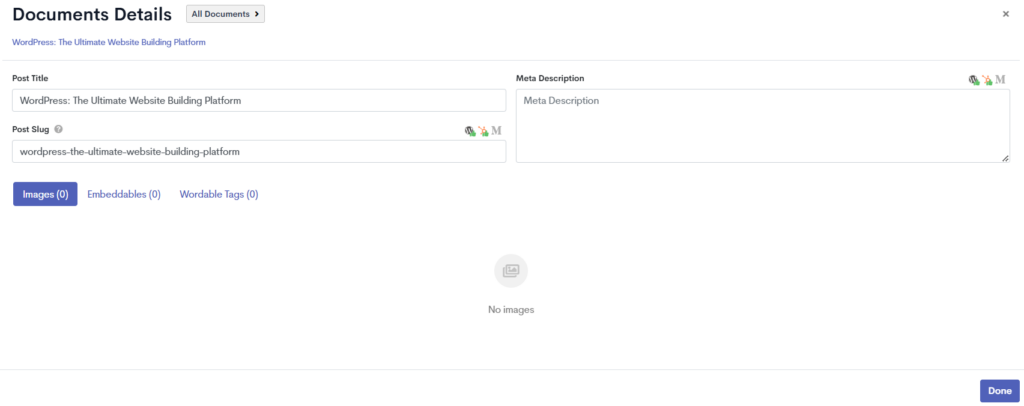
Screenshot 9: Document Details
Step 5: Export Settings
Click on Export Options to proceed further.
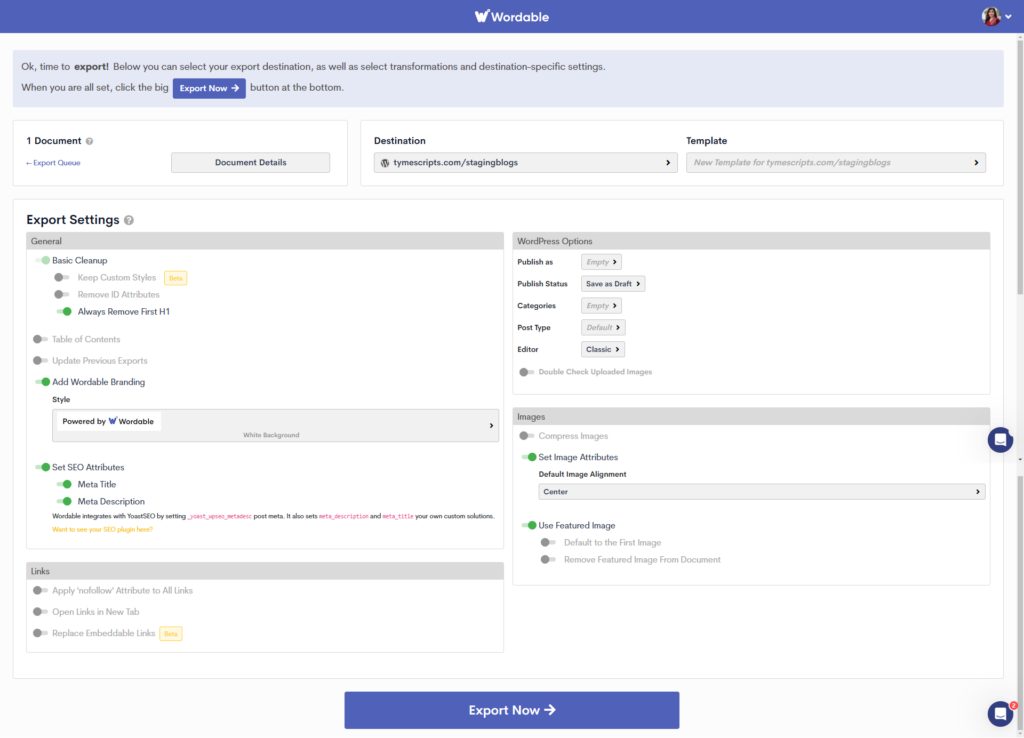
Screenshot 10: Export Settings
The details of these settings are provided below:
General Settings
This section contains various cleanup and formatting options that help optimize content before exporting.
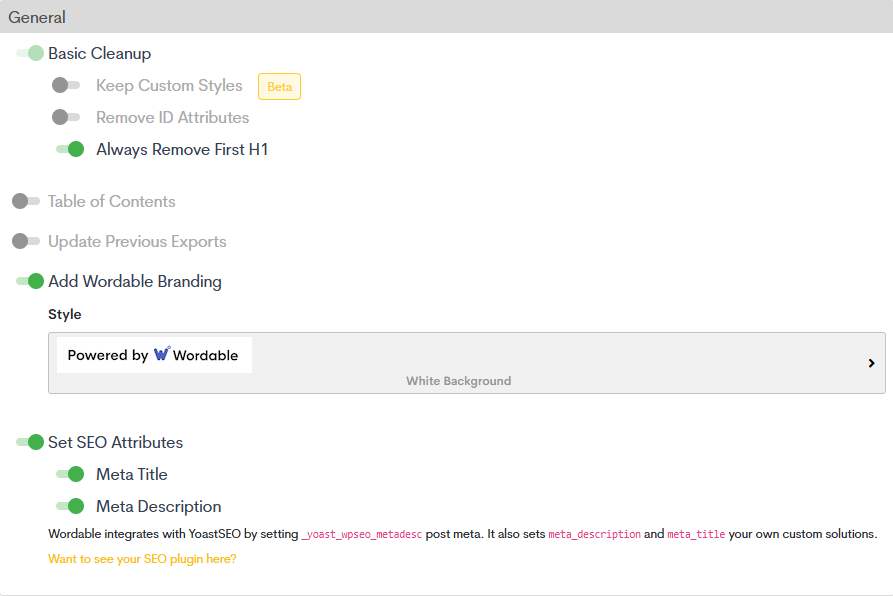
Screenshot 11: General Settings
Basic Cleanup
- Keep Custom Styles (Beta) – This option retains any custom styles applied in Google Docs when exporting to WordPress. Since it is in beta, it may not work perfectly.
- Remove ID Attributes – If enabled, this removes ID attributes from HTML elements, which can help clean up unnecessary code.
- Always Remove First H1 – This ensures that the first <h1> heading in the document is removed. Many WordPress themes automatically generate an <h1> from the post title, so having another <h1> in the content could negatively affect SEO.
Table of Contents
- If enabled, this feature automatically generates a Table of Contents (ToC) based on the headings within the document. This is useful for improving readability and navigation.
Update Previous Exports
- If checked, Wordable will update an already exported document instead of creating a new one. This is helpful when making revisions to previously published content.
Add Wordable Branding
- Style – If this option is enabled, a “Powered by Wordable” branding will be added to the post.
- The branding style is customizable with a white background or a transparent background.
SEO Attributes
This section ensures the exported content is optimized for search engines.
- Meta Title: This allows the user to set a custom meta title for the post, which is crucial for SEO.
- Meta Description: This lets the user add a meta description, which influences how the page appears in search engine results.
Wordable integrates with the Yoast SEO plugin and automatically sets these attributes using _yoast_wpseo_metadesc post meta. If another SEO plugin is used, Wordable can still apply custom meta titles and descriptions, you just have to put a request for that.
Links
This section provides link management options to improve SEO and user experience.

Screenshot 12: Links Settings
- Apply ‘nofollow’ Attribute to All Links: If enabled, all links in the post will have the rel=”nofollow” attribute, preventing search engines from passing link authority.
- Open Links in New Tab: Forces all links in the post to open in a new browser tab.
- Replace Embeddabble Links (Beta): This option (currently in beta) replaces embeddable content (like YouTube or Twitter links) with their embedded version instead of just a plain URL.
WordPress Options
This section allows customization of how the document will be published on WordPress.
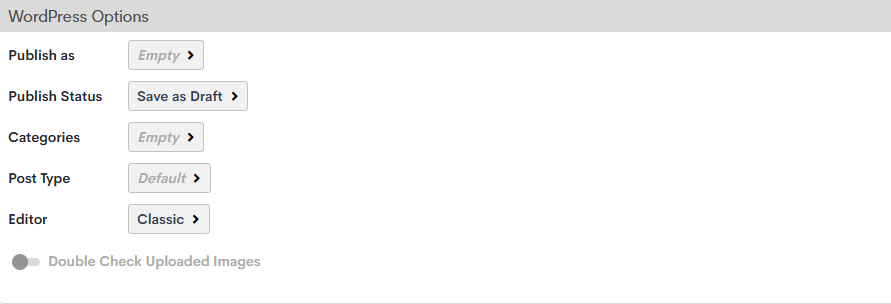
Screenshot 13: WordPress Settings
- Publish As: Users can choose whether to export the document as a post, page, or other post type.
- Publish Status: Options include Save as Draft, Publish Immediately, or Schedule for Later.
- Categories: The user can assign one or more WordPress categories to the post.
- Post Type: Defines whether the content should be treated as a blog post, page, or another custom post type.
- Editor: Users can select between the Classic and Block (Gutenberg) editor in WordPress.
- Double Check Uploaded Images: If enabled, this verifies that all images are properly uploaded and formatted before publishing.
Image Settings
This section controls how images in the document are handled when exported.
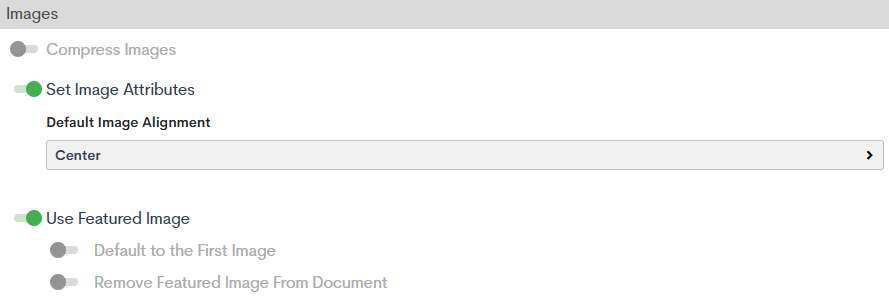
Screenshot 14: Image Settings
- Compress Images: Reduces image file sizes to improve page loading speed.
- Set Image Attributes: Allows setting a default image alignment (e.g., Center, Left, or Right) for all images in the post.
- Use Featured Image: This determines whether an image from the document will be set as the featured image in WordPress.
- Default to the First Image: If enabled, the first image in the document is automatically set as the featured image.
- Remove Featured Image from Document: This removes the first image from the body of the post if it has been set as the featured image.
Step 6: Complete Export Process
Click on Export Now to continue.
You can save the above settings for future use, or you can check the settings every time.
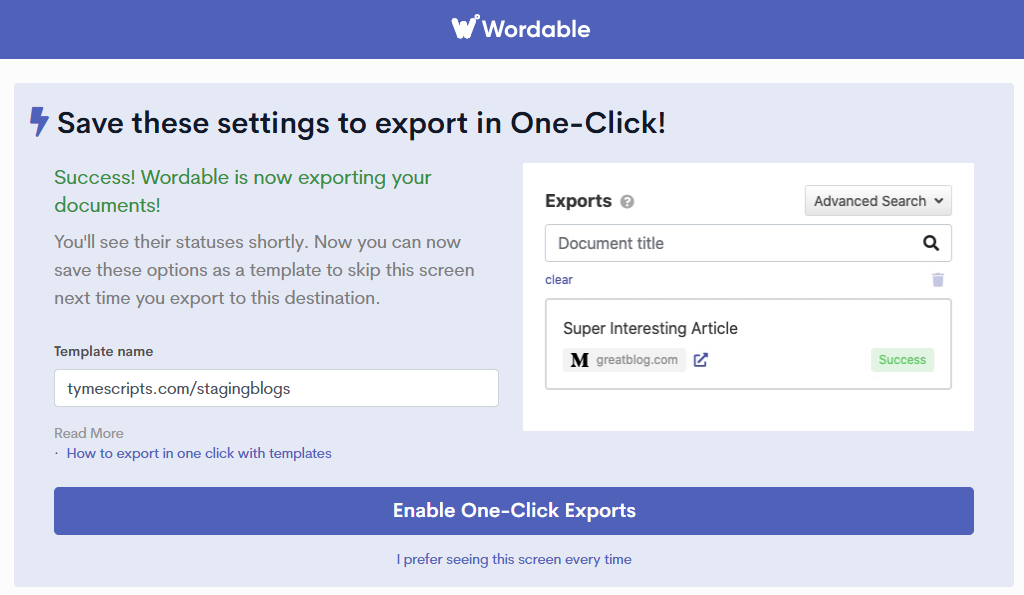
Screenshot 15: Save Settings
You’ll be redirected to the Wordable dashboard, where you can see your exported documents.
Step 7: Final Step to Export
Click on the icon as shown in the image to open your post in WordPress.

Screenshot 16: Click to Edit Post
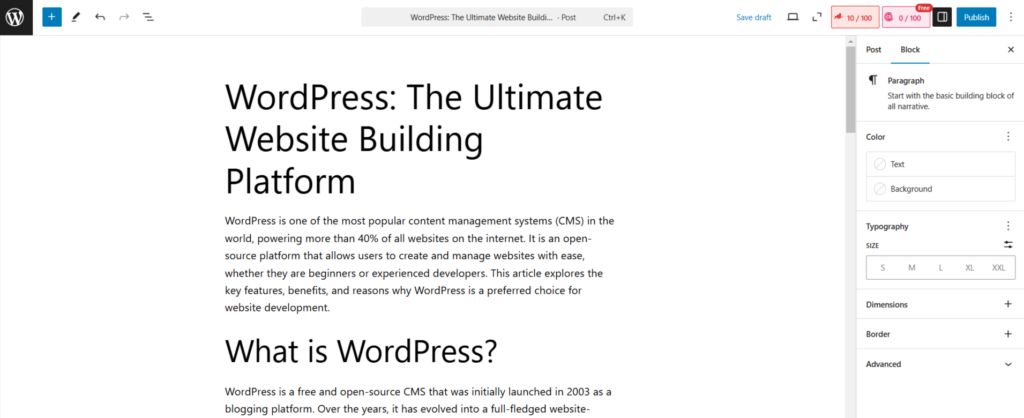
Screenshot 17: Edit Post in WordPress
Voila! You just imported your Google Doc in WordPress in literally one click!
Before hitting Publish, take a few minutes for a final review—formatting, images, links, and SEO details can sometimes go off-track. A quick check ensures your post looks polished, professional, and ready to go live!
Conclusion
Transferring blog posts from Google Docs to WordPress shouldn’t be a hassle. However, with tools like Wordable, you can keep formatting intact, upload images automatically, and save your valuable time. Focus on writing great content—let the one-click import tool Wordable handle the rest!
