
Ever landed on a website, saw a sleek little popup offering 10% off, and thought, “Yep, I’m in”?
That’s the power of a well-designed pop-up. It grabs attention, drives action, and can seriously boost your leads or subscribers when done right.
But here’s the catch: creating one that works (and doesn’t annoy your visitors) takes more than just slapping a form on the screen.
In this guide, we’re breaking down exactly how to create a high-converting pop-up form in WordPress using an easy, no-code method.
This will help you in growing your email list, offering a freebie, or nudging visitors toward a purchase. We have got you covered step by step. Let’s make your first (or next) pop-up a total success!
Adding a Popup Form in WordPress Using the Popup Maker Plugin
Step 1: Install and Activate the Popup Maker Plugin
Log in to your WordPress dashboard.
Go to Plugins > Add New> Popup Maker
Click Install Now, then Activate.
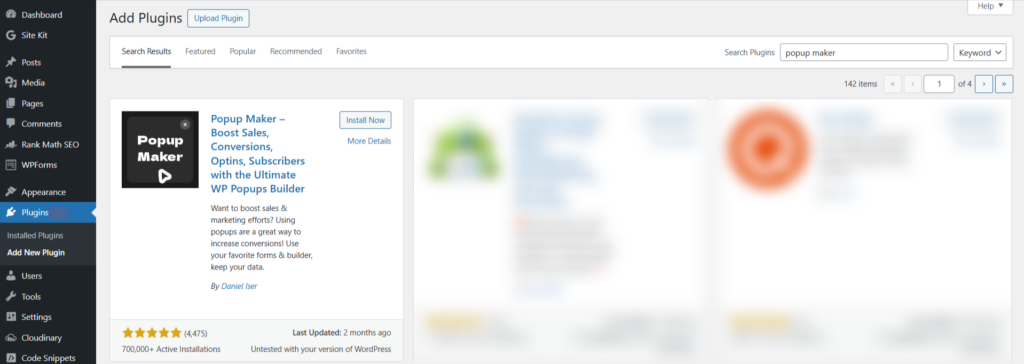
Screenshot: Install and Activate Popup Maker
Since we have to make a pop-up form, we will also need a form builder plugin. We will proceed with the WPForms plugin.
Go to WordPress Dashboard> Plugins> Add New> WPForms
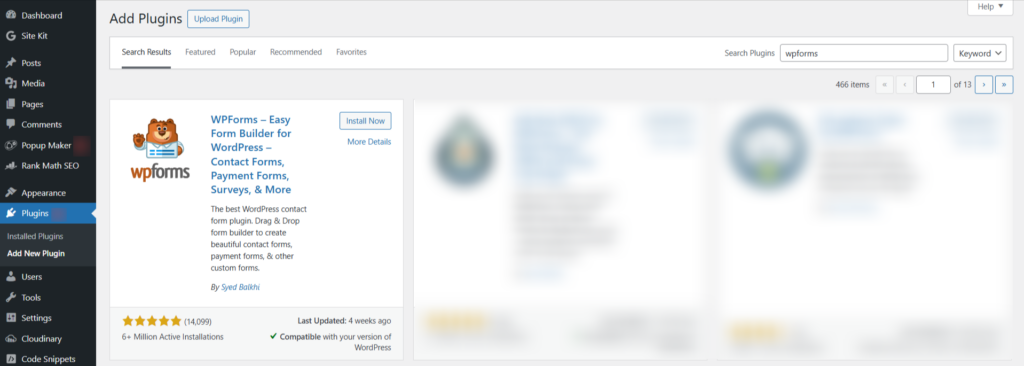
Screenshot: Install and Activate WPForms Plugin
Step 2: Create a Form with WPForms
Go to WPForms and click on Add New.
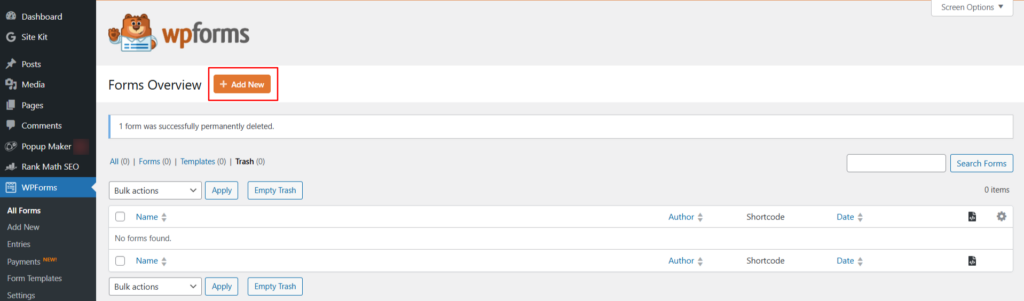
Screenshot: Add New Form
You can either create a form from scratch or use a template provided by WPForms.
We will use a template here.
Hover over your desired template to use it.
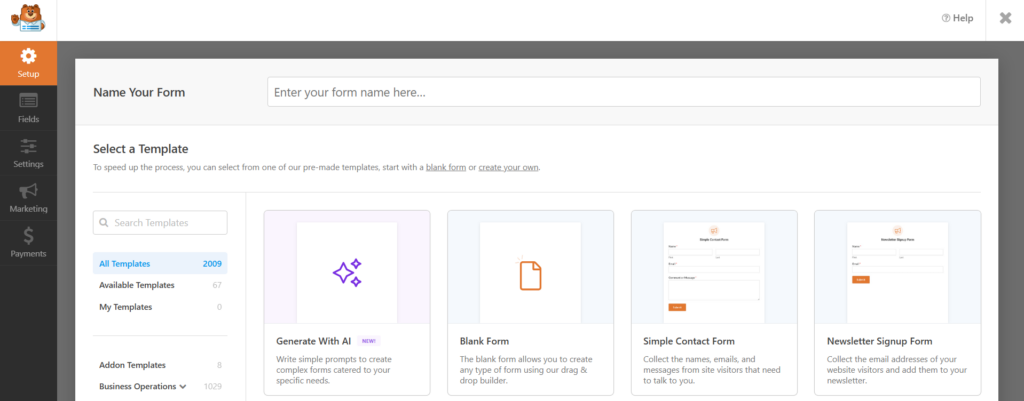
Screenshot: Select Template and Name Your Form
Use the drag-and-drop builder to create your form. The left panel contains all available fields under different categories:
- Standard Fields like Name, Email, Dropdown, and Checkboxes.
- Fancy Fields like Phone, Address, Date/Time, and File Upload.
Simply drag a field like “Name” or “Email” and drop it into the live preview area on the right.
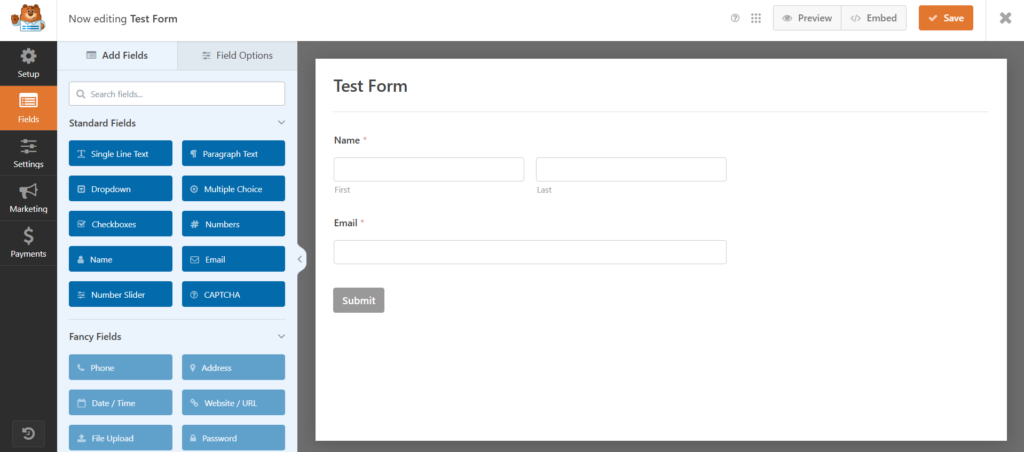
Screenshot: Customize Your Form
You can also customize the Field Settings.
Click on any field in the form preview to customize it. You can change the label, mark it required, or adjust the placeholder text.
Navigate to the Settings tab from the left sidebar to configure.
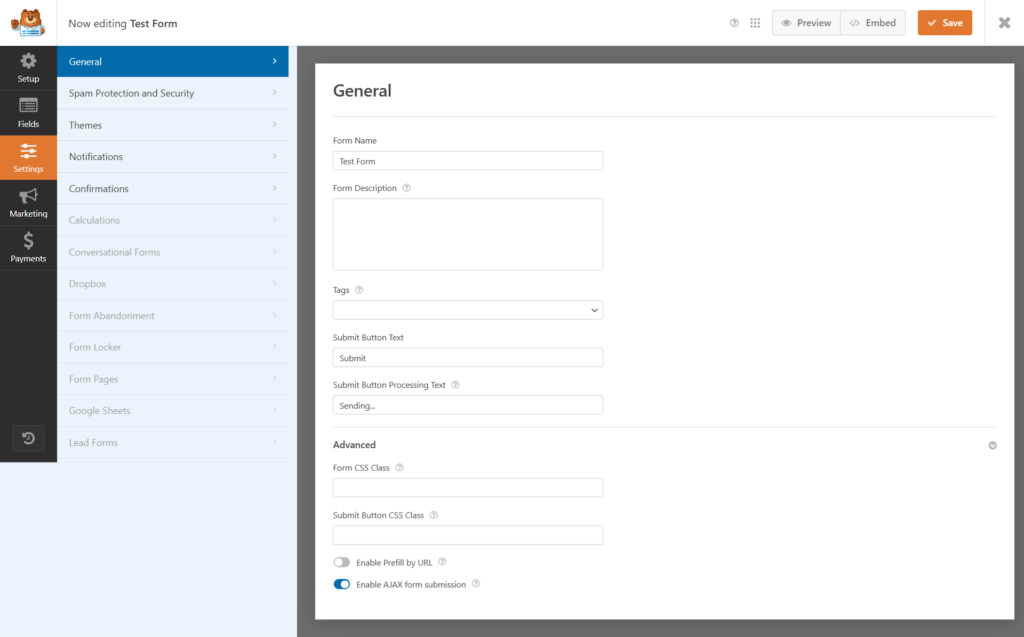
Screenshot: General Settings
You can configure settings like:
- General settings like form name and description
- Notifications, like email alerts, are sent when someone fills out the form
- Confirmation as messages are shown after submission
This allows you to tailor the form behavior based on your needs.
Once your form is ready, click the Save button at the top right.
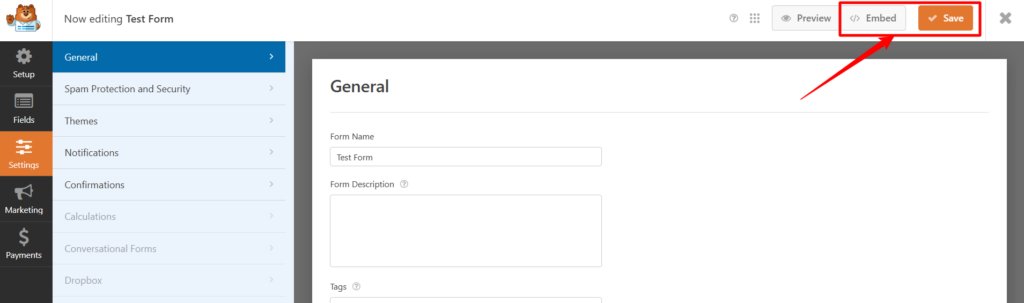
Screenshot: Save the form and click on Embed
Click Embed to generate a shortcode or directly insert the form into a page or post.
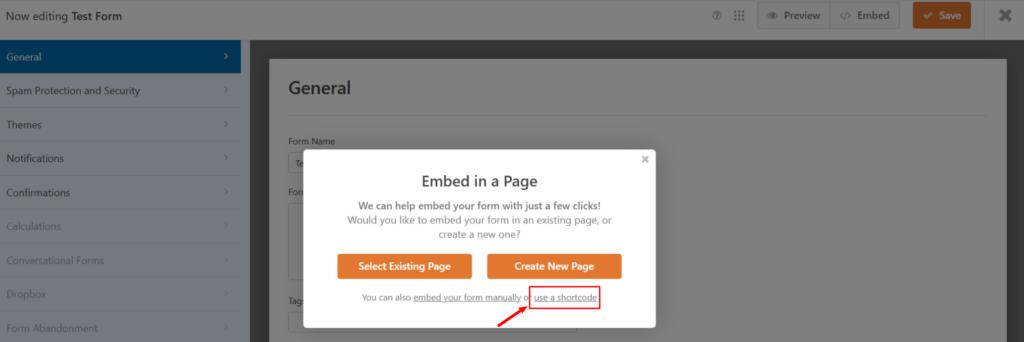
Screenshot: Click on Use A Shortcode
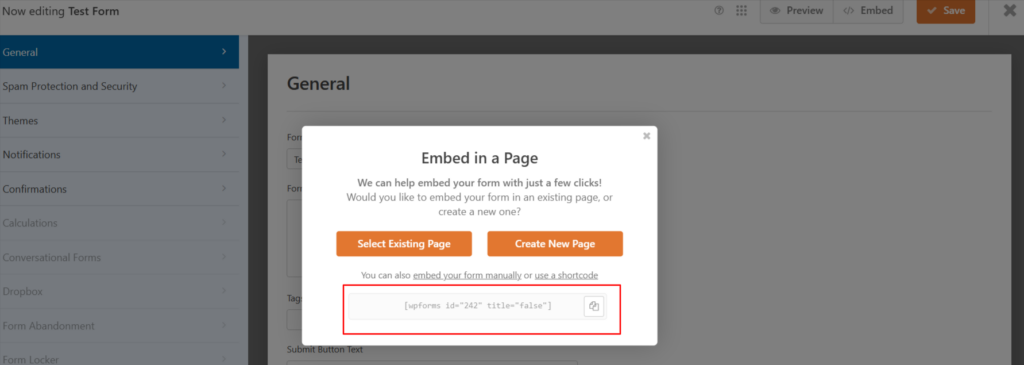
Screenshot: Copy the Shortcode
Step 3: Add a Popup using Popup Maker
Go to WordPress dashboard> Popup Maker> Create New Popup
Enter the Popup Name and Title.
You can paste the copied shortcode (from WPForms) into the content editor.
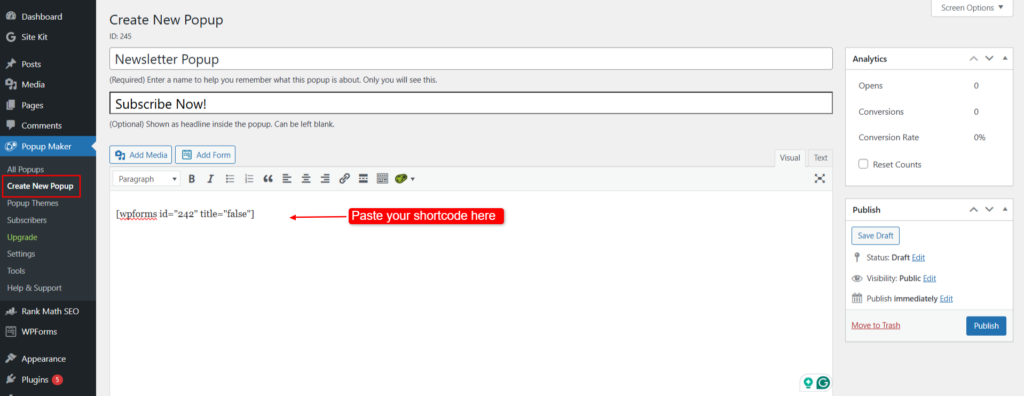
Screenshot: Create New Popup and Paste Your Shortcode
Step 4: Popup Settings
After creating your popup content in Popup Maker, it’s time to define how and when it appears to visitors.
Triggers
Triggers define what action should make the pop-up appear.
- Time Delay / Auto Open: The Popup appears after a set number of seconds
- Click Open: Opens when a user clicks a specific button or link
- Form Submission: Opens after a user submits a form (useful for success messages)
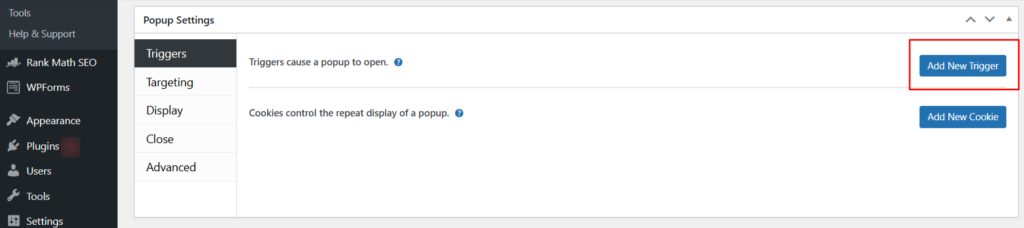
Screenshot: Add New Trigger
We are selecting the Time Delay/ Auto Open option for the trigger.

Screenshot: Select Trigger
Click on Add.
Then you are required to set a Click Trigger so the popup opens when a user clicks an element with the class popmake-245.
You can also specify extra CSS selectors and control repeat display using cookies.
- Extra CSS selectors: This lets you specify which element (like a button or link) should trigger the popup. For example, if you want a button with a class. open-popupp, enter. .open-popupp here. If you’re not sure what to enter, leave it blank for now. You can always add the CSS class to your element later in your post/page editor.
- Cookie Name: Popup Maker automatically assigns a cookie pum-245 to control when the popup should reappear for the same visitor. You can leave this as is unless you need custom behavior.
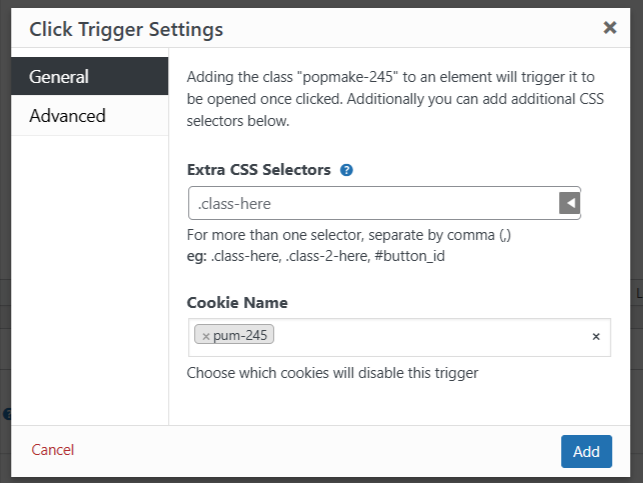
Screenshot: Click Trigger Settings
- Advanced Settings: Do not prevent the default click functionality
When checked, this allows the default browser action, like opening a link, submitting a form, or downloading a file, to happen even after the pop-up is triggered.
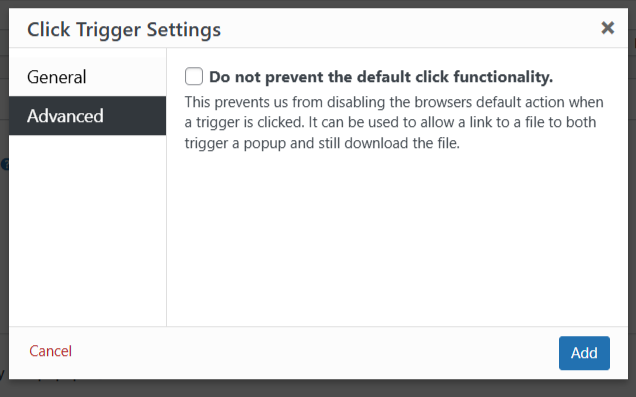
Screenshot: Advanced Click Trigger Settings
Click on Add to save the settings.
Targeting
The Targeting section in the popup settings allows you to control where and to whom your popup appears. With this feature, you can narrow down visibility based on specific conditions.
Choose a Targeting ConditionClick the dropdown labeled “Choose a condition”. You’ll see a list of targeting options like Home Page, Search Result Page, 404 Error Page, and many more.
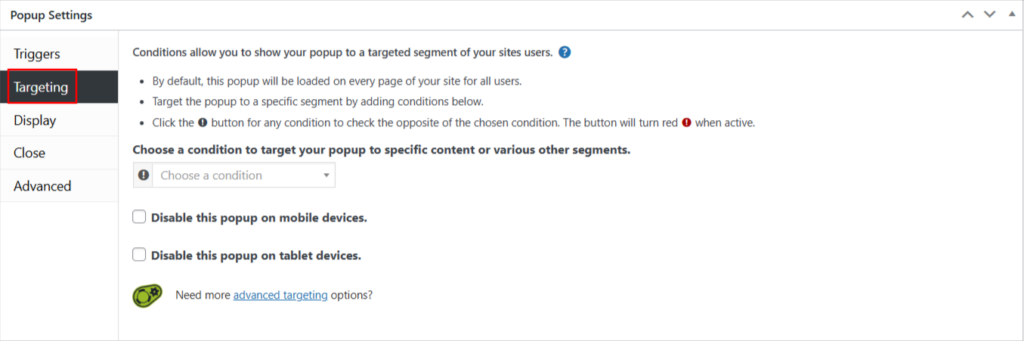
Screenshot: Targeting
Exclude Specific Devices (Optional)
You can choose to hide the pop-up on specific device types:
- Check “Disable this popup on mobile devices” if you don’t want it to show on phones.
- Check “Disable this popup on tablet devices” for tablets.
Display
This tab lets you customize how the popup looks and behaves visually. You can control everything about your pop-up! You can customize where the popup is placed, its theme, size, animation, sounds, position, and advanced settings like display overlay, etc.
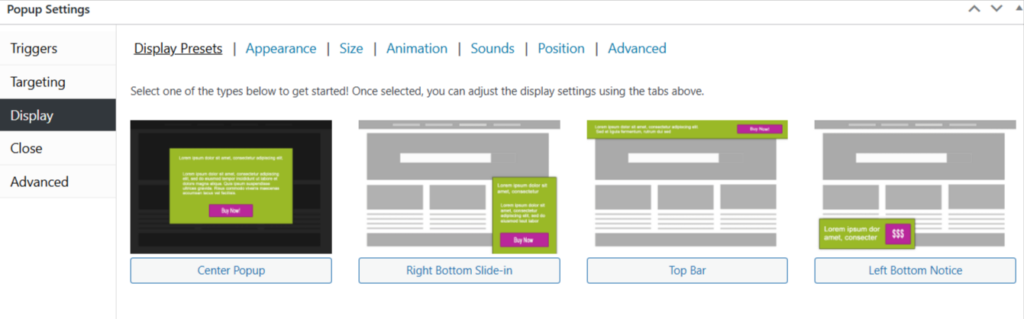
Screenshot: Display Settings
Close
The Close settings control how users can dismiss the popup, including options to show or hide the close button, allow closing by clicking the overlay or pressing the Escape key, and automatically close the popup after a set number of seconds.
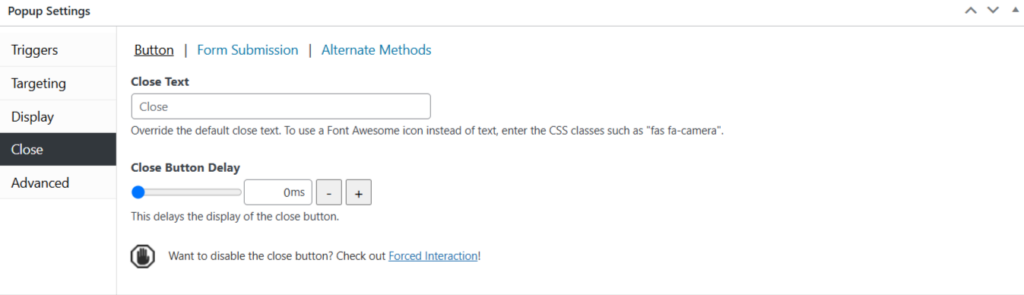
Screenshot: Close
Advanced
The Advanced tab provides extra customization options, including the ability to prevent the pop-up from re-triggering after non-AJAX form submissions and to adjust accessibility settings.
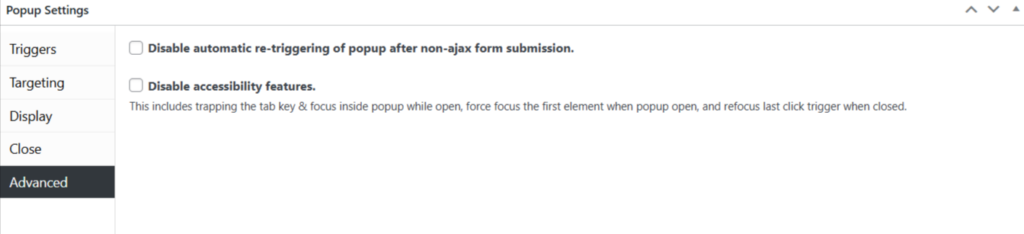
Screenshot: Advanced Settings
Step 4: Click on Publish
After you have configured the settings, click on Publish on the right side.
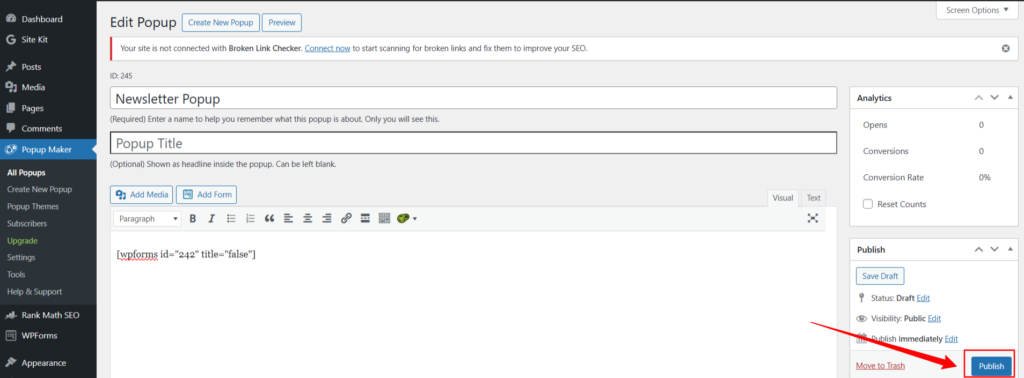
Screenshot: Click on Publish
That’s it! Your Popup is published!
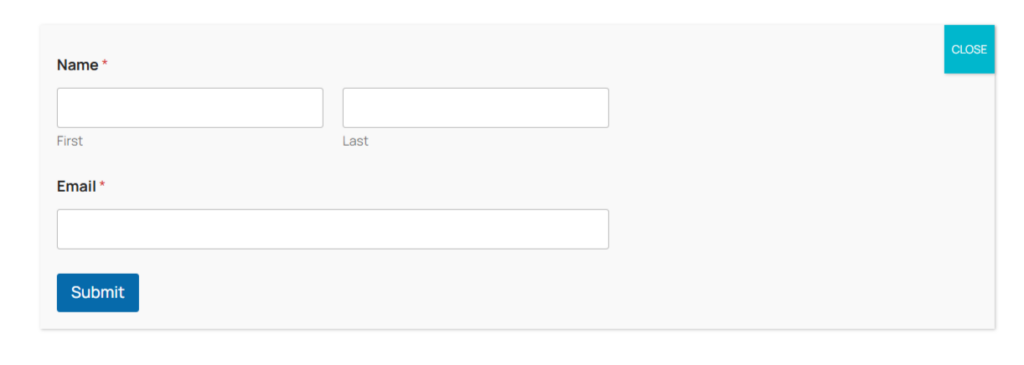
Screenshot: Newsletter Popup
Conclusion
And that’s it! You’ve just learned how to create a pop-up form in WordPress without the tech headache.
Remember, the key is to keep it relevant, time it right, and make it as seamless as possible for your visitors. A thoughtful pop-up can turn casual browsers into loyal subscribers in just a few clicks.
If you found this guide helpful, share it with a fellow WordPress user, or drop your questions in the comments. We’re here to help!